HOOD LOCK CONTROL CABLE ASSEMBLY REMOVAL

-
REMOVE WINDSHIELD WIPER ARM COVER
-
Using a screwdriver, disengage the 2 claws and remove the 2 windshield wiper arm covers.
Tech Tips
Tape the screwdriver tip before use.
-
-
REMOVE FRONT WIPER ARM AND BLADE ASSEMBLY RH
-
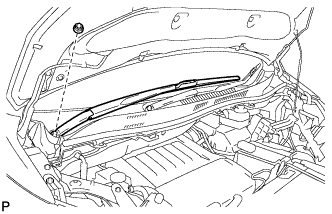
Remove the nut and the front wiper arm and blade assembly RH.
-
-
REMOVE FRONT WIPER ARM AND BLADE ASSEMBLY LH
-
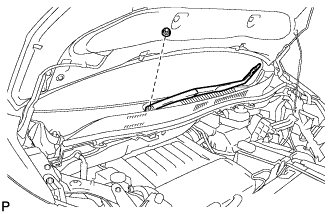
Remove the nut and the front wiper arm and blade assembly LH.
-
-
REMOVE COWL TOP VENTILATOR LOUVER SUB-ASSEMBLY
-
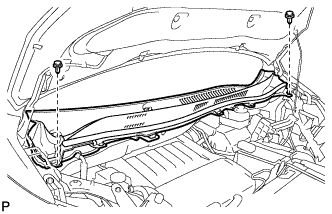
Remove the 2 clips.
-
Disengage the 15 claws and 2 guides, and remove the cowl top ventilator louver sub-assembly as shown in the illustration.
-
-
REMOVE WINDSHIELD WIPER MOTOR AND LINK ASSEMBLY
-
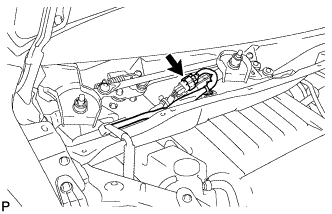
Disconnect the connector.
-
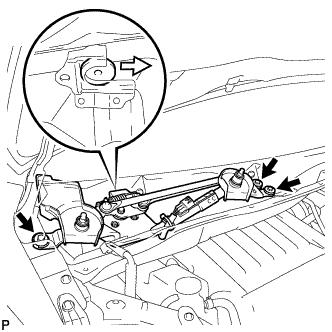
Remove the 3 bolts and the windshield wiper motor and link assembly as shown in the illustration.
-
-
SEPARATE BRAKE MASTER CYLINDER RESERVOIR WITH BRACKET
-
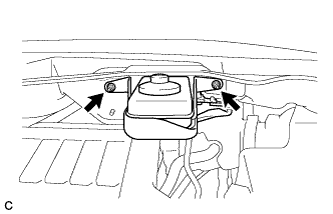
Remove the 2 nuts and separate the brake master cylinder reservoir with bracket from the outer cowl top panel.
-
-
REMOVE OUTER COWL TOP PANEL
-
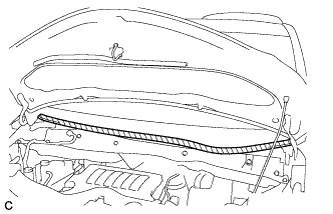
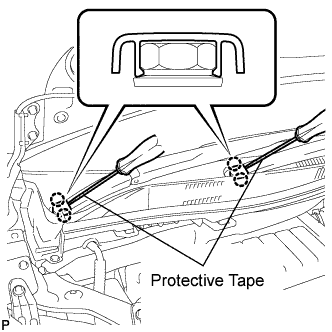
Apply protective tape as shown in the illustration.
Text in Illustration 
Protective Tape -
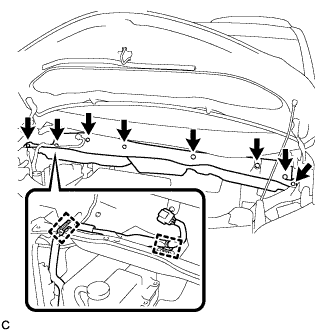
Disconnect the 2 clamps from the outer cowl top panel.
-
Remove the 8 bolts.
-
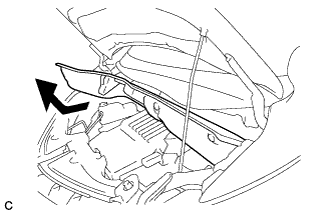
Remove the outer cowl top panel as shown in the illustration.
-
-
REMOVE RADIATOR COVER SUB-ASSEMBLY (for ALPHARD)
-

Using a clip remover, remove the 4 clips and radiator cover sub-assembly.
-
-
REMOVE RADIATOR COVER SUB-ASSEMBLY (for VELLFIRE)
-
Using a clip remover, remove the 4 clips and radiator cover sub-assembly.
-
-
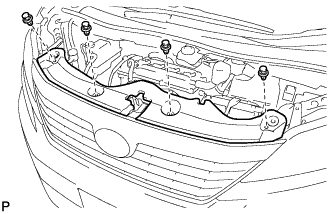
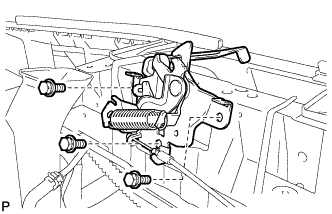
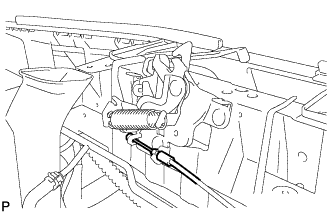
REMOVE HOOD LOCK ASSEMBLY (for LHD)
-
w/o Engine Hood Courtesy Switch:
-
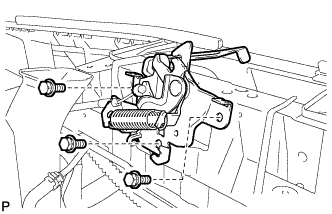
Remove the 3 bolts.
-
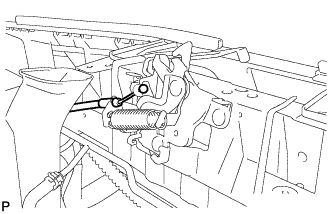
Disconnect the hood lock control cable and remove the hood lock assembly.
-
-
w/ Engine Hood Courtesy Switch:
-

Disconnect the connector.
-
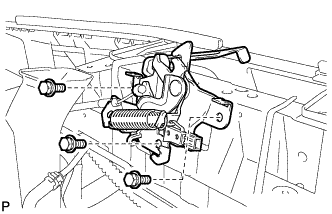
Remove the 3 bolts.
-
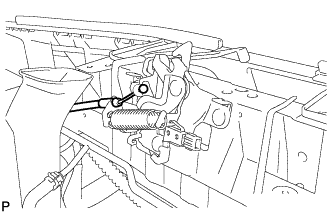
Disconnect the hood lock control cable and remove the hood lock assembly.
-
-
-
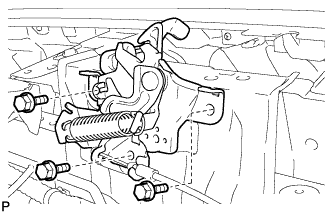
REMOVE HOOD LOCK ASSEMBLY (for RHD)
-
for ALPHARD:
-
Remove the 3 bolts.
-
Disconnect the hood lock control cable and remove the hood lock assembly.
-
-
for VELLFIRE:
-
Remove the 3 bolts.
-
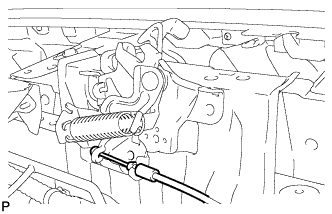
Disconnect the hood lock control cable and remove the hood lock assembly.
-
-
-
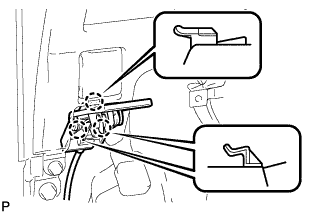
REMOVE NO. 1 INSTRUMENT PANEL UNDER COVER SUB-ASSEMBLY (for RHD)
-
Remove the 2 screws <B>.
-
Disengage the 2 claws and 2 guides.
-
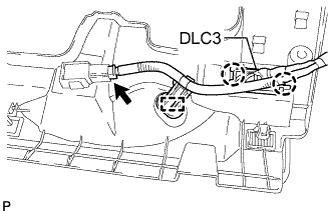
Disengage the 2 claws and disconnect the DLC3.
-
Disengage the clamp.
-
Disconnect each connector and remove the No. 1 instrument panel under cover sub-assembly.
-
-
REMOVE NO. 1 INSTRUMENT PANEL UNDER COVER SUB-ASSEMBLY (for LHD)
-
Remove the 2 screws <B>.
-
Disengage the 2 claws and guide.
-
Disengage the clamp.
-
Disconnect each connector and remove the No. 1 instrument panel under cover sub-assembly.
-
-
REMOVE HOOD LOCK CONTROL LEVER SUB-ASSEMBLY (for RHD)
-
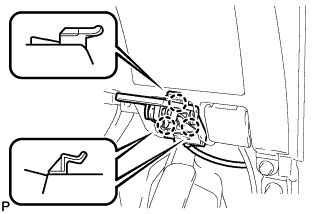
Disengage the 3 claws and disconnect the hood lock control lever sub-assembly.
-
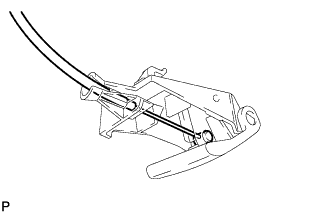
Disconnect the hood lock control cable and remove the hood lock control lever sub-assembly.
-
-
REMOVE HOOD LOCK CONTROL LEVER SUB-ASSEMBLY (for LHD)
-
Disengage the 3 claws and disconnect the hood lock control cable sub-assembly.
-
Disconnect the hood lock control cable and remove the hood lock control lever sub-assembly.
-
-
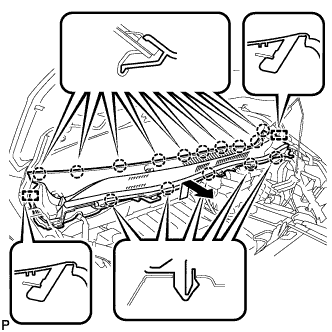
REMOVE HOOD LOCK CONTROL CABLE ASSEMBLY (for RHD)
-
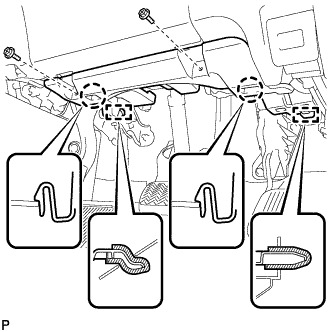
Using a screwdriver, disconnect the clamps shown in the illustration.
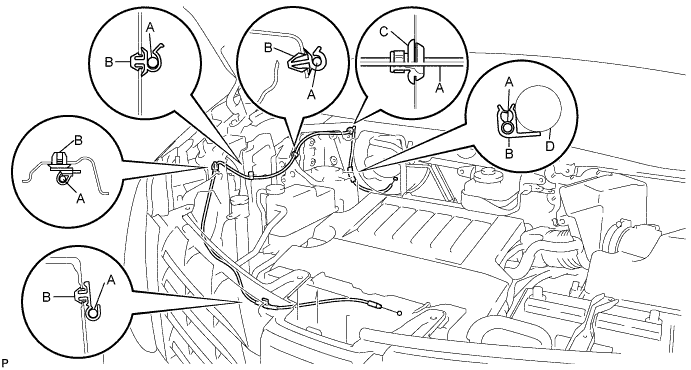
Area Part Name Area Part Name A Hood lock control cable C Hood cable grommet B Clamp D Wire harness Tech Tips
Tape the screwdriver tip before use.
-
Pull the cable from the engine compartment and remove it.
-
-
REMOVE HOOD LOCK CONTROL CABLE ASSEMBLY (for LHD)
-
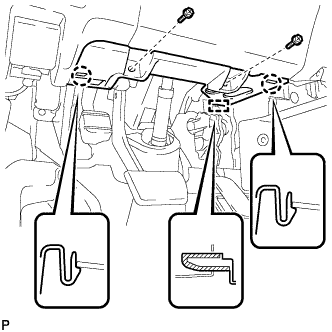
Using a screwdriver, disconnect the clamps shown in the illustration.
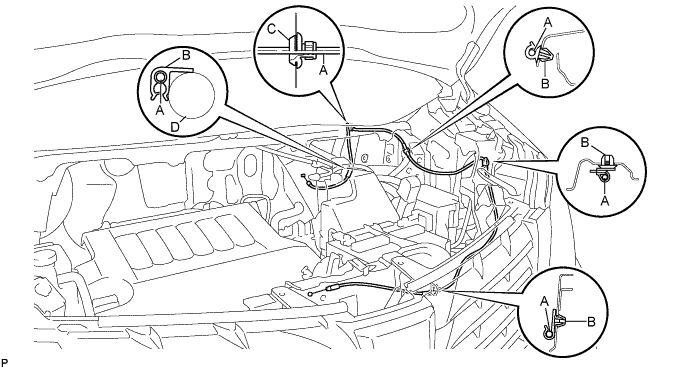
Area Part Name Area Part Name A Hood lock control cable C Hood cable grommet B Clamp D Wire harness Tech Tips
Tape the screwdriver tip before use.
-
Pull the cable from the engine compartment and remove it.
-