SLIDING ROOF SWITCH ASSEMBLY REMOVAL

-
REMOVE ROOF HEADLINING ASSEMBLY
Tech Tips
Refer to the procedure up to Remove Roof Headlining Assembly Click here.
-
REMOVE MAP LIGHT ASSEMBLY (for Front Side)
-
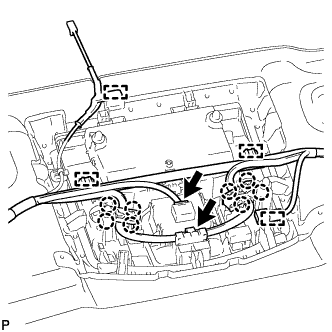
Disengage the 4 clamps.
-
Disengage the 8 claws.
-
Disconnect the 2 connectors.
-
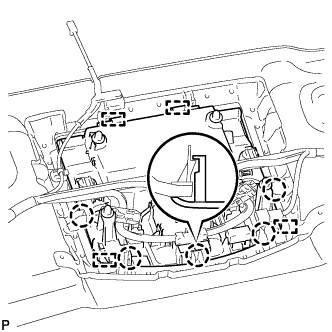
Disengage the each claw and 4 guides, and remove the map light assembly from the roof headlining assembly.
Note
Disengage the front guides first.
-
-
REMOVE SLIDING ROOF SWITCH (POWER SLIDE DOOR CONTROL SWITCH) (for Front Side)
-
Disengage the 4 claws to remove the sliding roof switch (power slide door control switch).
-
-
REMOVE SLIDING ROOF SWITCH (INTEGRATION CONTROL AND PANEL ASSEMBLY) (for Rear Side)
-
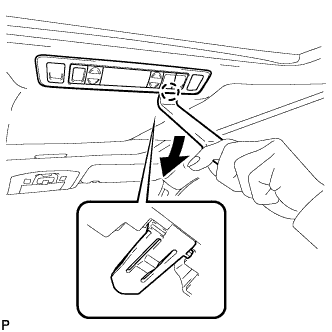
Using a moulding remover, disengage the claw.
-
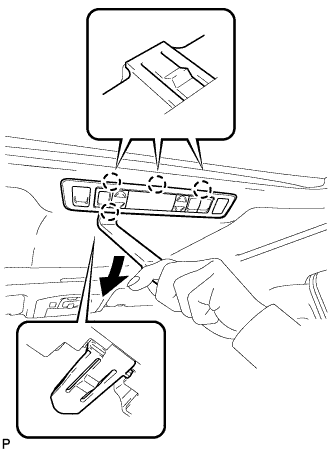
Using a moulding remover, disengage the 4 claws and remove the sliding roof switch (integration control and panel assembly).
-