CENTER POWER OUTLET SOCKET REMOVAL

-
REMOVE SHIFT LEVER KNOB SUB-ASSEMBLY
-
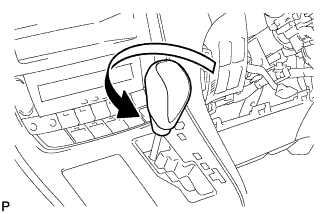
Turn the shift lever knob counterclockwise and remove the shift lever knob sub-assembly.
-
-
REMOVE CENTER INSTRUMENT CLUSTER FINISH PANEL SUB-ASSEMBLY
-
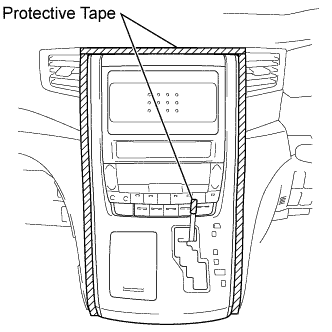
Apply protective tape to the area shown in the illustration.
-
Move the shift lever to N.
-
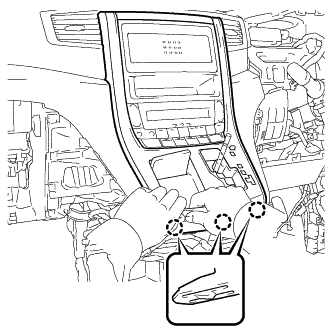
Disengage the 3 claws as shown in the illustration.
Note
Make sure to disengage the lower claws first. The center instrument cluster finish panel sub-assembly may be damaged if the upper claws are disengaged first.
-
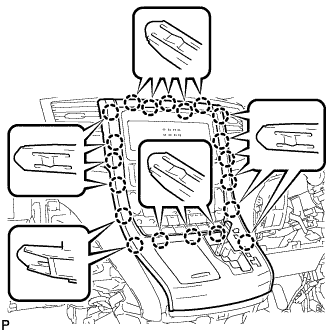
Disengage the 20 claws.
Note
Make sure to disengage the lower claws first. The center instrument cluster finish panel sub-assembly may be damaged if the upper claws are disengaged first.
-
Disconnect the connector and remove the center instrument cluster finish panel sub-assembly.
-
-
REMOVE CENTER POWER OUTLET SOCKET ASSEMBLY
-
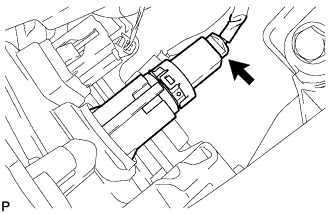
Disconnect the connector.
-
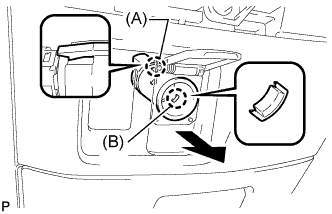
Disengage the claw (A).
-
Disengage the claw (B) and remove the center power outlet socket assembly as shown in the illustration.
-
-
REMOVE POWER OUTLET SOCKET COVER NO.2
-
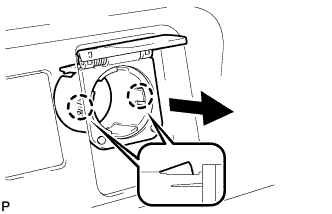
Disengage the 2 claws and remove the power outlet socket cover as shown in the illustration.
-