ION GENERATOR SWITCH REMOVAL

-
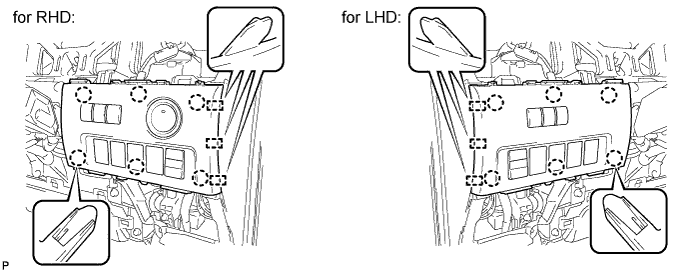
REMOVE NO. 1 INSTRUMENT CLUSTER FINISH PANEL
-
Operate the tilt lever to lower the steering wheel assembly.
-
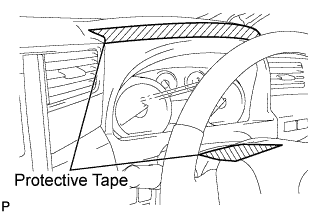
Apply protective tape to the areas shown in the illustration.
-
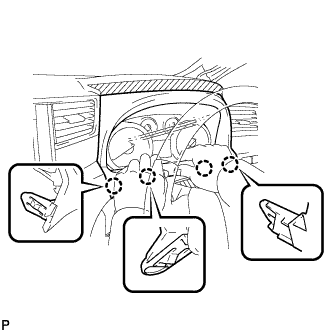
Disengage the 4 claws.
-
Disengage the 7 claws and 2 guides to remove the No. 1 instrument cluster finish panel.
-
-
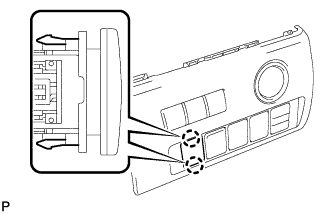
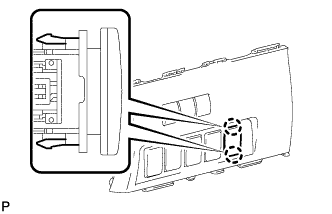
REMOVE NO. 1 INSTRUMENT CLUSTER FINISH PANEL GARNISH
-
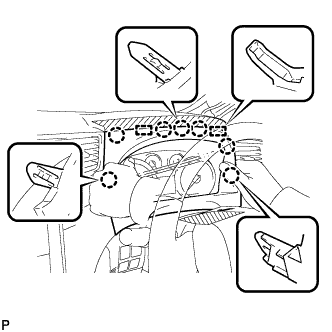
Disengage the 4 claws.
-
Disconnect the connector and remove the No. 1 instrument cluster finish panel garnish.
-
-
REMOVE NO. 1 INSTRUMENT PANEL UNDER COVER SUB-ASSEMBLY (for RHD)
-
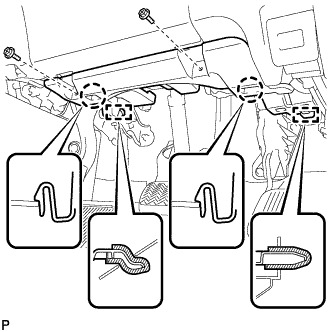
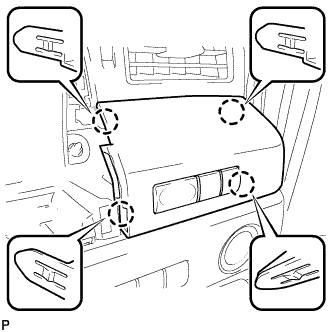
Remove the 2 screws <B>.
-
Disengage the 2 claws and 2 guides.
-
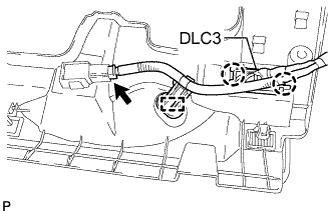
Disengage the 2 claws and disconnect the DLC3.
-
Disengage the clamp.
-
Disconnect each connector and remove the No. 1 instrument panel under cover sub-assembly.
-
-
REMOVE NO. 1 INSTRUMENT PANEL UNDER COVER SUB-ASSEMBLY (for LHD)
-
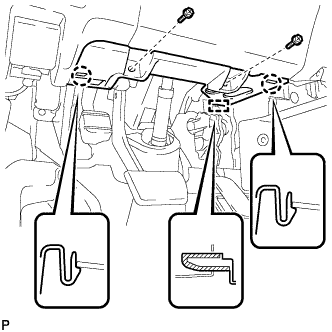
Remove the 2 screws <B>.
-
Disengage the 2 claws and guide.
-
Disengage the clamp.
-
Disconnect each connector and remove the No. 1 instrument panel under cover sub-assembly.
-
-
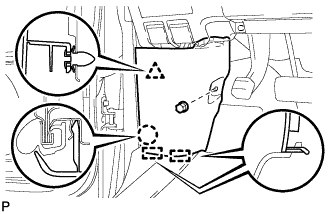
REMOVE COWL SIDE TRIM BOARD RH (for RHD)
-
Remove the clip.
-
Disengage the clip, claw and 2 guides, and remove the cowl side trim board RH.
-
-
REMOVE COWL SIDE TRIM BOARD LH (for LHD)
-
Remove the clip(A).
-
Disengage the clip, claw and 2 guides, and remove the cowl side trim board LH.
-
-
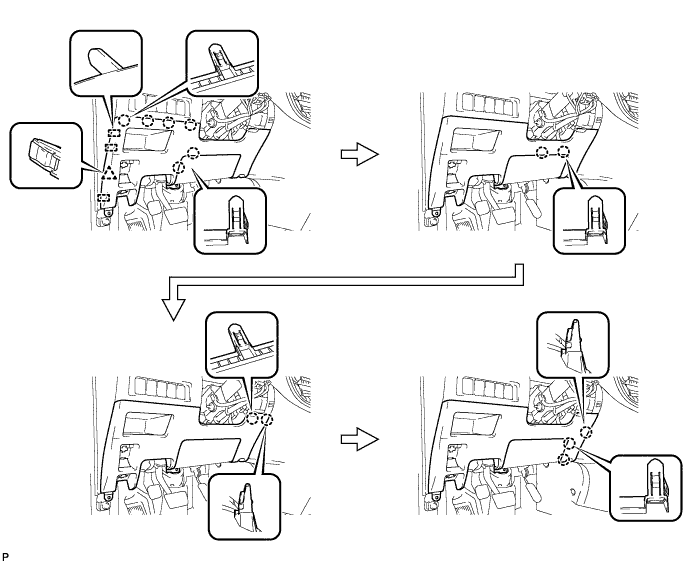
REMOVE LOWER INSTRUMENT PANEL FINISH PANEL (for RHD)
-
Disengage the 3 claws and disconnect the hood lock control cable assembly.
-
Disengage the 3 claws and disconnect the fuel lid lock control cable assembly.
-
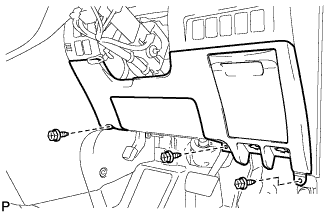
Remove the 3 screws <B>.
-
Disengage the 14 claws and the 3 guides, and remove the lower instrument panel finish panel as shown in the illustration.
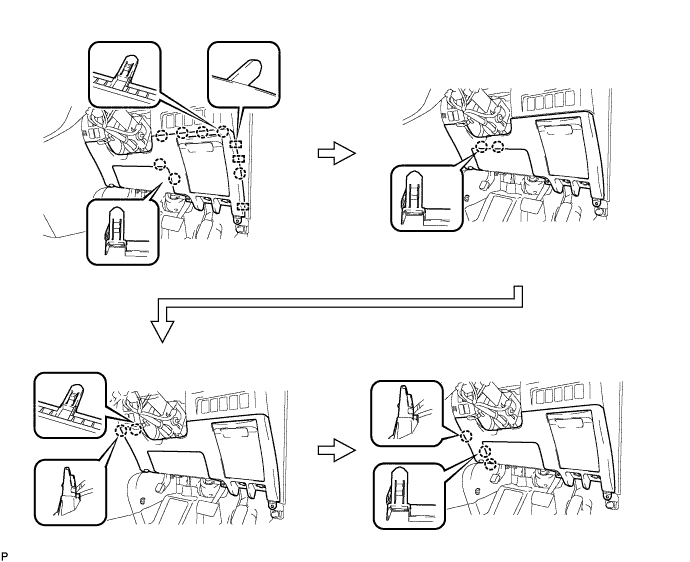
Note
-
Make sure to follow the order shown in the illustration to avoid damage to the lower instrument panel finish panel.
-
While supporting the knee airbag, remove the lower instrument panel finish panel.
-
-
-
REMOVE LOWER INSTRUMENT PANEL FINISH PANEL (for LHD)
-
Disengage the 3 claws and disconnect the hood lock control cable assembly.
-
Disengage the 3 claws and disconnect the fuel lid lock control cable assembly.
-
Disconnect the fuel filler opening lid lock sub-assembly and remove the fuel lid lock open lever sub-assembly.
-

Remove the 3 screws <B>.
-
Disengage the 13 claws, clip and the 3 guides and remove the lower instrument panel finish panel as shown in the illustration.
Note
-
Make sure to follow the order shown in the illustration to avoid damage to the lower instrument panel finish panel.
-
While supporting the knee airbag, remove the lower instrument panel finish panel.
-
-
-
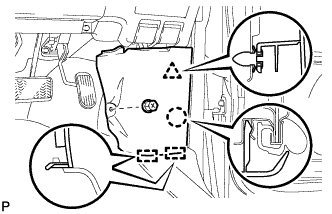
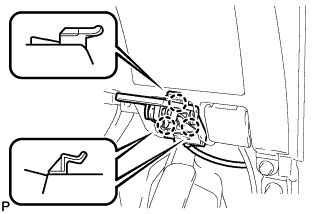
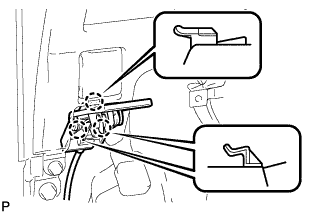
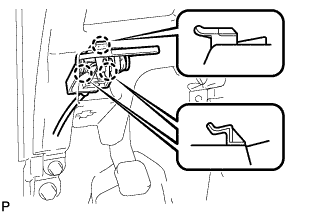
REMOVE NO. 1 SWITCH HOLE BASE
-
Disengage the 6 claws and 3 guides.
-
Disconnect each connector and remove the No. 1 switch hole base.
-
-
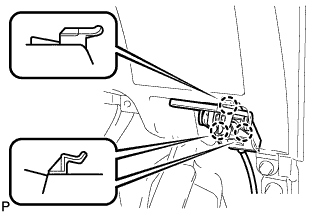
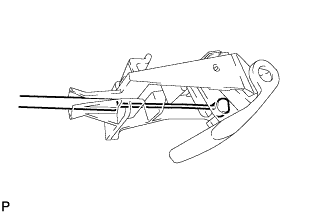
REMOVE ION GENERATOR SWITCH (AIR PURIFIER SWITCH ASSEMBLY) (for RHD)
-
Disengage the 2 claws and remove the ion generator switch (air purifier switch assembly).
-
-
REMOVE ION GENERATOR SWITCH (AIR PURIFIER SWITCH ASSEMBLY) (for LHD)
-
Disengage the 2 claws and remove the ion generator switch (air purifier switch assembly).
-