- Click here
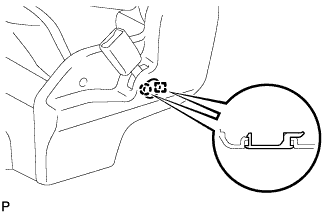
INSTALL REAR NO. 1 SEAT INNER BELT ASSEMBLY
-
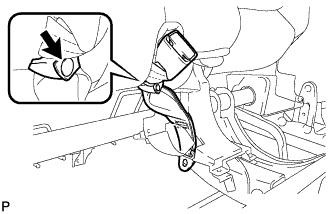
Route the rear No. 1 seat inner belt assembly through the seatback mount as shown in the illustration and fasten the snap button on the installation band.
-
Install the rear No. 1 seat inner belt assembly with the bolt.
42 N*m 428 kgf*cm 31 ft.*lbf Note:Do not allow the anchor part of the rear No. 1 seat inner belt assembly to overlap the protruding parts of the rear No. 1 seat spring assembly.
-
- Click here
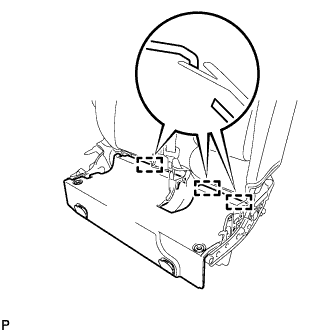
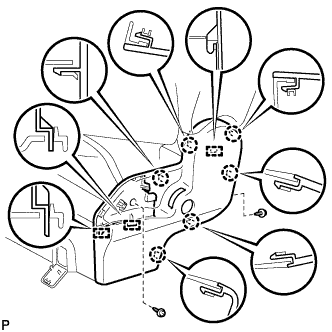
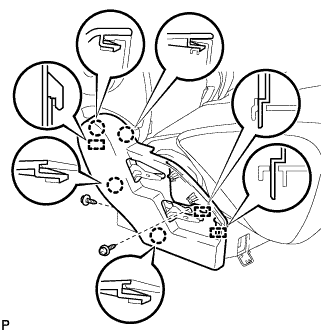
INSTALL REAR SEAT INNER BELT COVER
-
Engage the 2 guides.
-
Install the rear seat inner belt cover with the 4 screws.
-
Engage the claw to close the cover as shown in the illustration.
-
- Click here
INSTALL REAR SEATBACK LOCK STRIKER COVER
-
Engage the 3 claws to install the rear seatback lock striker cover.
-
- Click here
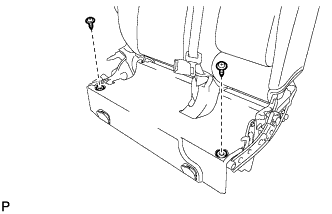
INSTALL REAR SEAT CUSHION UNDER COVER
-
Insert the 3 guides to install the rear seat cushion under cover.
-
- Click here
INSTALL NO. 2 REAR SEAT SUPPORT CUSHION
-
Install the 2 No. 2 rear seat support cushions with the 2 screws.
-
- Click here
INSTALL NO. 1 SEAT CUSHION COVER WITH PAD
-
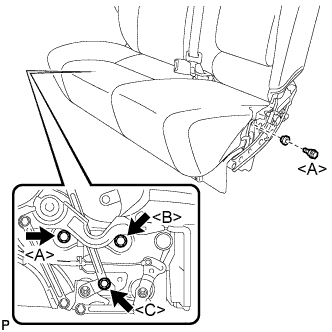
Install the No. 1 seat cushion cover with pad to the No. 1 seat leg RH with the 2 bolts <A>, bolt <B> and bush.
32 N*m 326 kgf*cm 24 ft.*lbf Note:Check that the separate type rear seat cushion cover with pad locks in place when it is tilted forward and backward.
-
If the separate type rear seat cushion cover with pad locks does not be locking:
-
Loosen the 2 bolts <A> and the bolt <B>.
-
Tilt backward the separate type rear seat cushion cover with pad.
-
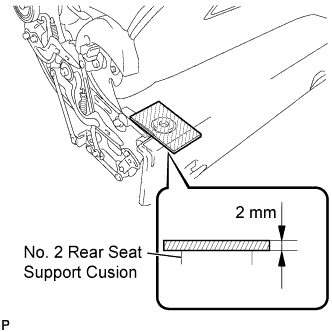
Place a 2 mm thick plate or equivalent tool on the No. 2 rear seat support cushion as shown in the illustration.
-
Tilt forward the separate type rear seat cushion cover with pad.
-
Push down on the front end of the separate type rear seat cushion cover with pad and tighten the bolt (B).
32 N*m 326 kgf*cm 24 ft.*lbf -
Tighten the 2 bolts <A>.
32 N*m 326 kgf*cm 24 ft.*lbf -
Check that the separate type rear seat cushion cover with pad locks in place when it is tilted forward and backward.
-
-
Install the bolt <C>.
8.0 N*m 82 kgf*cm 71 in.*lbf
-
- Click here
INSTALL NO. 1 REAR SEAT RECLINING COVER LH
-
Insert the 3 guides.
-
Engage the 6 claws.
-
Install the No. 1 rear seat reclining cover LH with the 2 screws.
-
- Click here
INSTALL REAR NO. 1 CENTER SEAT LAP TYPE BELT ASSEMBLY
-
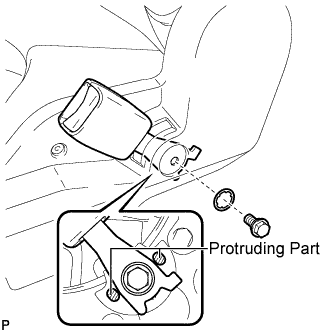
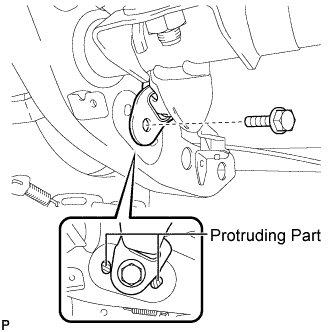
Install the rear No. 1 center seat lap type belt assembly with the bolt and washer.
42 N*m 428 kgf*cm 31 ft.*lbf Note:Do not allow the anchor part of the rear No. 1 center seat lap type belt assembly to overlap the protruding parts of the rear No. 1 seat adjuster.
-
- Click here
INSTALL SEAT ADJUSTER COVER CAP
-
Engage the guide and the claw to install the seat adjuster cover cap.
-
- Click here
INSTALL NO. 1 REAR SEAT RECLINING COVER RH
-
Insert the 3 guides.
-
Engage the 4 claws.
-
Install the No. 1 rear seat reclining cover RH with the 2 screws.
-
- Click here
INSTALL SEAT TRACK HANDLE CONTROL LEVER
-
Engage the claw to install the seat track handle control lever.
-
- Click here
INSTALL NO. 1 RECLINING ADJUSTER RELEASE HANDLE
-
Engage the claw to install the No. 1 reclining adjuster release handle.
-
- Click here
INSTALL REAR NO. 1 SEAT ASSEMBLY
-
Place the rear No. 1 seat assembly in the cabin.
Note:Be careful not to damage the vehicle body.
-
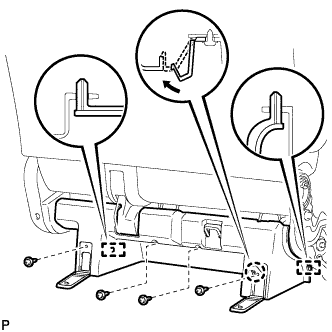
Temporary install the rear No. 1 seat assembly with the 4 bolts.
-
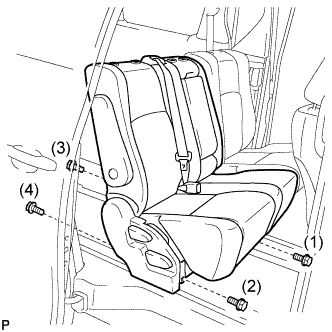
Install the rear No. 1 seat assembly with the 4 bolts.
50 N*m 510 kgf*cm 37 ft.*lbf Note:Tighten the bolts in the order indicated in the illustration.
-

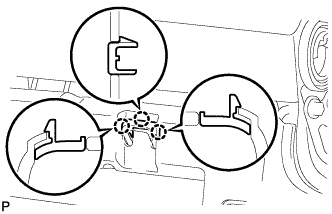
Engage the 3 claws to close the cover as shown in the illustration.
-
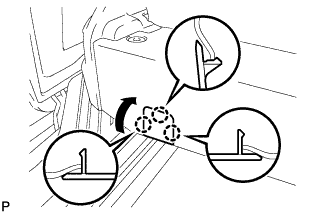
Engage the 3 claws to close the cover as shown in the illustration.
-
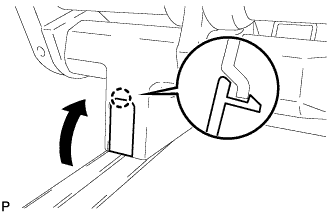
Engage the claw to close the cover as shown in the illustration.
-
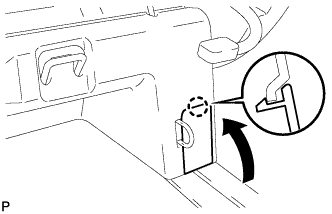
Engage the claw to close the cover as shown in the illustration.
-
- Click here
INSPECT FOR REAR SEAT SLIDE ADJUSTER LOCKS
-
During the sliding operation of the rear No. 1 seat assembly, check that the left and right adjusters move together smoothly and lock simultaneously. If the seat adjusters do not lock simultaneously, loosen the seat fixation bolts to adjust the adjuster position.
-
- Click here
INSTALL REAR SEAT CENTER HEADREST ASSEMBLY
- Click here
INSTALL REAR SEAT HEADREST ASSEMBLY