POWER SEAT SWITCH (for Rear No. 1 Seat) INSTALLATION

-
INSTALL REAR POWER SEAT SWITCH
-
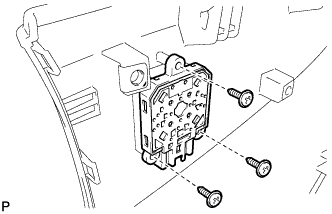
Install the rear power seat switch with the 3 screws.
-
-
INSTALL RECLINING ADJUSTER COVER RH
-
Connect the connector of the rear power seat switch.
-
Connect the cable of the rear seat lock control lever sub-assembly.
-
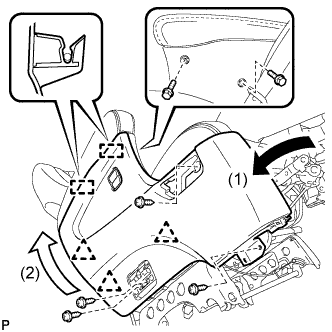
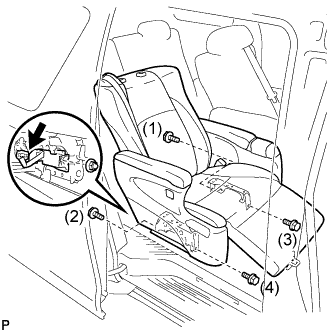
Place the reclining adjuster cover RH onto the seat in the direction indicated by arrow (1) in the illustration.
-
Slide the reclining adjuster cover RH in the direction indicated by arrow (2) in the illustration to engage the 2 guides.
-
Engage the 3 clips.
-
Install the 4 screws.
-
Install the reclining adjuster cover RH with the 2 bolts.
-
-
INSTALL NO. 2 SEAT ADJUSTER COVER CAP
-
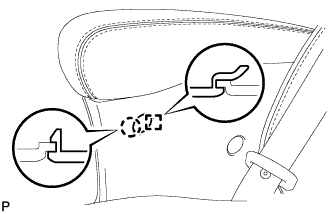
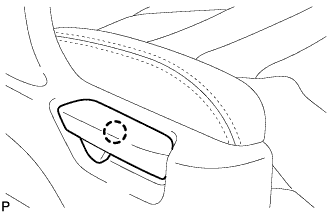
Engage the guide and the claw to install the No. 2 seat adjuster cover cap.
-
-
INSTALL NO. 1 SEAT ADJUSTER COVER CAP
-
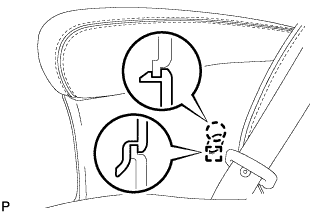
Engage the guide and the claw to install the No. 1 seat adjuster cover cap.
-
-
INSTALL NO. 3 RECLINING ADJUSTER INSIDE COVER
-

Engage the 3 claws and 2 clips to install the No. 3 reclining adjuster inside cover RH.
-
-
INSTALL SEAT ADJUSTER COVER CAP RH
-
Engage the 4 guides and the 6 claws to install the seat adjuster cover cap RH.
-
-
INSTALL REAR SEAT CUSHION
-
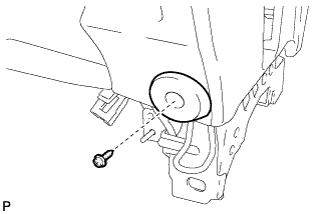
Install the rear seat cushion with the screw.
-
-
INSTALL NO. 1 RECLINING ADJUSTER RELEASE HANDLE
-
Engage the claw to install the No. 1 reclining adjuster release handle.
-
-
INSTALL REAR NO. 1 SEAT ASSEMBLY
-
Place the rear No. 1 seat assembly in the cabin.
Note
Be careful not to damage the vehicle body.
-
Temporary install the rear No. 1 seat assembly with the 4 bolts.
-
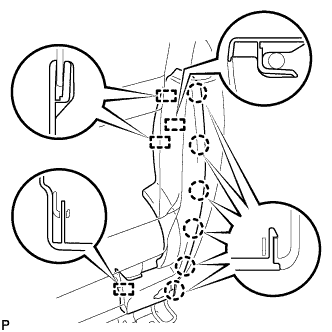
Install the rear No. 1 seat assembly with the 4 bolts.
- Torque:
- 50 N*m { 510 kgf*cm, 37 ft.*lbf }
Note
Tighten the bolts in the order indicated in the illustration.
-
Install the wiring harness protector set with the nut.
-
Connect each connector.
-
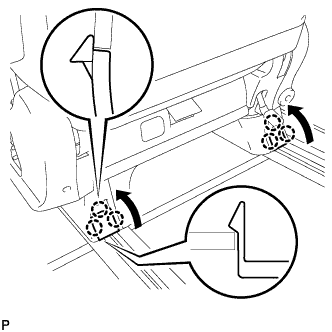
Engage the 6 claws to close the 2 covers as shown in the illustration.
-
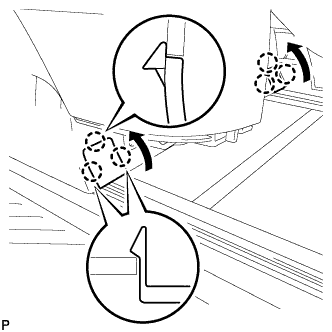
Engage the 6 claws to close the 2 covers as shown in the illustration.
-
-
INSTALL REAR SEAT LEG COVER
-
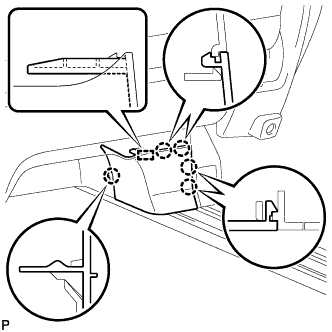
Engage the 5 claws and the guide to install the rear seat leg cover.
-
-
INSTALL REAR SEAT LOWER CUSHION SHIELD
-
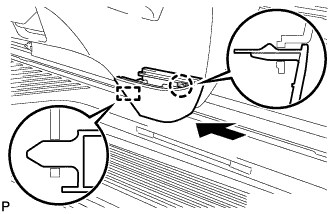
Engage the claw and the guide to install the rear seat lower cushion shield as shown in the illustration.
-
-
INSTALL REAR SEAT HEADREST ASSEMBLY
-
INSPECT REAR NO. 1 SEAT ASSEMBLY
-
Inspect the power seat operation Click here.
-