REAR SEATBACK HEATER INSTALLATION

-
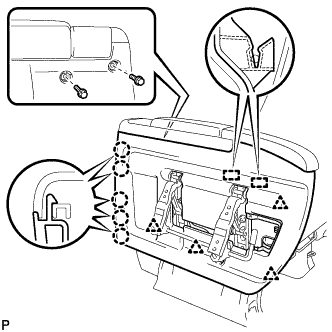
INSTALL REAR NO. 1 SEATBACK COVER SUB-ASSEMBLY
-
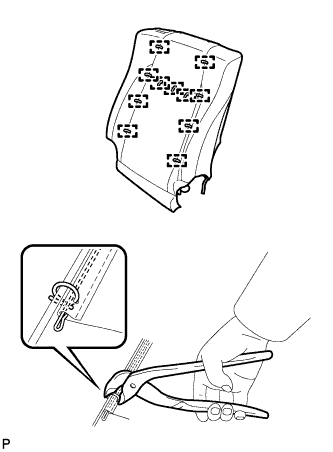
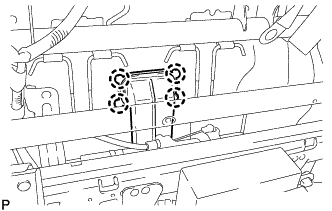
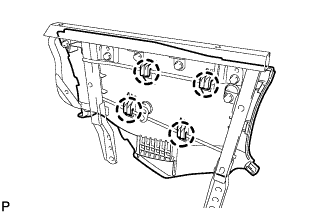
Using hog ring pliers, install the rear No. 1 seatback cover sub-assembly with new 11 hog rings.
Note
-
Be careful not to damage the cover.
-
Be sure to securely install the hog rings as shown in the illustration while preventing wrinkles from forming on the rear No. 1 seatback cover sub-assembly.
-
-
-
INSTALL REAR NO. 1 SEATBACK COVER WITH PAD
-
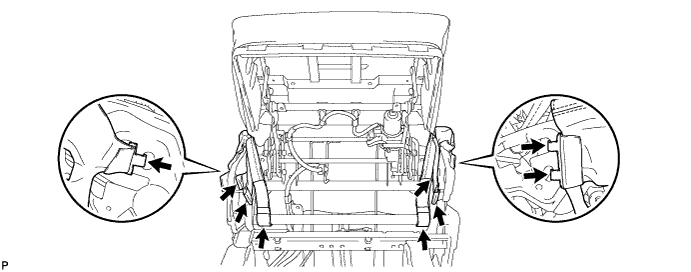
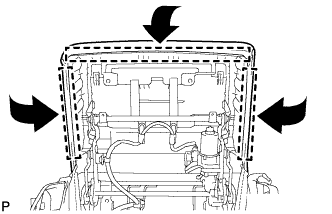
Temporarily install the rear No. 1 seatback cover with pad to the rear No. 1 seatback frame sub-assembly.
-

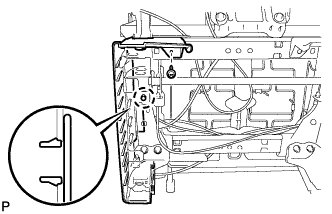
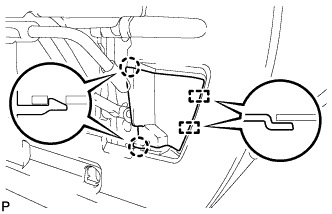
Engage the 4 claws to install the 2 rear seat headrest supports.
-
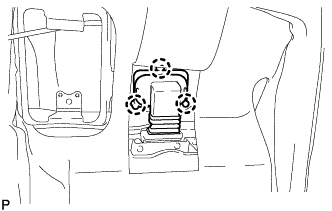
Engage the 3 claws to connect the No. 2 seatback climate control duct.
-
Text in Illustration *1 Fastener Close the 2 fasteners.
-
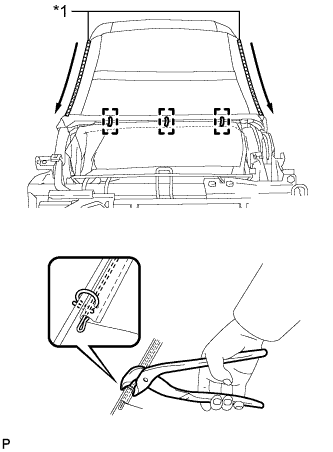
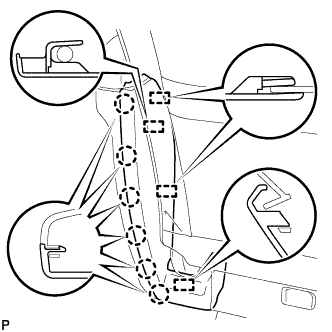
Using hog ring pliers, install the rear No. 1 seatback cover with pad with 3 new hog rings.
Note
-
Be careful not to damage the cover.
-
Be sure to securely install the hog rings as shown in the illustration while preventing wrinkles from forming on the rear No. 1 seatback cover with pad.
-
-
-
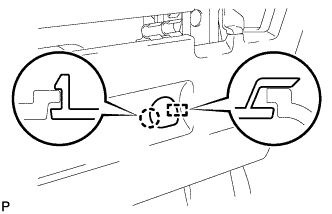
INSTALL REAR SEAT LOCK CONTROL LEVER SUB-ASSEMBLY
-
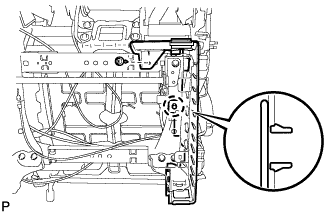
Connect the 2 cable clamps.
-
Install the rear seat lock control lever sub-assembly with the 2 screws.
-
-
INSTALL SEAT STAND FRAME CAP
-
Engage the 2 claws to install the seat stand frame cap.
-
-
INSTALL REAR SEAT SHOULDER BELT COVER
-
Install the rear seat shoulder belt cover with the 2 screws.
-
-
INSTALL REAR SHOULDER BELT ANCHOR COVER
-
Engage the 6 claws to install the rear shoulder belt anchor cover.
-
-
INSTALL FRONT SHOULDER BELT ANCHOR COVER
-

Engage the guide.
-
Engage the 2 claws to install the front shoulder belt anchor cover.
-
-
INSTALL REAR NO. 1 SEAT CUSHION COVER WITH PAD
-
Engage the hook.
-
Engage the 4 claws to connect the seat cushion climate control duct.
-
Engage the 9 hooks.
-
Engage the 3 hooks to install the rear No. 1 seat cushion cover with pad.
-
-
INSTALL NO. 6 REAR SEAT LEG SIDE COVER
-
Engage the claw.
-
Install the No. 6 rear seat leg side cover with the screw.
-
-
INSTALL NO. 5 REAR SEAT LEG SIDE COVER
-
Engage the claw.
-
Install the No. 5 rear seat leg side cover with the screw.
-
-
INSTALL LOWER REAR SEAT LEG COVER
-
Engage the 4 claws.
-
Install the lower rear seat leg cover with the 2 screws.
-
Engage the clamp.
-
-
INSTALL NO. 3 REAR SEAT LEG SIDE COVER
-
Engage the 2 claws and guide to install the No. 3 rear seat leg side cover.
-
-
INSTALL NO. 2 REAR SEAT LEG SIDE COVER
-
Engage the 2 claws and guide to install the No. 2 rear seat leg side cover.
-
-
INSTALL NO. 3 RECLINING ADJUSTER INSIDE COVER
-
Engage the 2 claws and guide to install the No. 3 rear seat leg side cover.
-
-
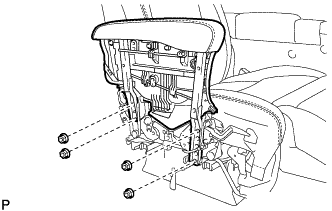
INSTALL REAR SEAT ARMREST FRAME SUB-ASSEMBLY
-
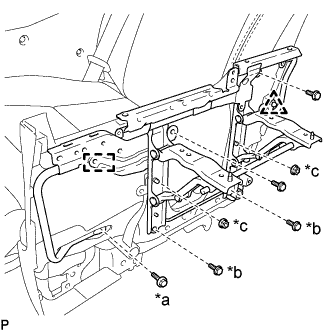
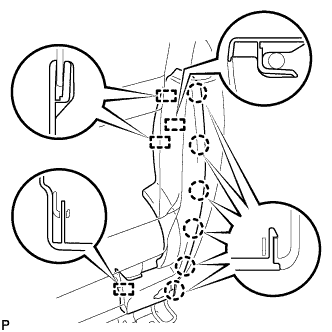
Text in Illustration *a Bolt <A> *b Bolt <B> *c Nut <C> Engage the clip and guide.
-
Install the rear seat armrest frame sub-assembly with the 5 bolts and 2 nuts.
- Torque:
- Bolt <A>
- 14 N*m { 143 kgf*cm, 10 ft.*lbf }
- Bolt <B>
- 14 N*m { 143 kgf*cm, 10 ft.*lbf }
- Nut <C>
- 14 N*m { 143 kgf*cm, 10 ft.*lbf }
-
-
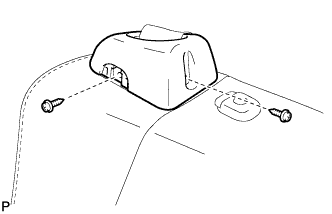
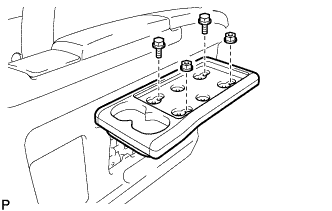
INSTALL REAR POWER SEAT SWITCH WITH CUP HOLDER ASSEMBLY
-
Install the rear power seat switch with cup holder assembly with the 3 bolts and 2 screws.
-
Connect the connector and engage the 2 clamps.
-
-
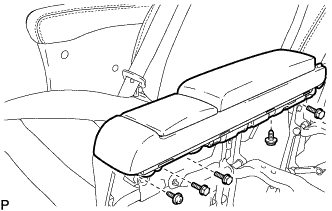
INSTALL REAR SEAT ARMREST ASSEMBLY
-
Engage the guide.
-
Install the rear seat armrest assembly with the 2 bolts.
- Torque:
- 4.5 N*m { 46 kgf*cm, 40 in.*lbf }
-
-
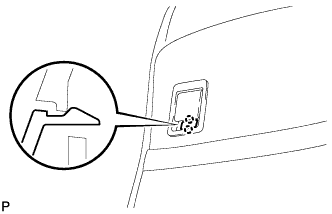
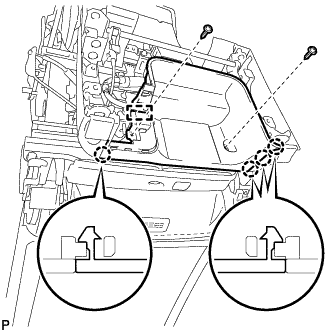
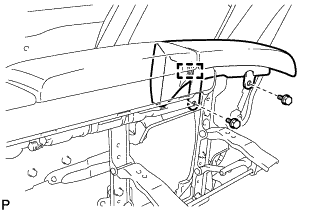
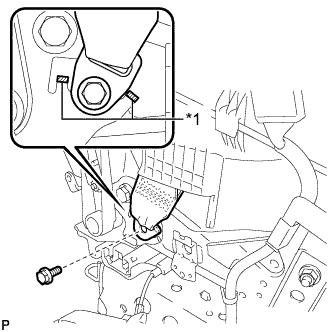
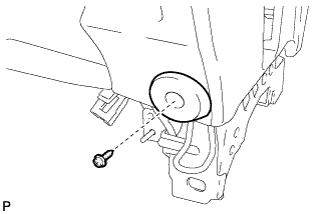
INSTALL REAR NO. 1 SEAT INNER BELT ASSEMBLY
-
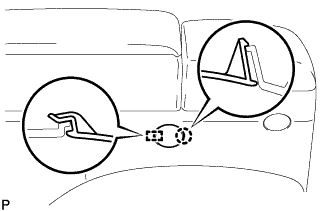
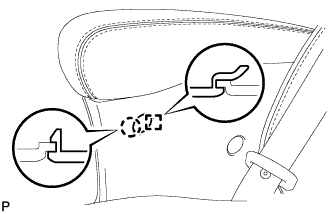
Text in Illustration *1 Protruding Part Install the rear No. 1 seat inner belt assembly with the bolt and washer.
- Torque:
- 42 N*m { 428 kgf*cm, 31 ft.*lbf }
Note
Do not allow the anchor part of the rear No. 1 seat inner belt assembly to overlap the protruding parts of the floor panel.
-
-
INSTALL REAR SEAT CUSHION MOULDING
-
Engage the 2 guides.
-
Engage the 5 claws.
-
Engage the 4 clips.
-
Install the rear seat cushion moulding with the 2 bolts.
-
-
INSTALL NO. 4 SEAT ADJUSTER COVER CAP
-
Engage the guide and claw to install the No. 4 seat adjuster cover cap.
-
-
INSTALL NO. 3 SEAT ADJUSTER COVER CAP
-
Engage the guide and claw to install the No. 3 seat adjuster cover cap.
-
-
INSTALL SEAT ADJUSTER COVER CAP LH
-
Engage the 4 guides.
-
Engage the 6 claws to install the seat adjuster cover cap LH.
-
-
INSTALL NO. 1 SEAT SIDE ADJUSTER COVER CAP (for RH Side)
-
Engage the 2 claws to install the 2 No. 1 seat side adjuster cover caps.
-
-
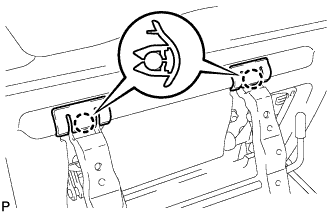
INSTALL REAR SEAT SIDE TABLE (for RH Side)
-
Install the rear seat side table with the 2 nuts and 2 bolts.
-
Engage the hook to store the table.
-
Secure the rear seat side table clip with the screw.
-
-
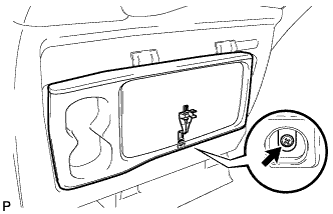
INSTALL REAR SEAT SIDE TABLE BOARD (for RH Side)
-

Engage the 6 clips to install the rear seat side table board.
-
-
INSTALL NO. 2 SEAT SIDE ADJUSTER COVER CAP (for RH Side)
-
Engage the 2 claws and 2 guides to install the No. 2 seat side adjuster cover cap.
-
-
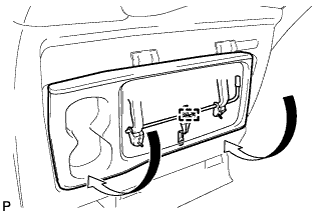
INSTALL REAR SEAT SIDE TABLE COVER (for RH Side)
-
Engage the guide and claw to install the rear seat side table cover.
-
-
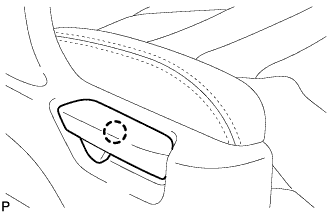
INSTALL REAR NO. 1 SEAT ARMREST ASSEMBLY RH WITH FRAME AND COVER
-
Install the rear No. 1 seat armrest assembly RH with frame and cover with the 4 nuts.
- Torque:
- 14 N*m { 143 kgf*cm, 10 ft.*lbf }
-
-
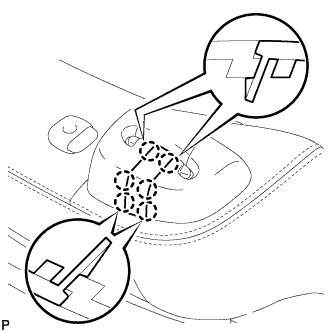
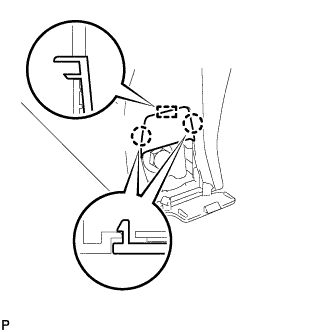
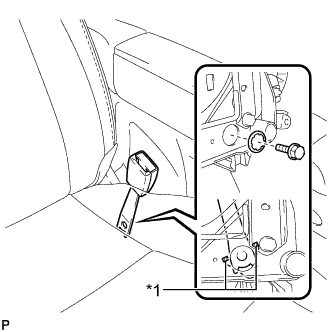
CONNECT NO. 1 SEAT 3 POINT TYPE BELT ASSEMBLY
-
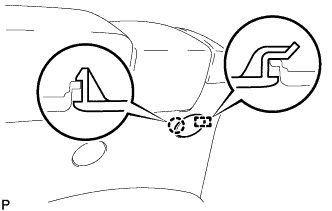
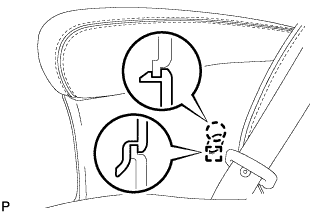
Text in Illustration *1 Protruding Part Connect the rear No. 1 seat 3 point type belt assembly with the bolt.
- Torque:
- 42 N*m { 428 kgf*cm, 31 ft.*lbf }
Note
Do not allow the anchor part of the rear No. 1 seat 3 point type belt assembly to overlap the protruding parts of the cushion frame.
-
-
INSTALL RECLINING ADJUSTER COVER RH
-
Engage the 4 claws to install the reclining adjuster inside cover RH to the rear seat armrest frame sub-assembly RH.
-
-
INSTALL NO. 1 SEAT ADJUSTER COVER CAP
-
Engage the guide and claw to install the No. 1 seat adjuster cover cap.
-
-
INSTALL NO. 2 SEAT ADJUSTER COVER CAP
-
Engage the guide and claw to install the No. 2 seat adjuster cover cap.
-
-
INSTALL NO. 3 RECLINING ADJUSTER INSIDE COVER RH
-

Engage the 3 claws and 2 clips to install the No. 3 reclining adjuster inside cover RH.
-
-
INSTALL SEAT ADJUSTER COVER CAP RH
-
Engage the 4 guides and 6 claws to install the seat adjuster cover cap RH.
-
-
INSTALL REAR SEAT CUSHION
-
Install the rear seat cushion with the screw.
-
-
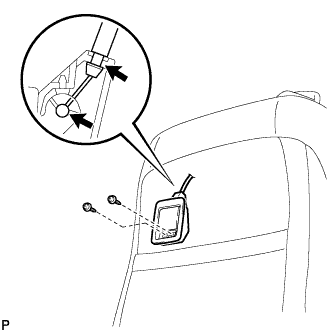
INSTALL NO. 1 RECLINING ADJUSTER RELEASE HANDLE
-
Engage the claw to install the No. 1 reclining adjuster release handle.
-
-
INSTALL REAR NO. 1 SEAT ASSEMBLY