FRONT SEAT ASSEMBLY (for Driver Side Power Seat) REASSEMBLY

-
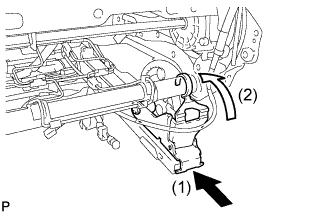
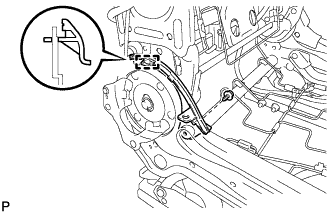
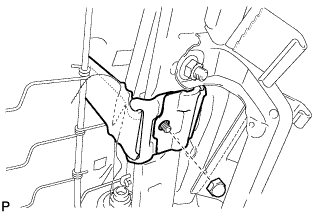
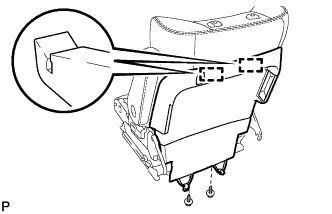
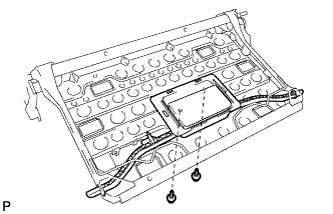
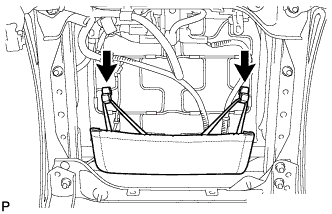
INSTALL ACTIVE HEADREST LOWER UNIT
-
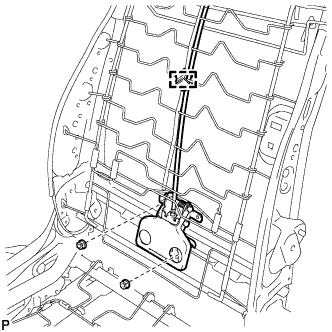
Install the active headrest lower unit with the 2 nuts.
- Torque:
- 5.0 N*m { 51 kgf*cm, 44 in.*lbf }
-
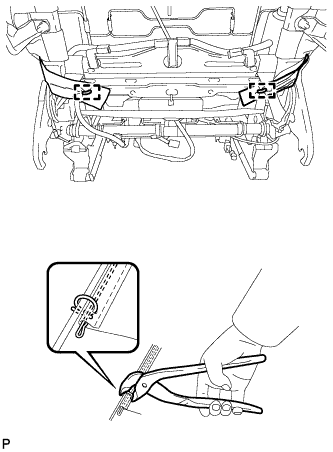
Install the new clamp.
-
-
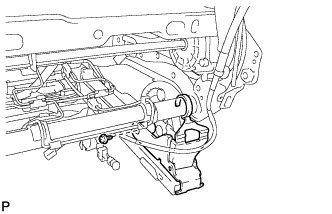
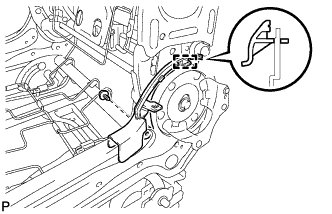
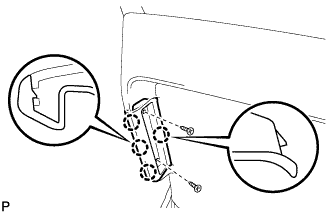
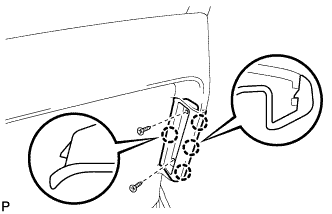
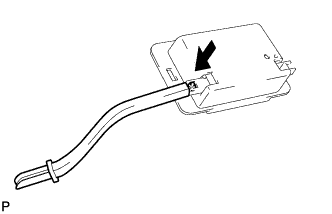
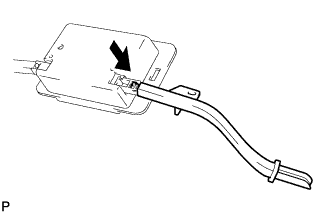
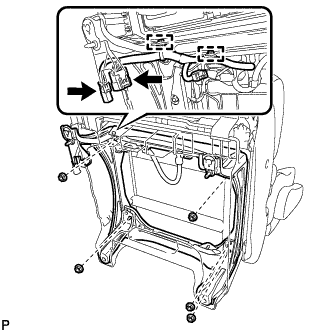
INSTALL ACTIVE HEADREST UPPER UNIT
-
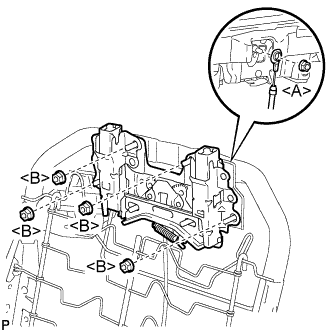
Install the active headrest upper unit with the 4 nuts <B>.
- Torque:
- 14 N*m { 143 kgf*cm, 10 ft.*lbf }
-
Install the active headrest lower unit cable with the nut <A>.
- Torque:
- 5.0 N*m { 51 kgf*cm, 44 in.*lbf }
-
-
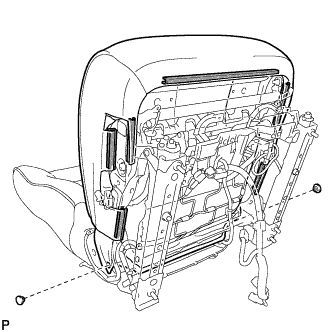
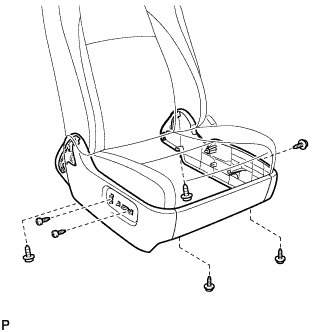
INSTALL FRONT SEAT OUTER TRACK ASSEMBLY
-
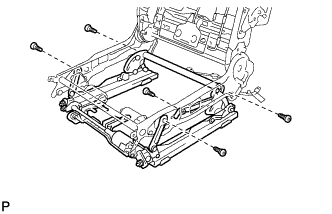
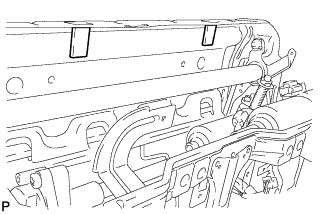
Using a T40 "TORX" socket wrench, install the front seat outer track assembly with the 5 "TORX" bolts.
- Torque:
- 25 N*m { 255 kgf*cm, 18 ft.*lbf }
-
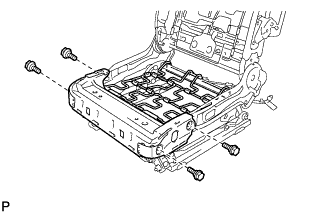
Install the front seat cushion frame sub-assembly and front seat cushion spring assembly with the 4 bolts.
- Torque:
- 19 N*m { 194 kgf*cm, 14 ft.*lbf }
-
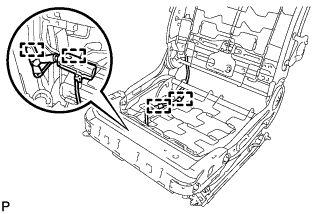
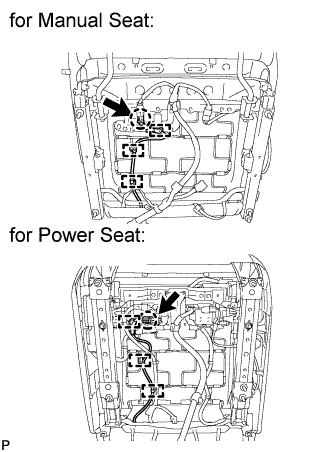
Engage the 4 clamps to connect the seat airbag harness.
-
-
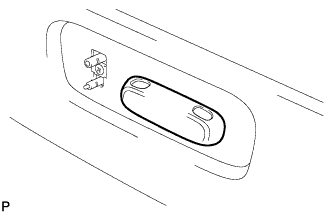
INSTALL FRONT SEAT CUSHION EDGE PROTECTOR
-
Install the 2 front seat cushion edge protectors.
-
-
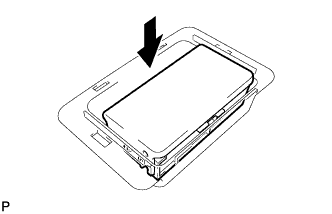
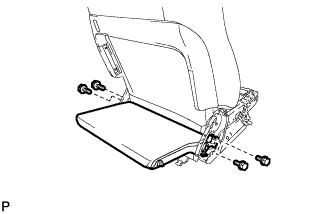
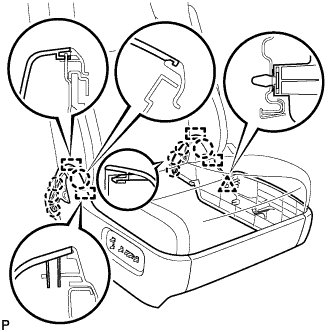
INSTALL FRONT SEAT SIDE AIRBAG ASSEMBLY
CAUTION:
-
The nuts must not be reused.
-
Make sure that the front seat frame with adjuster assembly is not deformed. If it is, replace it with a new one.
-
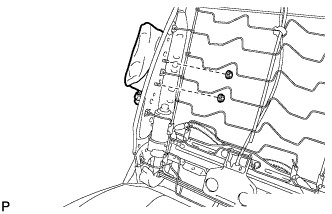
Install the front seat side airbag assembly with 2 new nuts.
- Torque:
- 5.5 N*m { 56 kgf*cm, 49 in.*lbf }
-
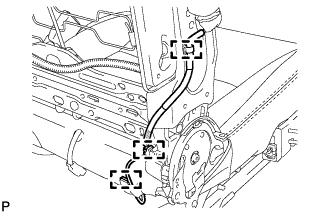
Engage the 3 clamps.
-
Engage the claw and 5 clamps to connect the wire harness.
-
Connect the connector.
-
-
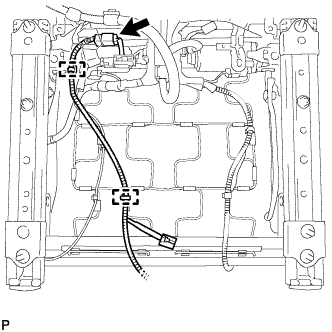
INSTALL FRONT SEAT WIRE
-
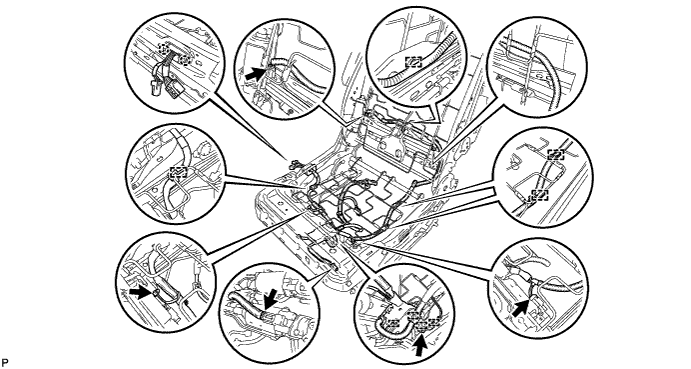
Engage each clamp.
-
Engage the 2 claws.
-
Connect each connector and install the front seat wire.
-
-
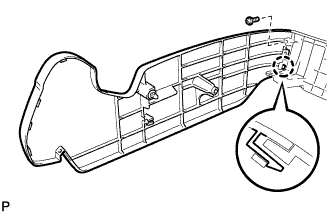
INSTALL FRONT SEAT LOWER CUSHION SHIELD LH
-
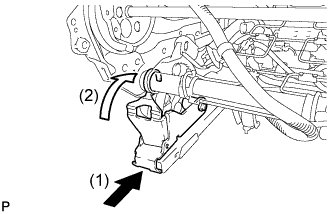
Engage the hook as shown in the illustration.
-
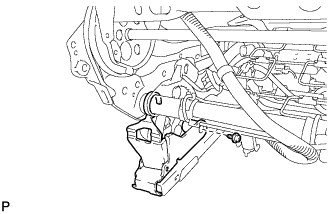
Install the front seat lower cushion shield LH with the screw.
-
-
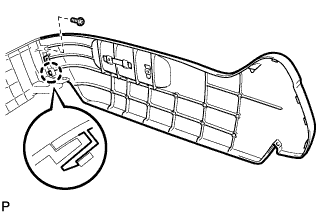
INSTALL FRONT SEAT LOWER CUSHION SHIELD RH
-
Engage the hook as shown in the illustration.
-
Install the front seat lower cushion shield RH with the screw.
-
-
INSTALL RECLINING ADJUSTER INSIDE COVER LH
-
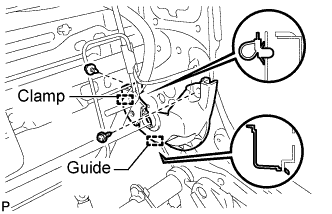
Engage the clamp and guide.
-
Install the reclining adjuster inside cover LH with the 2 screws.
-
-
INSTALL RECLINING ADJUSTER INSIDE COVER RH
-
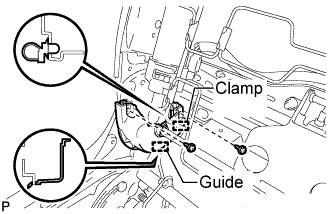
Engage the clamp and guide.
-
Install the reclining adjuster inside cover RH with the 2 screws.
-
-
INSTALL NO. 1 RECLINING ADJUSTER INSIDE COVER LH
-
Engage the guide.
-
Install the No. 1 reclining adjuster inside cover LH with the screw.
-
-
INSTALL NO. 1 RECLINING ADJUSTER INSIDE COVER RH
-
Engage the guide.
-
Install the No. 1 reclining adjuster inside cover RH with the screw.
-
-
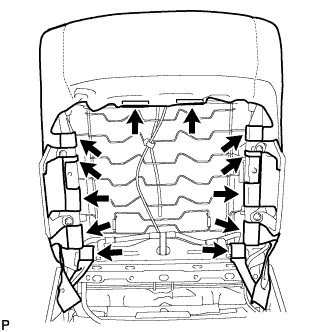
INSTALL SEPARATE TYPE FRONT SEATBACK COVER
-
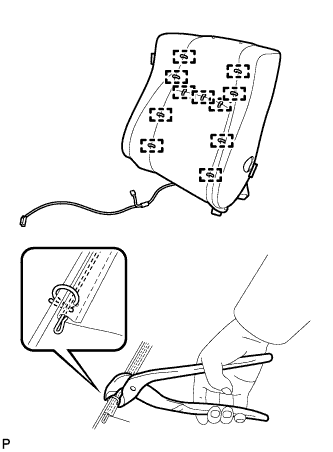
Using hog ring pliers, install the separate type front seatback cover to the separate type front seatback pad with 11 new hog rings.
Note
-
Be careful not to damage the cover.
-
When installing the hog rings, avoid wrinkling the cover.
-
-
-
INSTALL SEPARATE TYPE FRONT SEATBACK COVER WITH PAD
-
Temporarily install the separate type front seatback cover with pad.
-
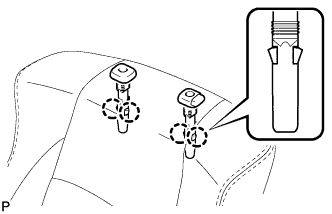
Engage the 4 claws to install the 2 front seat headrest supports.
-
Install the nut.
- Torque:
- 5.5 N*m { 56 kgf*cm, 49 in.*lbf }
-
Engage the 12 hooks.
-
for Leather Seat:
-
Engage the 2 clamps.
-
Connect the connector.
-
-
Using hog ring pliers, install the separate type front seatback cover with pad with 3 new hog rings.
Note
-
Be careful not to damage the cover.
-
When installing the hog rings, avoid wrinkling the cover.
-
-
Using hog ring pliers, install the separate type front seatback cover with pad with 2 new hog rings.
Note
-
Be careful not to damage the cover.
-
When installing the hog rings, avoid wrinkling the cover.
-
-
-
INSTALL FRONT SEAT ARMREST ASSEMBLY
-
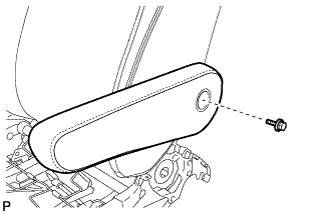
Install the front seat armrest assembly with the bolt.
- Torque:
- 37 N*m { 377 kgf*cm, 27 ft.*lbf }
-
-
INSTALL SEAT ARMREST COVER
-
Engage the 3 claws to install the seat armrest cover.
-
-
INSTALL FRONT SEATBACK POCKET CLIP
-
Install the 2 front seatback pocket clips to the front seatback board sub-assembly.
-
-
INSTALL FRONT SEATBACK BOARD SUB-ASSEMBLY
-
Engage the 2 guides.
-
Install the front seatback board sub-assembly with the 2 screws.
-
-
INSTALL LOWER NO. 2 FRONT SEATBACK LOCK BEZEL
-
Engage the 4 claws.
-
Install the lower No. 2 front seatback lock bezel with the 2 screws.
-
-
INSTALL LOWER NO. 1 FRONT SEATBACK LOCK BEZEL
-
Engage the 4 claws.
-
Install the lower No. 1 front seatback lock bezel with the 2 screws.
-
-
INSTALL FRONT SEATBACK LOCK HANDLE
-
Install the front seatback lock handle to the front seatback edge protector.
-
-
INSTALL RECLINING ADJUSTER RELEASE HANDLE RH
-
Install the reclining adjuster release handle RH.
-
-
INSTALL RECLINING ADJUSTER RELEASE HANDLE RH
-
Install the reclining adjuster release handle RH.
-
-
INSTALL FRONT SEATBACK LOCK ASSEMBLY
-
Install the front seatback lock assembly with the 2 screws.
-
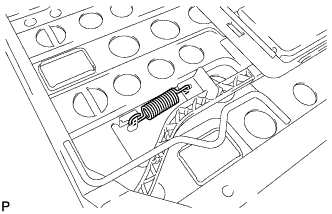
Install the spring.
-
-
INSTALL LOWER FRONT SEATBACK COVER SUB-ASSEMBLY
-
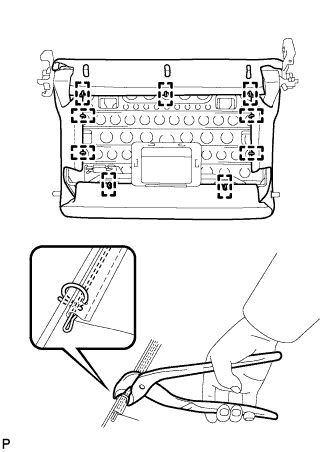
Using hog ring pliers, install the lower front seatback cover sub-assembly to the lower front seatback frame assembly with 9 new hog rings.
Note
-
Be careful not to damage the cover.
-
When installing the hog rings, avoid wrinkling the cover.
-
-
-
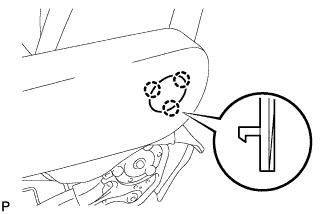
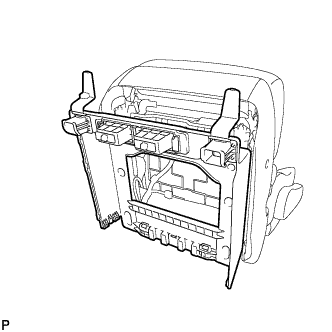
INSTALL FRONT SEATBACK EDGE PROTECTOR
-
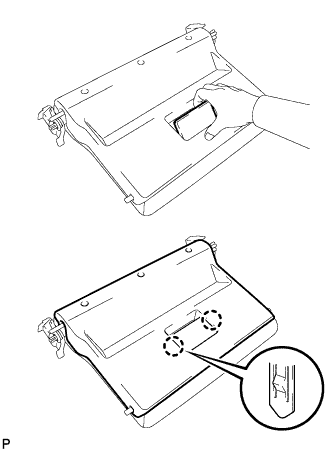
Engage the 2 claws while pulling the lever as shown in the illustration.
-
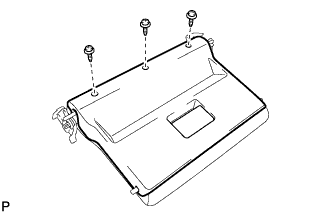
Install the front seatback edge protector with the 3 screws.
-
-
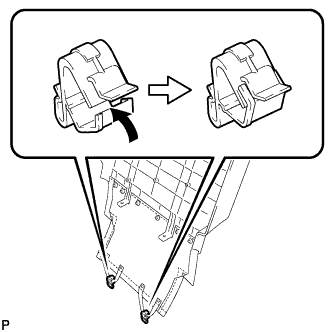
INSTALL SEAT STAND FRAME CAP
-
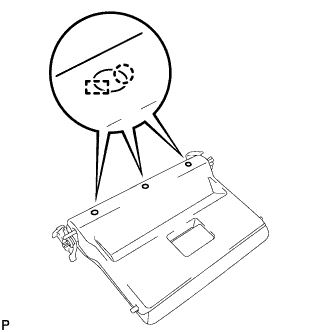
Engage the 3 guides and 3 claws to install the 3 seat stand frame caps.
-
-
INSTALL LOWER NO. 3 FRONT SEATBACK LOCK BEZEL
-
Install the lower No. 3 front seatback lock bezel.
Tech Tips
Use the same procedure for the LH side and RH side.
-
-
INSTALL FOOTREST ASSEMBLY
-
Install the footrest assembly with the 4 bolts.
- Torque:
- 32 N*m { 326 kgf*cm, 24 ft.*lbf }
-
-
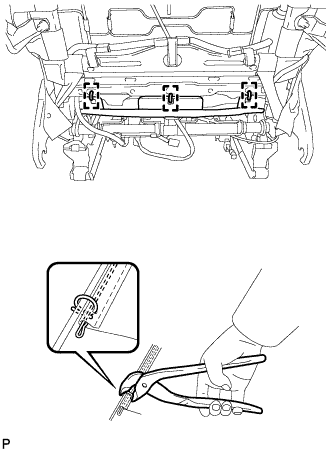
INSTALL SEPARATE TYPE FRONT SEAT CUSHION COVER
-
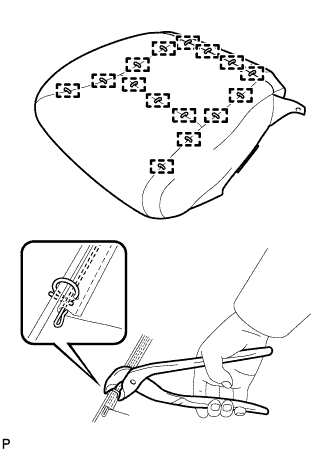
Using hog ring pliers, install the separate type front seat cushion cover to the separate type front seat cushion pad with 15 new hog rings.
Note
-
Be careful not to damage the cover.
-
When installing the hog rings, avoid wrinkling the cover.
-
-
-
INSTALL SEPARATE TYPE FRONT SEAT CUSHION COVER WITH PAD
-
Engage the 6 hooks to install the separate type front seat cushion cover with pad.
-
Install the 2 clips.
-
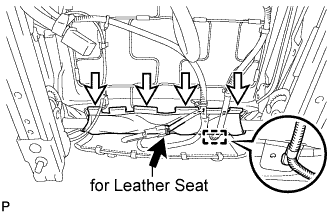
Engage the 4 hooks.
-
Engage the clamp.
-
for Leather Seat:
-
Connect the connector.
-
-
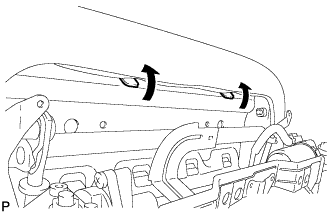
Engage the 2 front seat cushion edge protectors as shown in the illustration.
-
-
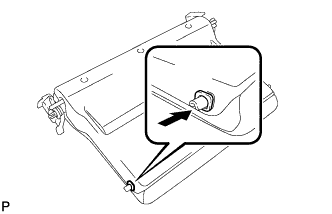
INSTALL FRONT SEAT INNER BELT ASSEMBLY
-
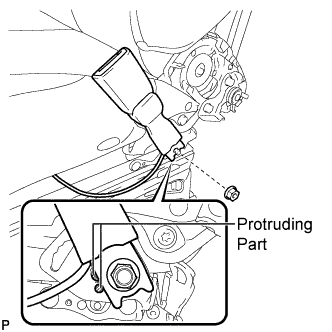
Install the front seat inner belt assembly with the nut.
- Torque:
- 42 N*m { 428 kgf*cm, 31 ft.*lbf }
Note
Do not allow the anchor part of the front seat inner belt assembly to overlap the protruding parts of the front seat adjuster.
-
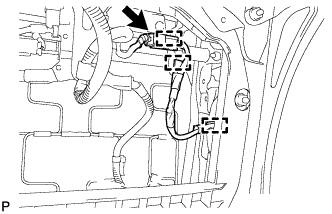
Engage each clamp.
-
Connect the connector.
-
-
INSTALL POSITION CONTROL ECU AND SWITCH ASSEMBLY
-

Connect the 2 connectors.
-
Install the position control ECU and switch assembly with the 3 screws.
-
-
INSTALL FRONT SEAT CUSHION INNER SHIELD
-
Engage the claw.
-
Install the front seat cushion inner shield to the No. 1 front seat cushion inner shield with the screw.
-
-
INSTALL FRONT SEAT CUSHION SHIELD
-
Engage the claw.
-
Install the front seat cushion shield to the No. 1 front seat cushion inner shield with the screw.
-
-
INSTALL FRONT SEAT CUSHION SHIELD ASSEMBLY
-
Engage the 8 claws, clip and 4 guides.
-
Install the front seat cushion shield assembly, No. 2 reclining adjuster inside cover RH and No. 2 reclining adjuster inside cover LH with the 7 screws.
-
Engage the 2 hooks.
-
-
INSTALL SLIDE AND VERTICAL POWER SEAT SWITCH KNOB
-
Install the slide and vertical power seat switch knob.
-
-
INSTALL RECLINING POWER SEAT SWITCH KNOB
-
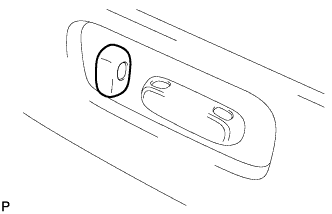
Install the reclining power seat switch knob.
-
-
INSTALL LOWER FRONT SEAT LEG COVER
-
Install the lower front seat leg cover.
-
-
INSTALL FRONT SEAT LEG ASSEMBLY
-
Install the front seat leg assembly with the 5 nuts.
- Torque:
- 20 N*m { 204 kgf*cm, 15 ft.*lbf }
-
Engage the 2 clamps.
-
Connect the 2 connectors.
-
-
INSTALL SEAT ADJUSTER COVER CAP
-

Install the 2 seat adjuster cover caps.
-