BACK DOOR COURTESY SWITCH INSTALLATION

-
INSTALL BACK DOOR LOCK ASSEMBLY (w/o Easy Closer)
-
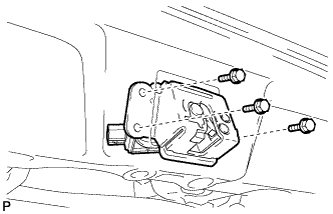
Install the back door lock assembly with the 3 bolts.
- Torque:
- 13 N*m { 133 kgf*cm, 10 ft.*lbf }
-
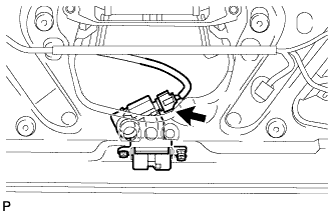
Connect the connector.
-
-
INSTALL BACK DOOR LOCK ASSEMBLY (w/ Easy Closer)
-
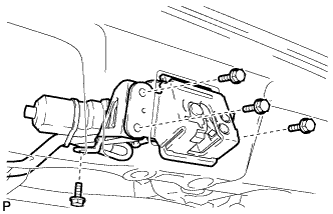
Install the back door lock assembly with the 4 bolts.
- Torque:
- 13 N*m { 133 kgf*cm, 10 ft.*lbf }
-
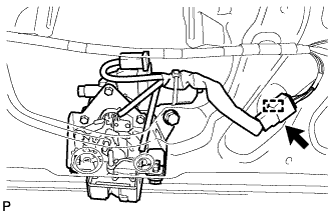
Connect the connector.
-
Engage the clamp.
-
-
INSTALL BACK DOOR TRIM BOARD ASSEMBLY
-
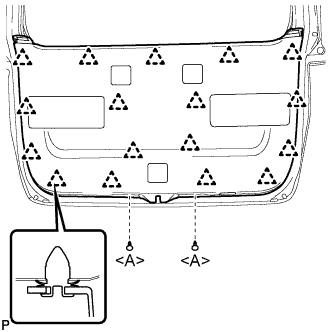
Engage the 17 clips and install the back door trim board assembly.
-
Install the 2 clips <A>.
-
-
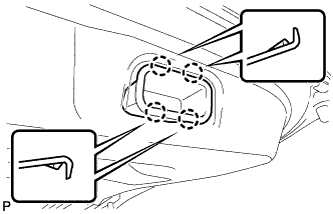
INSTALL SWITCH BEZEL (w/ Power Back Door)
-
Engage the 6 claws to install the switch bezel.
-
-
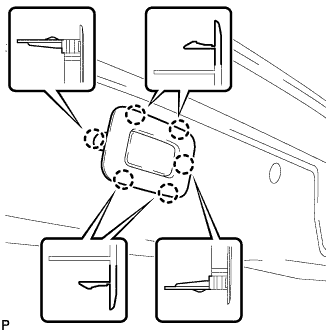
INSTALL BACK DOOR INSIDE HANDLE
-
Engage the 4 claws to install the back door inside handle.
-
-
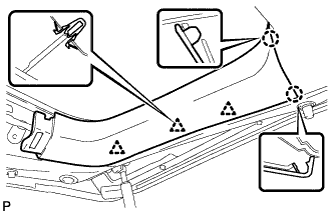
INSTALL REAR WINDOW SIDE GARNISH LH (w/o Power Back Door)
-
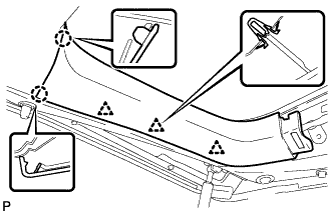
Engage the 3 clips and 2 claws to install the rear window side garnish LH.
-
-
INSTALL REAR WINDOW SIDE GARNISH LH (w/ Power Back Door)
-
Engage the 3 clips and 2 claws to install the rear window side garnish LH.
-
-
INSTALL BACK DOOR NO. 2 SERVICE HOLE COVER (w/ Power Back Door)
-
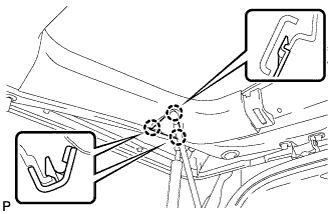
Engage the 3 claws to install the back door No. 2 service hole cover.
-
-
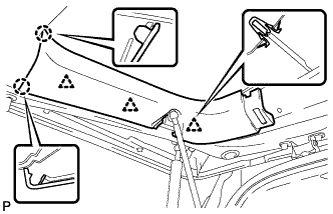
INSTALL REAR WINDOW SIDE GARNISH RH
-
Engage the 3 clips and 2 claws to install the rear window side garnish RH.
-
-
INSTALL BACK DOOR CENTER GARNISH
-
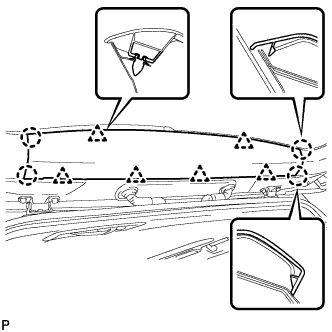
Engage the 6 clips and 4 claws to install the back door center garnish.
-