- Click here
REMOVE NO. 1 INSTRUMENT PANEL UNDER COVER SUB-ASSEMBLY (for RHD)
-
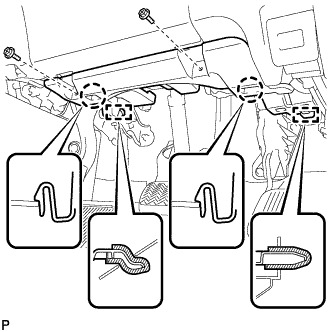
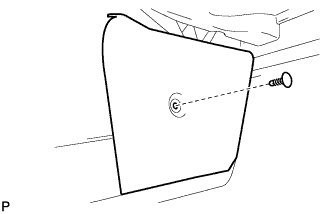
Remove the 2 screws <B>.
-
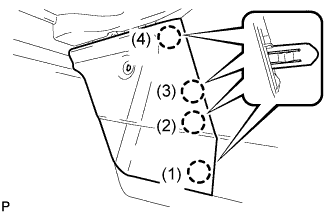
Disengage the 2 claws and 2 guides.
-
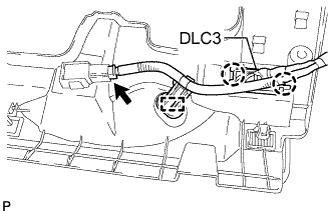
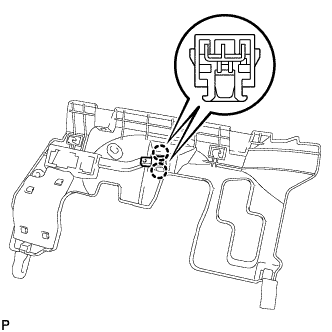
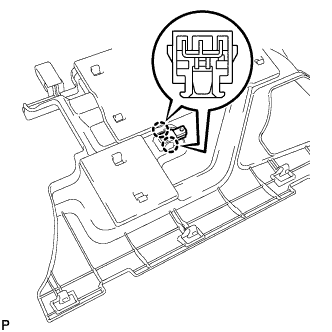
Disengage the 2 claws and disconnect the DLC3.
-
Disengage the clamp.
-
Disconnect each connector and remove the No. 1 instrument panel under cover sub-assembly.
-
- Click here
REMOVE INTERIOR ILLUMINATION LIGHT ASSEMBLY RH (for RHD)
-
Disengage the 2 claws and remove the interior illumination light assembly RH.
-
- Click here
REMOVE NO. 1 INSTRUMENT PANEL UNDER COVER SUB-ASSEMBLY (for LHD)
-
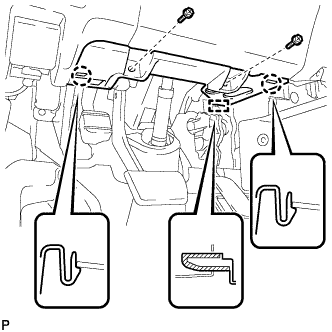
Remove the 2 screws <B>.
-
Disengage the 2 claws and guide.
-
Disengage the clamp.
-
Disconnect each connector and remove the No. 1 instrument panel under cover sub-assembly.
-
- Click here
REMOVE INTERIOR ILLUMINATION LIGHT ASSEMBLY LH (for LHD)
-

Disengage the 2 claws and remove the interior illumination light assembly LH.
-
- Click here
REMOVE CENTER FLOOR CARPET COVER LH (for RHD)
-

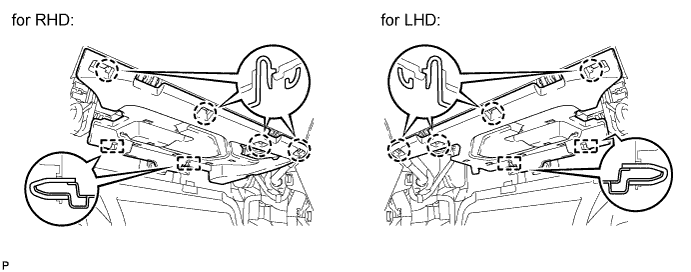
Using a clip remover, remove the clip.
-
Disengage the 4 claws and remove the center floor carpet cover LH in the order shown in the illustration.
Tip:Remove the center floor carpet cover LH while pushing on the instrument cluster finish panel.
-
- Click here
REMOVE CENTER FLOOR CARPET COVER RH (for LHD)
-
Using a clip remover, remove the clip.
-
Disengage the 5 claws and remove the center floor carpet cover RH in the order shown in the illustration.
Tip:Remove the center floor carpet cover RH while pushing on the instrument cluster finish panel.
-
- Click here
REMOVE NO. 2 INSTRUMENT PANEL UNDER COVER SUB-ASSEMBLY
-
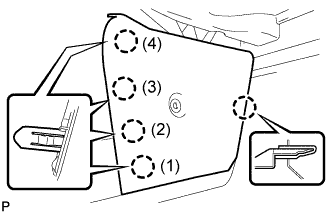
Disengage the 4 claws and 2 guides.
-
Disconnect the connector and remove the No. 2 instrument panel under cover sub-assembly.
-
- Click here
REMOVE INTERIOR ILLUMINATION LIGHT ASSEMBLY LH (for RHD)
-
Disengage the 2 claws and remove the interior illumination light assembly LH.
-
- Click here
REMOVE INTERIOR ILLUMINATION LIGHT ASSEMBLY RH (for LHD)
-

Disengage the 2 claws and remove the interior illumination light assembly RH.
-