BACK DOOR COURTESY SWITCH REMOVAL

-
REMOVE BACK DOOR CENTER GARNISH
-
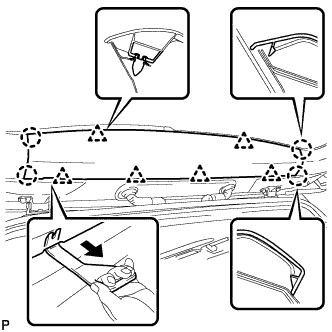
Using a moulding remover C, disengage the 6 clips and 4 claws, and remove the back door center garnish.
-
-
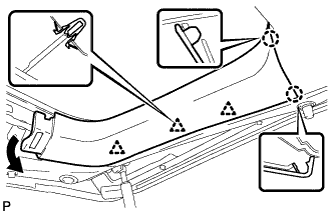
REMOVE REAR WINDOW SIDE GARNISH LH (w/o Power Back Door)
-
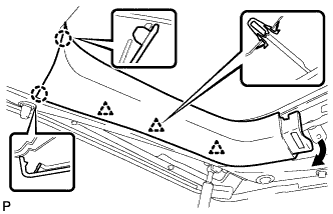
Disengage the 3 clips and 2 claws, and remove the rear window side garnish LH.
-
-
REMOVE BACK DOOR NO. 2 SERVICE HOLE COVER (w/ Power Back Door)
-
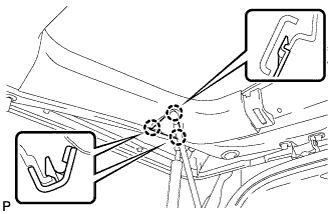
Disengage the 3 claws and remove the back door No. 2 service hole cover.
-
-
REMOVE REAR WINDOW SIDE GARNISH LH (w/ Power Back Door)
-
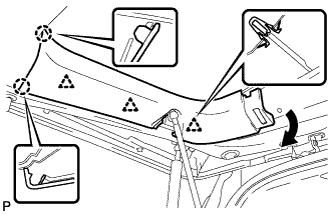
Disengage the 3 clips and 2 claws, and remove the rear window side garnish LH.
-
-
REMOVE REAR WINDOW SIDE GARNISH RH
-
Disengage the 3 clips and 2 claws, and remove the rear window side garnish RH.
-
-
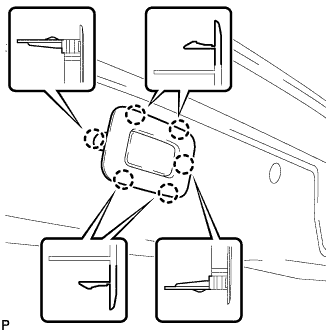
REMOVE BACK DOOR INSIDE HANDLE
-

Using a moulding remover, disengage the 4 claws as shown in the illustration and remove the back door inside handle.
-
-
REMOVE SWITCH BEZEL (w/ Power Back Door)
-
Disengage the 6 claws and remove the switch bezel.
-
-
REMOVE BACK DOOR TRIM BOARD ASSEMBLY
-
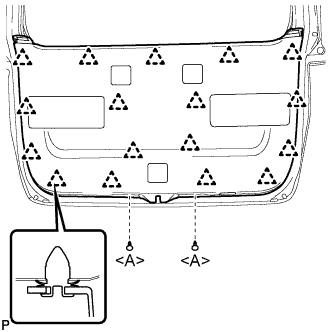
Using a clip remover, remove the 2 clips <A>.
-
Disengage the 17 clips and remove the back door trim board assembly.
Note
w/ Power Back Door:To prevent the parts from being damaged, make sure that the back door trim board assembly does not get caught on the power back door closer switch assembly during removal.
-
-
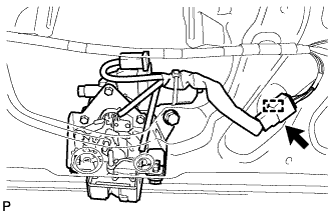
REMOVE BACK DOOR LOCK ASSEMBLY (w/o Easy Closer)
-
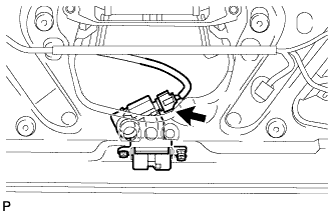
Disconnect the connector.
-
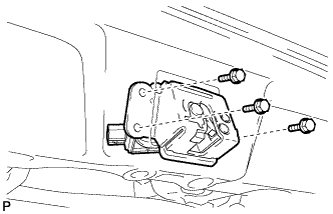
Remove the 3 bolts and back door lock assembly.
-
-
REMOVE BACK DOOR LOCK ASSEMBLY (w/ Easy Closer)
-
Disconnect the connector.
-
Disengage the clamp.
-
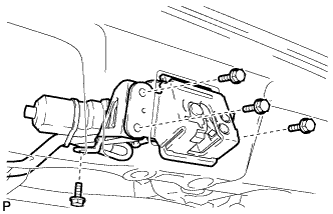
Remove the 4 bolts and back door lock assembly.
-