INSTRUMENT PANEL SPEAKER REMOVAL

-
DISCONNECT FRONT DOOR OPENING TRIM WEATHERSTRIP
-
Disconnect the front door opening trim weatherstrip.
-
-
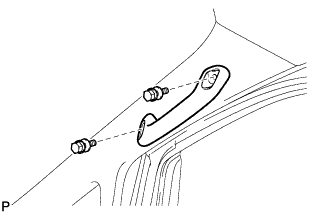
REMOVE ASSIST GRIP PLUG
-

Text in Illustration *1 Protective Tape Using a screwdriver, disengage the 4 claws and remove the 2 assist grip plugs.
Tech Tips
Tape the screwdriver tip before use.
-
-
REMOVE NO. 1 ASSIST GRIP
-
Remove the 2 bolts and the No. 1 assist grip.
-
-
REMOVE FRONT PILLAR GARNISH
-
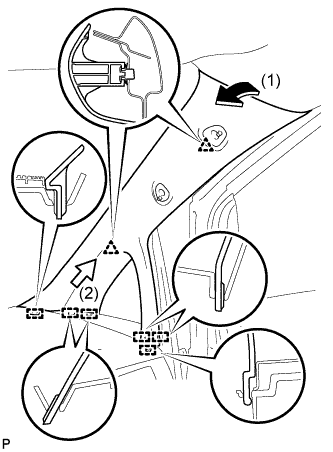
Pull the upper part of the garnish toward the inside of the cabin and disengage the 2 clips.
-
Disengage the 6 guides and remove the front pillar garnish RH.
-
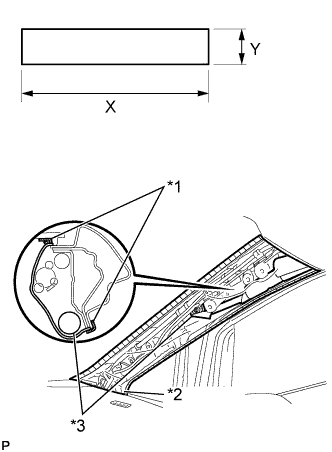
Text in Illustration *1 Adhesive Tape *2 Protective Cover *3 Curtain Shield Airbag Assembly Protect the curtain shield airbag assembly.
-
Cover the airbag with a cloth or piece of nylon and secure the ends of the cover with tape as shown in the illustration.
Protective Cover size X 700 mm (27.56 in.) Y 120 mm (4.72 in.) Note
Cover the curtain shield airbag assembly with a protective cover as soon as the front pillar garnish is removed.
-
-
-
REMOVE NO. 1 INSTRUMENT PANEL SPEAKER PANEL SUB-ASSEMBLY
-
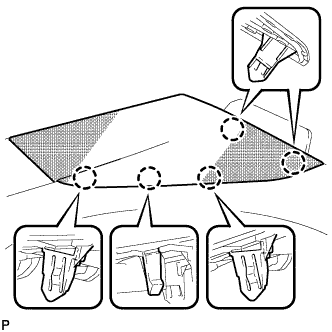
Disengage the 5 claws.
-
Disengage the 3 guides and remove the No. 1 instrument panel speaker panel sub-assembly.
-
-
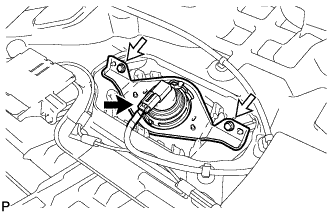
REMOVE FRONT NO. 2 SPEAKER ASSEMBLY
-
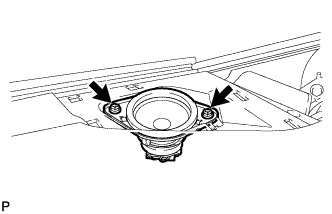
Remove the 2 bolts.
-
Lift the front No. 2 speaker assembly and disconnect the connector to remove the speaker assembly.
Note
Do not touch the cone part of the speaker.
-
-
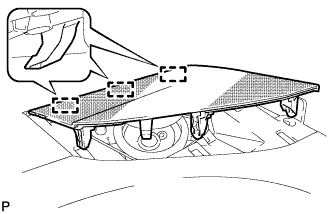
REMOVE UPPER INSTRUMENT PANEL SUB-ASSEMBLY (w/ Front Center Speaker)
-
REMOVE FRONT NO. 3 SPEAKER ASSEMBLY (w/ Front Center Speaker)
-
Disconnect the connector.
-
Remove the 2 screws and front No. 3 speaker assembly.
Note
Do not touch the cone part of the speaker.
-