- Click here
REMOVE REAR NO. 2 SEAT ASSEMBLY RH
- Click here
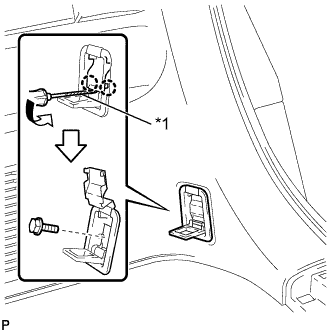
REMOVE BACK DOOR STRIKER COVER
-
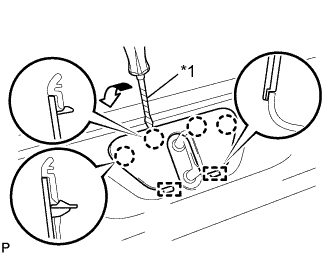
Using a screwdriver, disengage the 4 claws and 2 guides, and remove the back door striker cover.
Table 1. Text in Illustration *1 Protective Tape Tip:Tape the screwdriver tip before use.
-
- Click here
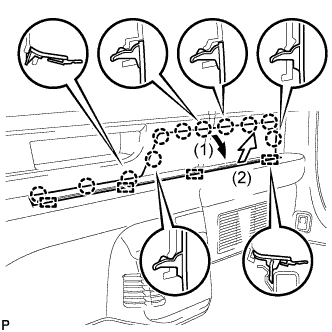
REMOVE BACK DOOR SCUFF PLATE
-
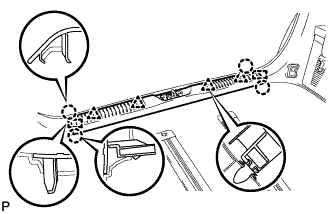
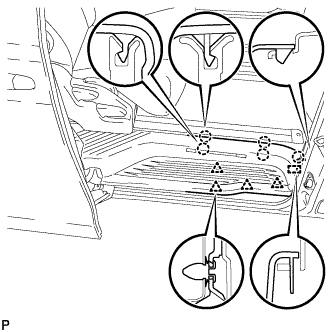
Remove the 4 claws, 4 clips and 2 guides, and remove the back door scuff plate.
-
- Click here
REMOVE REAR DOOR SCUFF PLATE
-
Captain type rear seat:
-
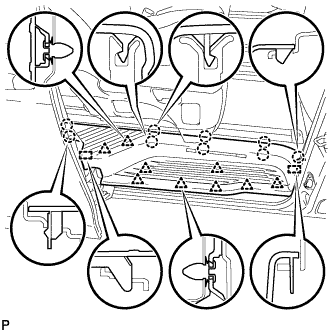
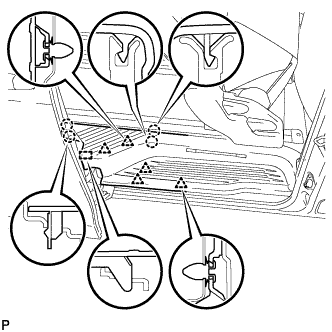
Disengage the 9 claws, 9 clips and 2 guides, and remove the rear door scuff plate RH.
-
-
Tip-up type rear seat:
-
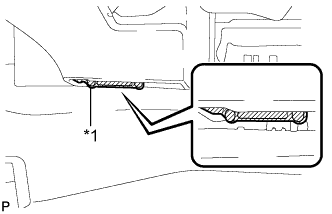
Apply protective tape to the bottom of the seat as shown in the illustration.
Table 2. Text in Illustration *1 Protective Tape -
Using the slide lever, slide the rear No. 1 seat to the rearmost position.
-
Disengage the 4 clips, 5 claws and guide on the front side of the scuff plate as shown in the illustration.
Note:To prevent damage to the scuff plate, make sure not to use excessive force when disengaging the clips, claws and guide.
-
Using the reclining lever or foot-operated walk-in pedal, tip up the rear No. 1 seat and slide it to the foremost position.
-
Disengage the 5 clips, 4 claws and guide on the rear side of the scuff plate as shown in the illustration, and remove the rear door scuff plate RH.
Note:To prevent damage to the scuff plate, make sure not to use excessive force when disengaging the clips, claws and guide.
-
-
- Click here
DISCONNECT NO. 1 SLIDE DOOR WEATHERSTRIP
-
Disconnect the No. 1 slide door weatherstrip.
-
- Click here
REMOVE NO. 1 LUGGAGE COMPARTMENT TRIM HOOK
-
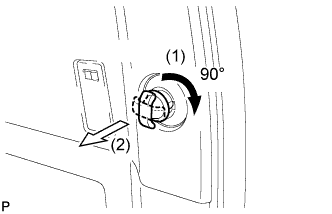
Turn the No. 1 luggage compartment trim hook clockwise approximately 90° and pull it out as shown in the illustration.
-
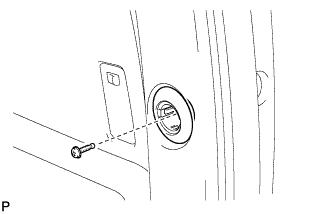
Remove the bolt and No. 1 luggage compartment trim hook.
-
- Click here
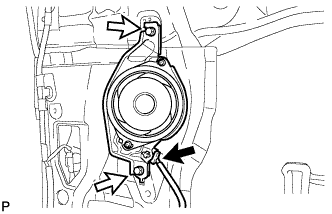
REMOVE ROPE HOOK ASSEMBLY
-
Using a screwdriver, disengage the 2 claws.
Table 3. Text in Illustration *1 Protective Tape Tip:Tape the screwdriver tip before use.
-
Remove the bolt and the rope hook assembly.
-
- Click here
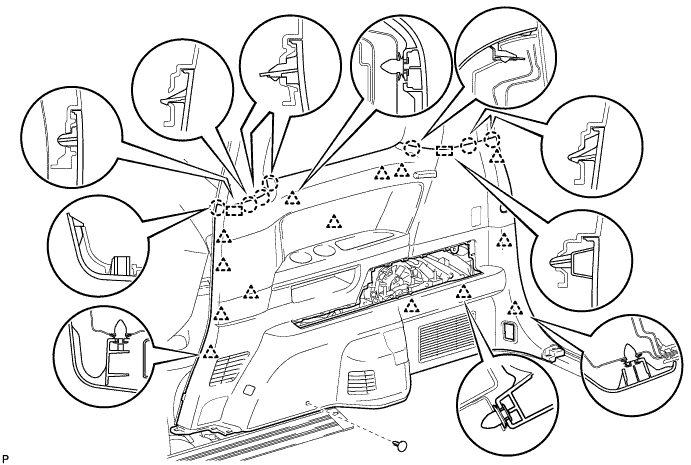
REMOVE DECK SIDE GARNISH
-
Disengage the 11 claws and 4 guides, and remove the deck side garnish RH as shown in the illustration.
-
- Click here
REMOVE REAR QUARTER TRIM PANEL ASSEMBLY
-
Remove the clip.
-
Disengage the 14 clips, 7 claws and 2 guides.
-
Disconnect the connectors, and remove the rear quarter trim panel assembly RH.
-
- Click here
REMOVE REAR NO. 2 SPEAKER ASSEMBLY
-
Disconnect the connector.
-
Remove the 2 screws and rear No. 2 speaker assembly.
-