FRONT DOOR SPEAKER INSTALLATION

-
INSTALL FRONT NO. 1 SPEAKER ASSEMBLY
-
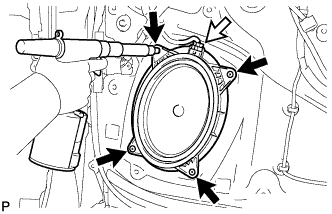
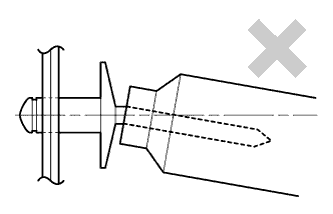
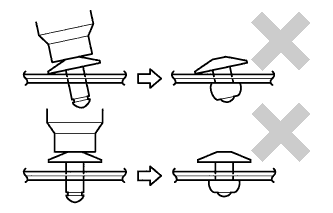
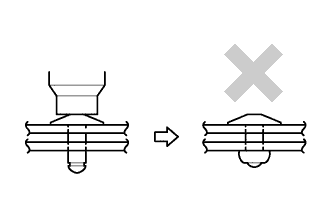
Using an air riveter or a hand riveter, install the front No. 1 speaker assembly with 4 new rivets.
Note
-
Do not pry on the rivets with the riveter, as this will cause damage to the riveter and mandrel.
-
Confirm that the rivets are seated properly against the speaker.
-
Do not tilt the riveter when installing the rivets to the speaker.
-
Do not leave any clearance between the rivet heads and speaker.
-
Do not leave any clearance between the speaker and door. Firmly hold the 2 items together while installing the rivets.
-
-
Connect the connector.
-
-
INSTALL FRONT DOOR TRIM BOARD SUB-ASSEMBLY
-
for Driver Side with Memory:
-
Connect the connector.
-
-

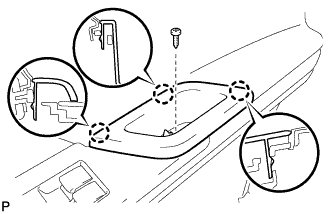
Engage the 12 clips and install the front door trim board sub-assembly to the front door panel.
-
Install the 2 screws.
-
-
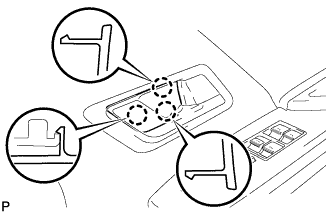
INSTALL POWER WINDOW REGULATOR MASTER SWITCH ASSEMBLY WITH FRONT DOOR ARMREST BASE PANEL
-
Connect the connector.
-
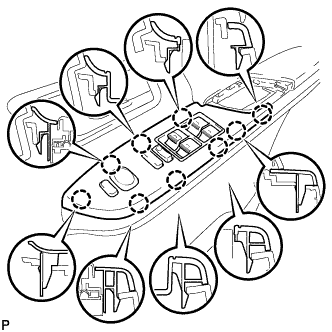
Engage the 9 claws to install the power window regulator master switch assembly with front door armrest base panel.
-
-
INSTALL FRONT DOOR PULL HANDLE
-
Engage the 3 claws.
-
Install the front door pull handle with the screw.
-
Engage the claw and close the cover.
-
-
INSTALL REFLEX REFLECTOR (w/o Courtesy Light)
-
Connect the connector.
-

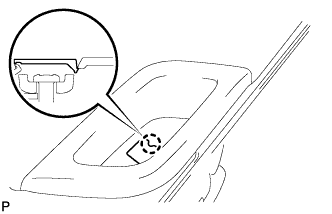
Engage the claw to install the reflex reflector.
-
-
INSTALL COURTESY LIGHT ASSEMBLY (w/ Courtesy Light)
-
Connect the connector.
-
Engage the claw to install the courtesy light assembly.
-
-
INSTALL FRONT DOOR INSIDE HANDLE BEZEL PLUG
-
Engage the 3 claws to install the front door inside handle bezel plug.
-
-
INSTALL LOWER DOOR FRAME GARNISH
-
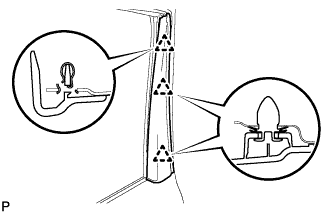
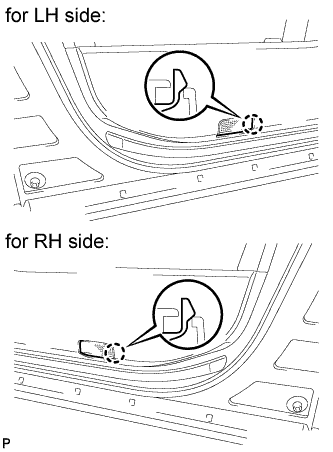
Engage the 3 clips to install the lower door frame garnish.
-
-
INSTALL FRONT DOOR LOWER FRAME BRACKET GARNISH
-
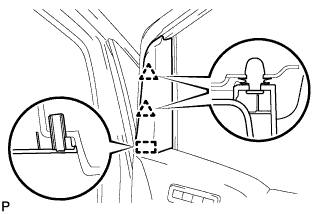
Engage the guide and 2 clips to install the front door lower frame bracket garnish.
-