FRONT DOOR SPEAKER REMOVAL

-
REMOVE FRONT DOOR LOWER FRAME BRACKET GARNISH
-
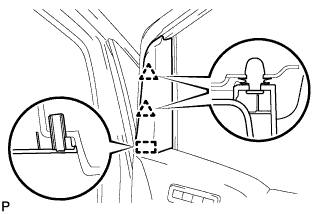
Disengage the 2 clips and guide, and remove the front door lower frame bracket garnish.
-
-
REMOVE LOWER DOOR FRAME GARNISH
-
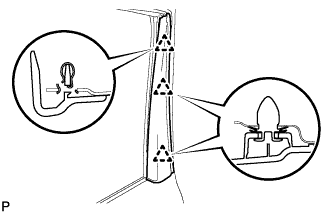
Disengage the 3 clips and remove the lower door frame garnish.
-
-
REMOVE FRONT DOOR INSIDE HANDLE BEZEL PLUG
-
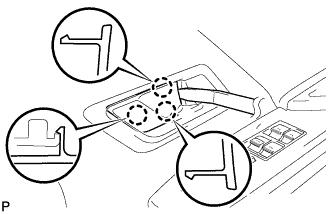
Using a moulding remover, disengage the 3 claws, and remove the front door inside handle bezel plug.
-
-
REMOVE REFLEX REFLECTOR (w/o Courtesy Light)
-
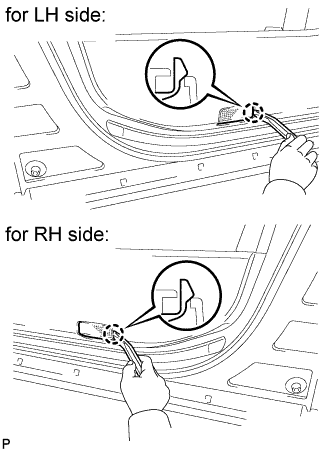
Using a moulding remover, disengage the claw, and remove the reflex reflector.
-
Disconnect the connector.
-
-
REMOVE COURTESY LIGHT ASSEMBLY (w/ Courtesy Light)
-

Using a moulding remover, disengage the claw.
-
Disconnect the connector and remove the courtesy light assembly.
-
-
REMOVE FRONT DOOR PULL HANDLE
-
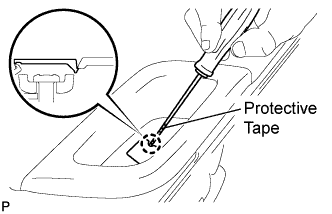
Using a screwdriver with the tip wrapped with protective tape, disengage the claw and open the cover.
-
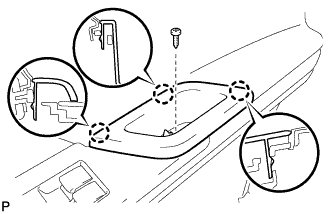
Remove the screw.
-
Disengage the 3 claws and remove the front door pull handle.
-
-
REMOVE POWER WINDOW REGULATOR MASTER SWITCH ASSEMBLY WITH FRONT DOOR ARMREST BASE PANEL
-
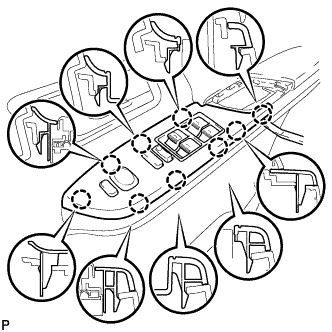
Using a moulding remover, disengage the 9 claws and remove the power window regulator master switch assembly with front door armrest base panel.
-
Disconnect the connector.
-
-
REMOVE FRONT DOOR TRIM BOARD SUB-ASSEMBLY
-
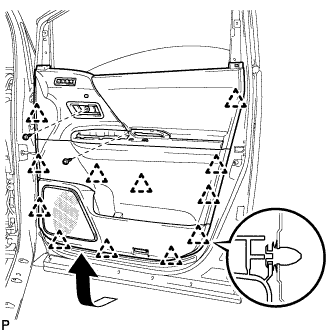
Remove the 2 screws.
-
Using a clip remover, disengage the 12 clips.
-
Pull out the front door trim board in the direction indicated by the arrow shown in the illustration.
-
Raise the front door trim board and remove the front door trim board together with the front door inner glass weatherstrip.
-
for Driver Side with Memory:
-
Disconnect the connector.
-
-
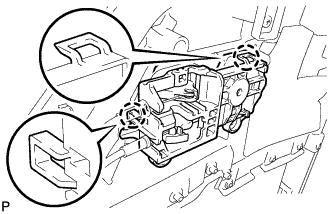
Disengage the 2 claws and disconnect the front door inside handle sub-assembly.
-
-
REMOVE FRONT NO. 1 SPEAKER ASSEMBLY
-
Disconnect the connector.
-
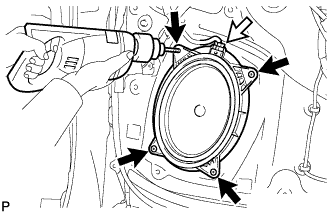
Drill out the 4 rivet heads using a drill with a bit diameter less than 4 mm (0.158 in.), and remove the front No. 1 speaker assembly.
-
Use the drill to remove the flange.
CAUTION:
Be careful as the cut rivets are very hot.
Note
Do not drill the rivets at an angle as this will cause damage to the drill and drill hole. Line up the drill with a rivet, and carefully drill out the rivet head.
-
Even if the flange is taken off, continue drilling and push out the remaining fragments using the drill.
-
Using a vacuum cleaner, remove the rivet fragments and shavings from the inside of the door.
-