FRONT SUSPENSION MEMBER REMOVAL

-
REMOVE FRONT SUSPENSION CROSSMEMBER SUB-ASSEMBLY
Tech Tips
Remove front suspension crossmember sub-assembly Click here.
-
REMOVE FRONT LOWER SUSPENSION ARM SUB-ASSEMBLY LH
-
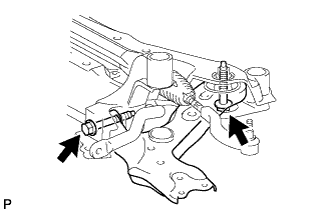
Remove the 2 bolts, the nut and the front lower suspension arm sub-assembly LH from the front suspension crossmember sub-assembly.
-
-
REMOVE FRONT LOWER SUSPENSION ARM SUB-ASSEMBLY RH
Tech Tips
Perform the same procedure as for the LH side.
-
REMOVE FRONT SUSPENSION MEMBER FRONT BRACE LH
-
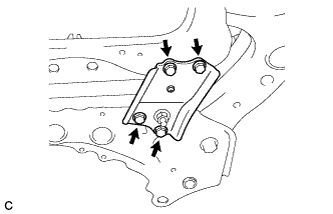
Remove the 4 bolts and the front suspension member front brace LH from the front suspension crossmember sub-assembly.
-
-
REMOVE FRONT SUSPENSION MEMBER FRONT BRACE RH
Tech Tips
Perform the same procedure as for the LH side.
-
REMOVE FRONT STABILIZER BAR
-
Remove the front stabilizer bar from the front suspension crossmember sub-assembly.
-
-
REMOVE STEERING LINK ASSEMBLY
-
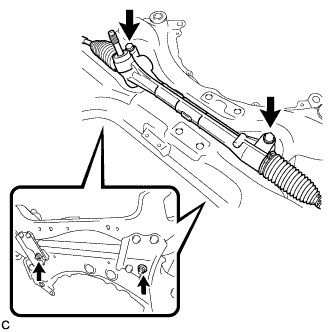
Remove the 2 bolts, 2 nuts and steering link assembly from the front suspension crossmember sub-assembly.
Note
Keep the nut from rotating while turning the bolt because the nut has its own stopper.
-
-
REMOVE FRONT SUSPENSION MEMBER DYNAMIC DAMPER (for 2AZ-FE)
-
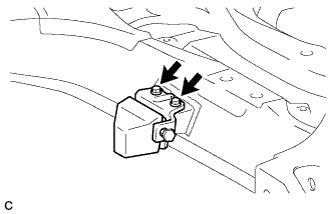
Remove the 2 bolts and front suspension member dynamic damper.
-
-
REMOVE FRONT SUSPENSION MEMBER BODY MOUNTING FRONT STOPPER
-
Remove the front suspension member body mounting front stopper from the front suspension crossmember sub-assembly.
-
-
REMOVE FRONT SUSPENSION MEMBER BODY MOUNTING REAR STOPPER
-
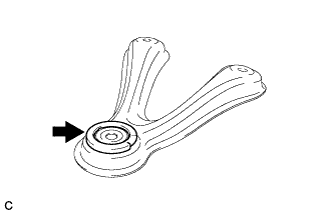
Remove the front suspension member body mounting rear stopper from the front suspension member brace sub-assembly.
-
-
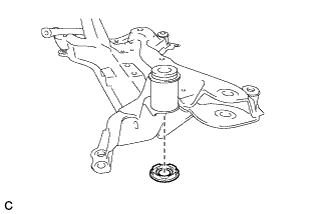
REMOVE FRONT SUSPENSION MEMBER BODY MOUNTING FRONT CUSHION
-
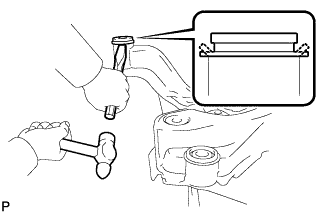
Using a chisel and hammer, bend the flange of the front suspension member body mounting front cushion as shown in the illustration.
-
Apply lubricant to the contact surface of the front suspension member body mounting front cushion.
-
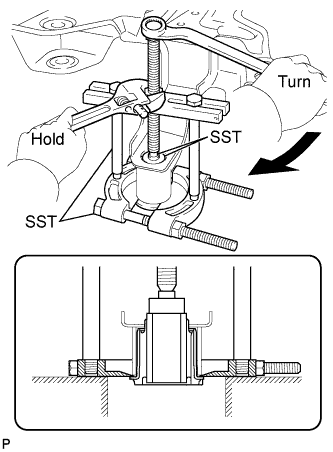
Using SST, slightly lower the front suspension member body mounting front cushion.
- SST
- 09950-00020
- 09950-00030
- 09950-40011 ( 09957-04010 )
- 09950-60010 ( 09951-00300 )
-
Apply lubricant to the contact surfaces between the front suspension member body mounting front cushion and front suspension crossmember.
-
Repeat the above 2 steps and remove the front suspension member body mounting front cushion.
Note
-
Be careful when removing the cushion because it may unexpectedly pop out.
-
Do not reuse the front suspension member body mounting front cushion.
-
-
-
REMOVE FRONT SUSPENSION MEMBER BODY MOUNTING REAR CUSHION
-
Apply lubricant to the contact surface of the front suspension member body mounting rear cushion.
-
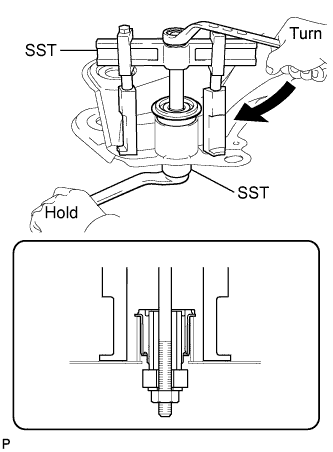
Position and firmly secure SST as shown in the illustration.
- SST
- 09950-40011 ( 09951-04020, 09952-04010, 09954-04010, 09955-04031 )
- 09950-60010 ( 09951-00320 )
- 09710-28030 ( 90101-12177, 90170-12110, 94612-11200 )
-
Using SST, slightly lower the front suspension member body mounting rear cushion.
-
Apply lubricant to the contact surface between the front suspension member body mounting rear cushion and front suspension crossmember.
-
Repeat the above 2 steps and remove the front suspension member body mounting rear cushion.
Note
-
Be careful when removing the cushion because it may unexpectedly pop out.
-
Do not reuse the front suspension member body mounting rear cushion.
-
-