CONTINUOUSLY VARIABLE TRANSAXLE ASSEMBLY REMOVAL
-
REMOVE ENGINE ASSEMBLY WITH TRANSAXLE
Tech Tips
See the steps from "Discharge Fuel System Pressure" through "Remove Engine Assembly with Transaxle" Click here.
-
REMOVE FRONT CROSS MEMBER SUB-ASSEMBLY
-
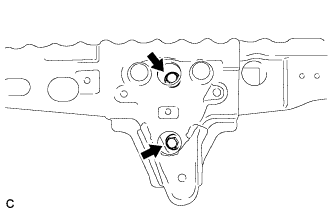
Remove the 2 bolts and disconnect the front crossmember sub-assembly.
-
-
REMOVE FRONT ENGINE MOUNTING INSULATOR
-
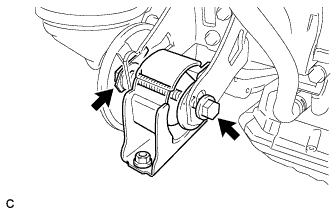
Remove the through bolt, nut and front engine mounting insulator.
-
-
REMOVE REAR ENGINE MOUNTING INSULATOR
-
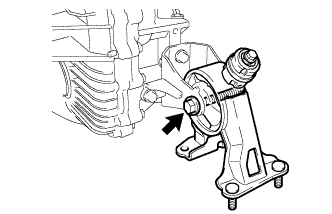
Remove the through bolt and separate the rear engine mounting insulator.
-
-
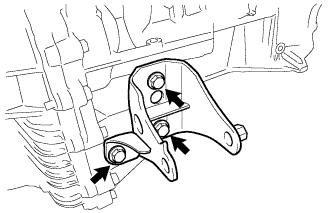
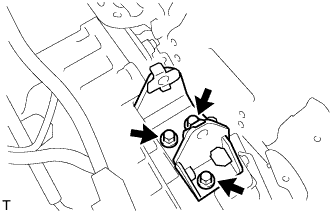
REMOVE FRONT ENGINE MOUNTING BRACKET
-
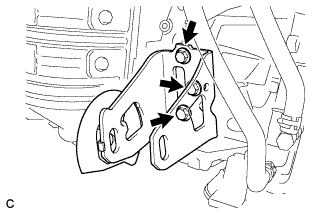
Remove the 3 bolts and front engine mounting bracket from the continuously variable transaxle assembly.
-
-
REMOVE REAR ENGINE MOUNTING BRACKET
-
Remove the 3 bolts and rear engine mounting bracket from the continuously variable transaxle assembly.
-
-
REMOVE STARTER ASSEMBLY (for 1.6 kW Type)
-
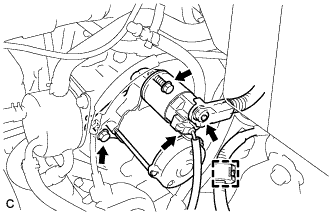
Disconnect the starter connector.
-
Open the terminal cap, remove the nut and disconnect the starter wire.
-
Detach the wire harness clamp.
-
Remove the 2 bolts and starter.
-
-
REMOVE STARTER ASSEMBLY (for 1.7 kW Type)
-

Disconnect the starter connector.
-
Open the terminal cap, remove the nut and disconnect the starter wire.
-
Detach the wire harness clamp.
-
Remove the 2 bolts and starter.
-
-
DISCONNECT ENGINE WIRE
-
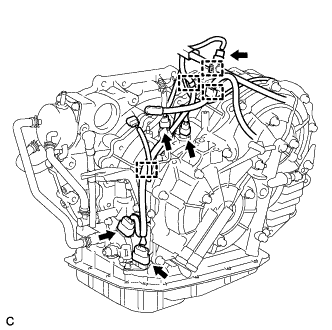
Disconnect the transmission wire connector, park/neutral position switch assembly connector, and 3 revolution sensor connectors, and detach the 4 wire harness clamps from the continuously variable transaxle assembly.
-
Disconnect the oil pressure sensor connector and detach the 2 wire harness clamps from the continuously variable transaxle assembly.
-
-
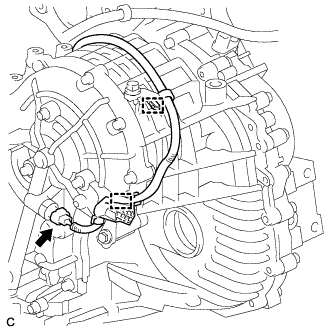
REMOVE WIRE HARNESS CLAMP BRACKET
-
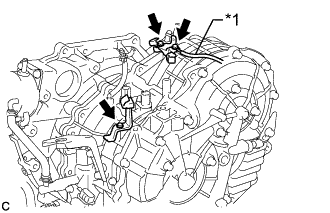
Text in Illustration *1 Ground Cable Remove the bolt and disconnect the ground cable from the wire harness clamp bracket.
-
Remove the 2 bolts, shift cable bracket and 2 wire harness clamp brackets from the continuously variable transaxle assembly.
-
-
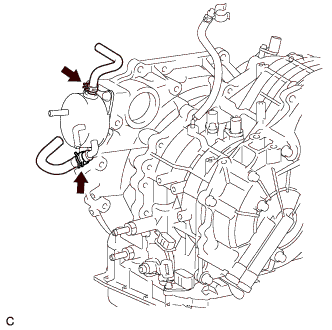
REMOVE OIL COOLER (w/o Air Cooled Transmission Oil Cooler)
-

Release the 3 clamps and disconnect the water by-pass hose and 2 oil cooler hoses from the oil cooler.
-
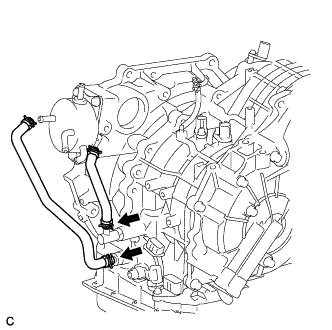
Release the 2 clamps and remove the 2 oil cooler hoses from the continuously variable transaxle assembly.
-
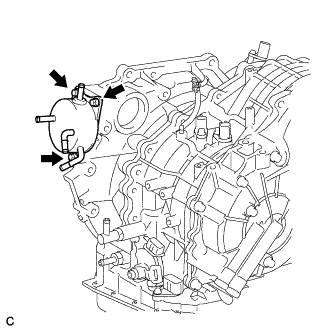
Remove the 3 bolts and oil cooler from the continuously variable transaxle assembly.
-
-
REMOVE OIL COOLER (w/ Air Cooled Transmission Oil Cooler)
-
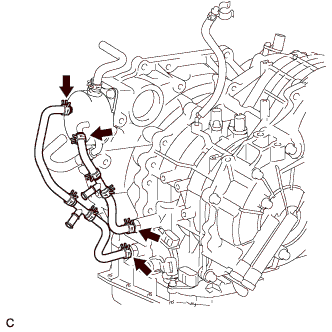
Release the 4 clamps and remove the 2 oil cooler hoses from the oil cooler and continuously variable transaxle assembly.
-
Release the 2 clamps and disconnect the 2 water by-pass hoses from the oil cooler.
-
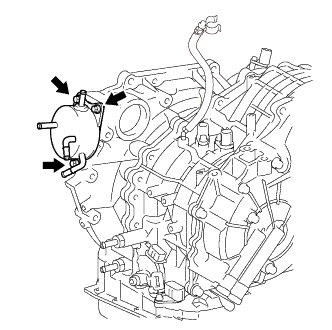
Remove the 3 bolts and oil cooler from the continuously variable transaxle assembly.
-
-
REMOVE CONTINUOUSLY VARIABLE TRANSAXLE ASSEMBLY
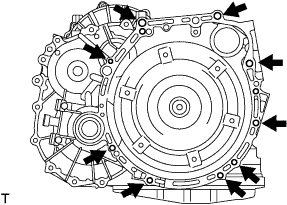
-
Remove the 9 bolts and continuously variable transaxle assembly from the engine.
Note
To prevent damage to the knock pins, do not pry between the transaxle and engine.
-
-
REMOVE NO. 1 TRANSMISSION CONTROL CABLE BRACKET
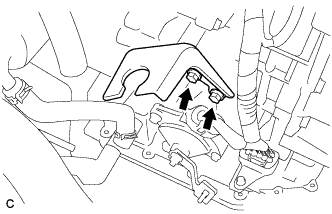
-
Remove the 2 bolts and No. 1 transmission control cable bracket from the continuously variable transaxle assembly.
-
-
REMOVE ENGINE MOUNTING BRACKET LH
-
Remove the 3 bolts and engine mounting bracket LH from the continuously variable transaxle assembly.
-
-
REMOVE TORQUE CONVERTER ASSEMBLY
-
Remove the torque converter assembly from the continuously variable transaxle assembly.
-