RADIATOR REMOVAL

-
RECOVER REFRIGERANT FROM REFRIGERATION SYSTEM
-
Start up the engine.
-
Turn the A/C switch on.
-
Operate the cooler compressor at an engine speed of approximately 1000 rpm for 5 to 6 minutes to circulate the refrigerant. This causes most of the compressor oil from the various components of the A/C system to collect in the A/C compressor.
-
Stop the engine.
-
Recover the refrigerant from the A/C system using a refrigerant recovery unit.
-
-
REMOVE FRONT BUMPER ASSEMBLY (for ALPHARD)
-
REMOVE FRONT BUMPER ASSEMBLY (for VELLFIRE)
-
REMOVE V-BANK COVER ASSEMBLY
-
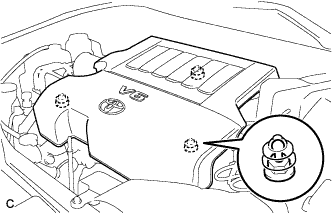
Hold the front of the V-bank cover sub-assembly and raise it to disengage the 2 clips on the front of the cover. Continue to raise the cover to disengage the clip on the rear of the cover and remove the V-bank cover sub-assembly.
Note
Attempting to disengage both front and rear clips at the same time may cause the cover to break.
-
-
REMOVE NO. 1 ENGINE UNDER COVER
-
DRAIN AUTOMATIC TRANSAXLE FLUID
-
Remove the 5 clips and rear engine under cover LH.
-
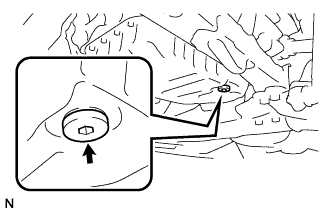
Using a 6 mm socket hexagon wrench, remove the overflow plug and gasket from the automatic transaxle.
-
Remove the refill plug and gasket from the automatic transaxle.
-

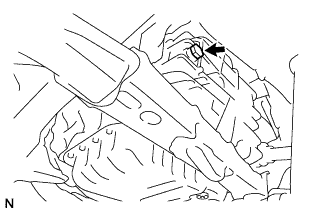
Using a 6 mm socket hexagon wrench, remove the No. 1 transmission oil filler tube from the automatic transaxle.
-
Drain automatic transaxle fluid from the automatic transaxle.
-
Using a 6 mm socket hexagon wrench, install the No. 1 transmission oil filler tube to the automatic transaxle.
- Torque:
- 1.7 N*m { 17 kgf*cm, 15 in.*lbf }
-
Using a 6 mm socket hexagon wrench, install a new gasket and the overflow plug to the automatic transaxle.
- Torque:
- 40 N*m { 408 kgf*cm, 30 ft.*lbf }
-
Install a new gasket and the refill plug to the automatic transaxle.
- Torque:
- 49 N*m { 500 kgf*cm, 36 ft.*lbf }
-
-
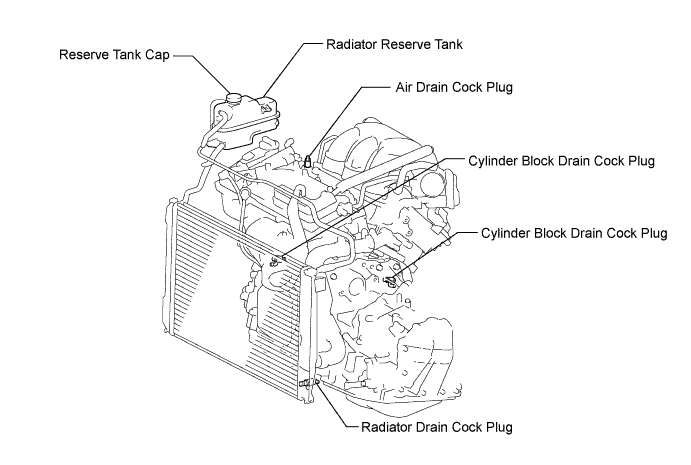
DRAIN ENGINE COOLANT
-
Loosen the radiator drain cock plug and drain the coolant.
CAUTION:
Do not remove the reserve tank cap, cylinder block drain cock plugs and radiator drain cock plug while the engine and radiator are still hot. Pressurized, hot engine coolant and steam may be released and cause serious burns.
Tech Tips
Collect the coolant in a container and dispose of it according to the regulations in your area.
-
Remove the reserve tank cap.
-
Loosen the 2 cylinder block drain cock plugs.
-
-
REMOVE BATTERY
-
Disconnect the positive (+) cable to the battery positive (+) terminal.
-
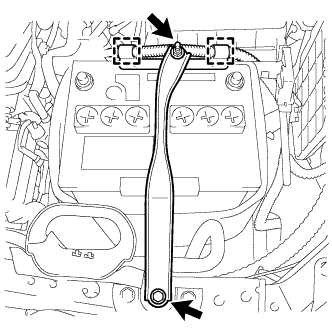
Disconnect the 2 wire clamps.
-
Loosen the nut, and remove the bolt with the battery clamp.
-
Remove the battery, battery insulator and battery tray.
-
-
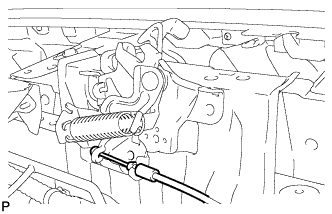
REMOVE HOOD LOCK ASSEMBLY (for LHD)
-
w/o Engine Hood Courtesy Switch:
-
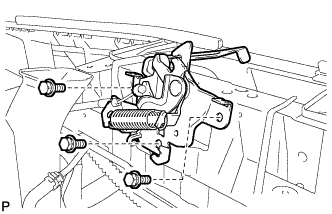
Remove the 3 bolts.
-
Disconnect the hood lock control cable and remove the hood lock assembly.
-
-
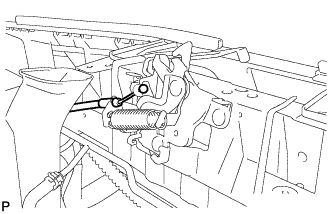
w/ Engine Hood Courtesy Switch:
-

Disconnect the connector.
-
Remove the 3 bolts.
-
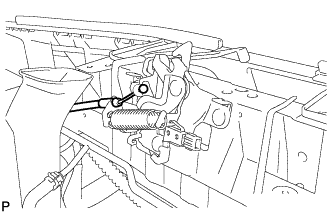
Disconnect the hood lock control cable and remove the hood lock assembly.
-
-
-
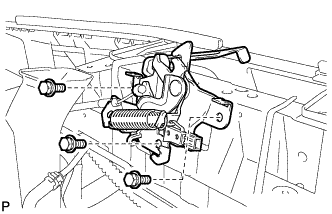
REMOVE HOOD LOCK ASSEMBLY (for RHD)
-
for ALPHARD:
-
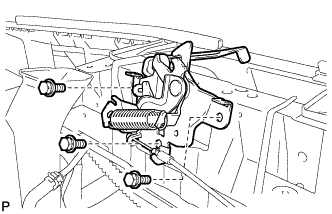
Remove the 3 bolts.
-
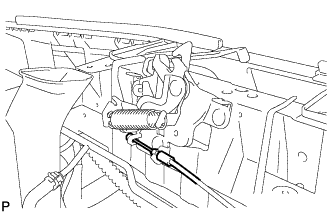
Disconnect the hood lock control cable and remove the hood lock assembly.
-
-
for VELLFIRE:
-
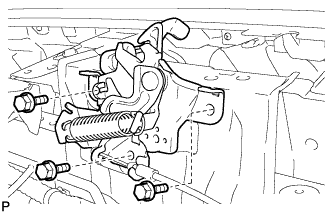
Remove the 3 bolts.
-
Disconnect the hood lock control cable and remove the hood lock assembly.
-
-
-
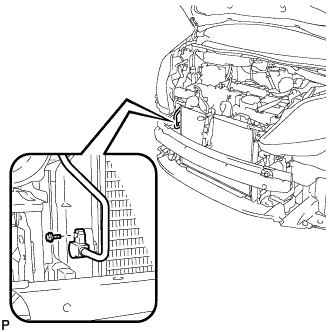
DISCONNECT NO. 3 AIR CONDITIONING TUBE AND ACCESSORY ASSEMBLY
-
w/ No. 2 Air Conditioning Tube:
-
Remove the bolt and disconnect the No. 3 air conditioning tube and accessory assembly from the condenser.
-
-
w/o No. 2 Air Conditioning Tube:
-
Remove the bolt and disconnect the No. 3 air conditioning tube and accessory assembly from the condenser.
-
-
Remove the O-ring from the No. 3 air conditioning tube and accessory assembly.
Note
Seal the openings of the disconnected parts using vinyl tape to prevent entry of moisture and foreign matter.
-
-
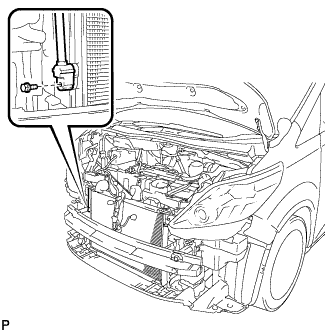
DISCONNECT COOLER REFRIGERANT LIQUID PIPE A
-
w/ No. 2 Air Conditioning Tube:
-
Remove the bolt and disconnect the cooler refrigerant liquid pipe A from the condenser.
-
-
w/o No. 2 Air Conditioning Tube:
-
Remove the bolt and disconnect the cooler refrigerant liquid pipe A from the condenser.
-
-
Remove the O-ring from the cooler refrigerant liquid pipe A.
Note
Seal the openings of the disconnected parts using vinyl tape to prevent entry of moisture and foreign matter.
-
-
REMOVE NO. 1 AIR CLEANER INLET
-
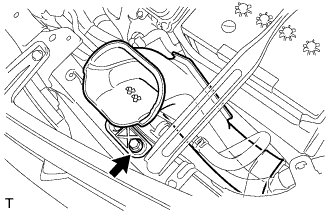
Remove the bolt and No. 1 air cleaner inlet.
-
-
REMOVE NO. 2 FRONT BUMPER SIDE SEAL LH (for ALPHARD)
-
Remove the 2 clips and No. 2 front bumper side seal LH.
-
-
REMOVE NO. 2 FRONT BUMPER SIDE SEAL LH (for VELLFIRE)
-
Remove the 2 clips and No. 2 front bumper side seal LH.
-
-
REMOVE NO. 2 FRONT BUMPER SIDE SEAL RH (for ALPHARD)
-

Remove the 2 clips and No. 2 front bumper side seal RH.
-
-
REMOVE NO. 2 FRONT BUMPER SIDE SEAL RH (for VELLFIRE)
-
Remove the 2 clips and No. 2 front bumper side seal RH.
-
-
REMOVE HOOD LOCK SUPPORT BRACE SUB-ASSEMBLY
-
Disconnect the 5 wire harness clamps.
-
Disconnect the 4 connectors.
-
Remove the 2 bolts and hood lock support brace sub-assembly.
-
-
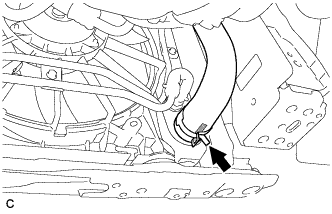
DISCONNECT NO. 1 RADIATOR HOSE
-
Disconnect the hose clamp and No. 1 radiator hose.
-
-
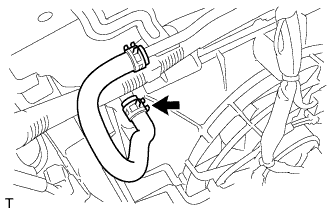
DISCONNECT NO. 2 RADIATOR HOSE
-
Disconnect the No. 2 radiator hose.
-
-
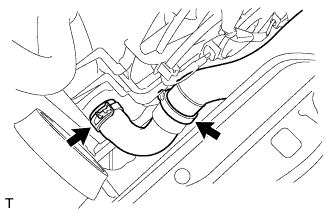
DISCONNECT OIL COOLER HOSE
-
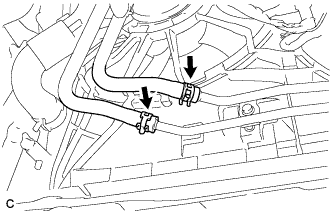
Disconnect the 2 oil cooler hoses.
-
-
DISCONNECT NO. 2 WATER BY-PASS HOSE
-
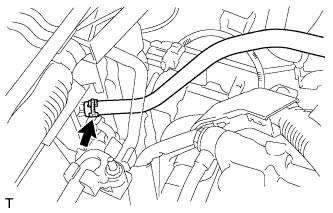
Disconnect the No. 2 water by-pass hose.
-
-
DISCONNECT NO. 1 WATER BY-PASS PIPE
-
Disconnect the No. 3 water by-pass hose.
-
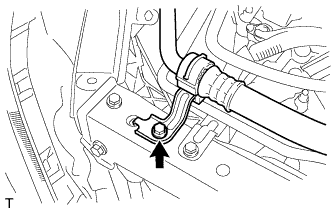
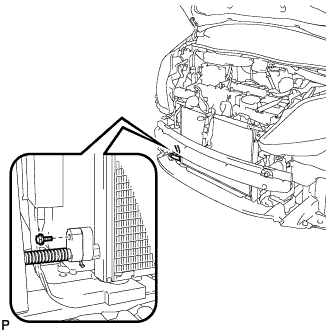
Remove the bolt and No. 1 cooler refrigerant suction hose.
-
Remove the 2 bolts and No. 1 water by-pass pipe.
-
-
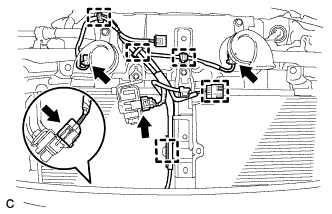
REMOVE UPPER RADIATOR SUPPORT SUB-ASSEMBLY
-
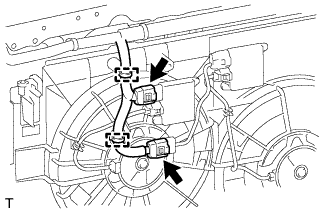
Disconnect the 2 clamps and 2 cooling fan ECU connectors.
-
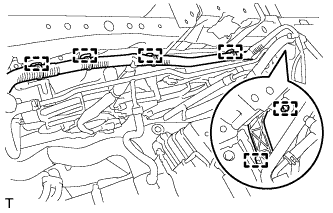
Disconnect the 6 wire harness clamps.
-
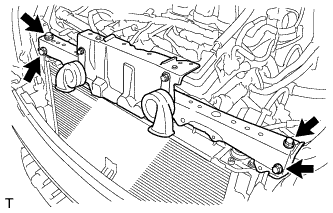
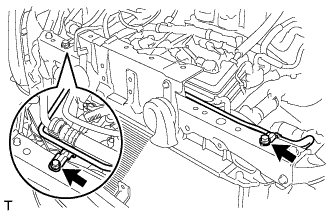
Remove the 4 bolts and upper radiator support sub-assembly.
-
Remove the 2 radiator support cushions.
-
-
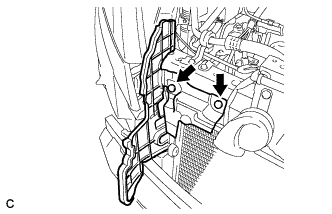
REMOVE NO. 2 FAN SHROUD
-
Remove the 2 bolts, 2 claws and the No. 2 fan shroud.
-
-
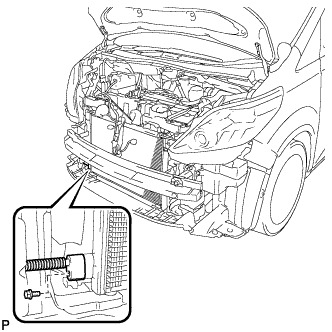
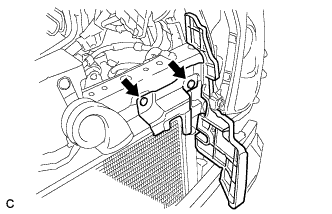
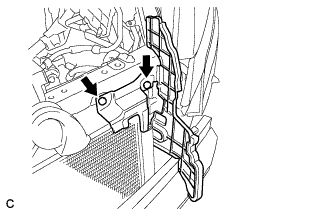
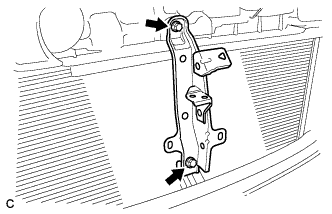
REMOVE COOLER CONDENSER ASSEMBLY
-
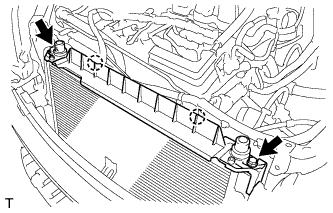
Remove the cooler condenser assembly as shown in the illustration.
-
-
REMOVE RADIATOR ASSEMBLY
-
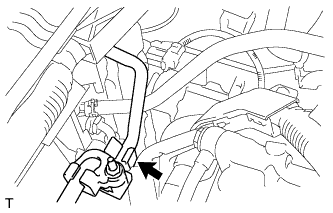
Disconnect the suction hose from the hose clamp.
-
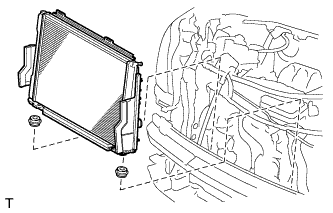
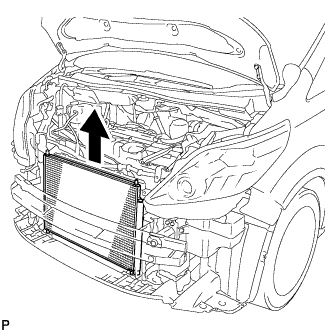
Remove the radiator with fan shroud and fan motors.
-
Remove the 2 lower radiator supports.
-
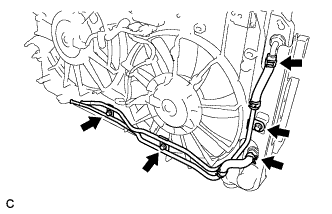
w/o Air cooled oil cooler:
-
Disconnect the 2 oil cooler hoses.
-
Remove the 3 bolts and oil cooler pipe.
-
-
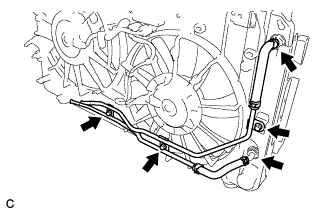
w/ Air cooled oil cooler:
-
Disconnect the 2 oil cooler hoses.
-
Remove the 3 bolts and oil cooler pipe.
-
-
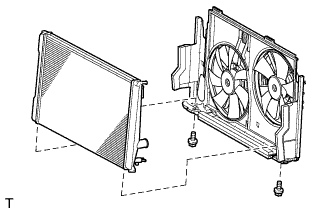
Remove the 2 bolts and fan shroud with fan motors from the radiator assembly.
-