THERMOSTAT REMOVAL

-
REMOVE FRONT WHEEL RH
-
REMOVE NO. 1 ENGINE UNDER COVER
-
REMOVE REAR ENGINE UNDER COVER RH
-
DRAIN ENGINE COOLANT
CAUTION:
Do not remove the reserve tank cap, cylinder block drain cock plugs or radiator drain cock plug while the engine and radiator assembly are still hot. Pressurized, hot engine coolant and steam may be released and cause serious burns.
-
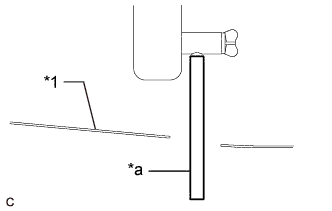
Text in Illustration *1 No. 1 Engine Under Cover *a Hose Connect a hose with an inside diameter of 9 mm (0.354 in.) to the radiator drain cock as shown in the illustration.
-
Loosen the radiator drain cock plug.
-
Remove the reserve tank cap. Then drain the engine coolant.
-
Loosen the cylinder block drain cock plug (for Bank 1).
-
Loosen the cylinder block drain cock plug (for Bank 2, w/ Cylinder Block Drain Cock Plug).
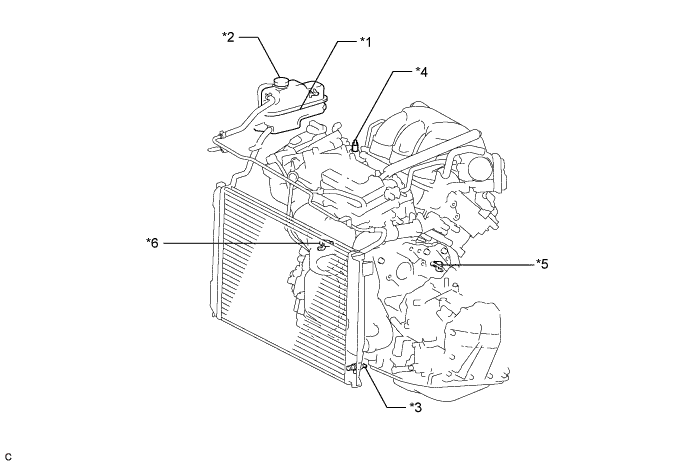
Text in Illustration *1 Radiator Reserve Tank *2 Reserve Tank Cap *3 Radiator Drain Cock Plug *4 Air Drain Cock Plug *5 Cylinder Block Drain Cock Plug (for Bank 1) *6 Cylinder Block Drain Cock Plug (for Bank 2, w/ Cylinder Block Drain Cock Plug) Tech Tips
Collect the engine coolant in a container and dispose of it according to the regulations in your area.
-
Disconnect a hose with an inside diameter of 9 mm (0.354 in.) from the radiator drain cock.
-
-
REMOVE FRONT BUMPER ASSEMBLY (for ALPHARD)
-
REMOVE FRONT BUMPER ASSEMBLY (for VELLFIRE)
-
REMOVE V-RIBBED BELT
-
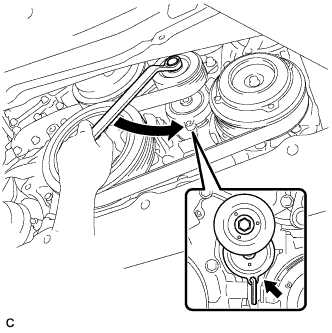
Release the V-ribbed belt tension by turning the V-ribbed belt tensioner counterclockwise, and remove the V-ribbed belt from the V-ribbed belt tensioner.
-
While turning the V-ribbed belt tensioner counterclockwise, align with its holes, and then insert a 5 mm bi-hexagon wrench into the holes to fix the V-ribbed belt tensioner.
-
-
DISCONNECT NO. 2 RADIATOR HOSE
-
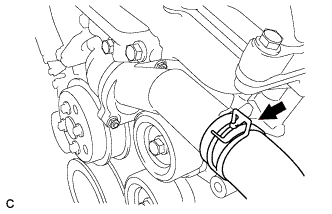
Disconnect the No. 2 radiator hose from the engine.
-
-
REMOVE NO. 2 IDLER PULLEY SUB-ASSEMBLY
-
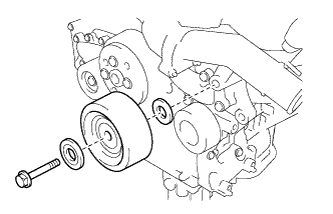
Remove the bolt, No. 2 idler pulley cover plate, No. 2 idler pulley sub-assembly and idler pulley cover plate.
-
-
REMOVE WATER INLET
-
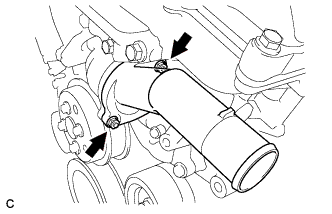
Remove the 2 nuts and water inlet.
-
-
REMOVE THERMOSTAT
-
Remove the thermostat from the water inlet housing.
-
Remove the gasket from the thermostat.
-