WATER PUMP REMOVAL

-
REMOVE AUTOMATIC TRANSAXLE ASSEMBLY
Tech Tips
See the steps from "Remove Engine Assembly with Transaxle" through "Remove Automatic Transaxle Assembly" Click here.
-
INSTALL ENGINE ON ENGINE STAND
-
Install the engine onto an engine stand with the bolts.
-
-
REMOVE ENGINE HANGER
-
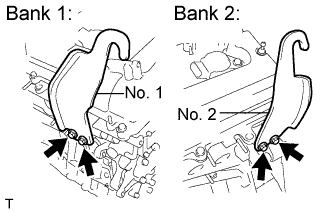
Remove the 4 bolts and 2 engine hangers.
-
-
REMOVE FRONT NO. 1 ENGINE MOUNTING BRACKET LH
-
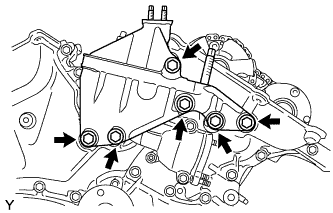
Remove the 6 bolts and No. 1 front engine mounting bracket LH.
-
Using an E8 "TORX" socket wrench, remove the 2 stud bolts.
-
-
REMOVE NO. 2 IDLER PULLEY SUB-ASSEMBLY
-
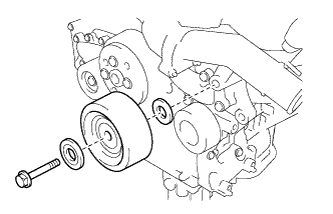
Remove the bolt, No. 2 idler pulley cover plate, No. 2 idler pulley sub-assembly and idler pulley cover plate.
-
-
REMOVE V-RIBBED BELT TENSIONER ASSEMBLY
-
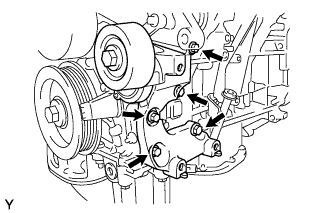
Remove the 5 bolts and V-ribbed belt tensioner assembly.
-
-
REMOVE WATER INLET HOUSING
-
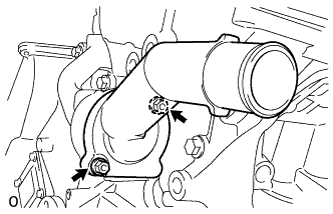
Remove the 2 nuts, water inlet and thermostat.
-
Remove the gasket.
-
Remove the 2 stud bolts.
-
Separate the No. 1 water by-pass hose from the water inlet housing.
-
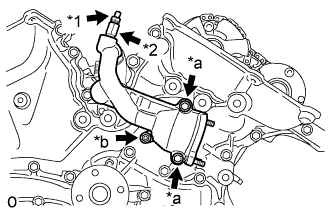
Text in Illustration *1 Drain Cock Plug *2 Drain Cock Assembly *a Bolt *b Nut Remove the drain cock plug.
-
Remove the drain cock assembly from the water inlet housing.
-
Remove the 2 bolts, nut and water inlet housing.
-
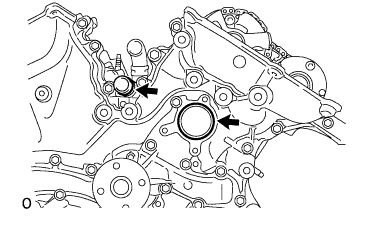
Remove the 2 O-rings.
-
-
REMOVE WATER PUMP PULLEY
-
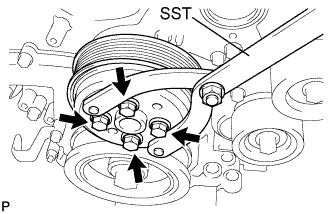
Using SST, hold the water pump pulley.
- SST
- 09960-10010 ( 09962-01000, 09963-00700 )
-
Remove the 4 bolts and water pump pulley.
-
-
REMOVE WATER PUMP ASSEMBLY
-
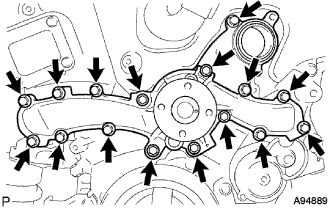
Remove the 16 bolts, water pump assembly and water pump gasket.
-