REAR NO. 2 SEAT OUTER BELT ASSEMBLY REMOVAL

Tech Tips
-
Use the same procedure for the RH and LH sides.
-
The procedure listed below is for the LH side.
-
REMOVE REAR NO. 2 SEAT ASSEMBLY LH
-
for Manual Seat Type:
Remove the rear No. 2 seat assembly LH Click here.
-
for Power Seat Type:
Remove the rear No. 2 seat assembly LH Click here.
-
-
REMOVE REAR NO. 1 FLOOR STEP COVER
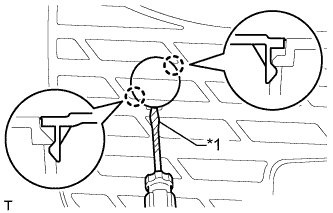
Text in Illustration *1 Protective Tape Tech Tips
Use the same procedure for all rear No. 1 floor step covers.
-
Using a screwdriver, detach the 2 claws and remove the rear No. 1 floor step cover.
Tech Tips
Tape the screwdriver tip before use.
-
-
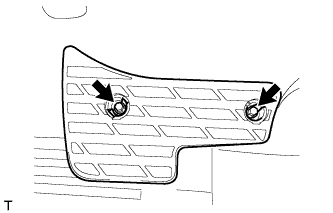
REMOVE QUARTER SCUFF PLATE LH
-
Remove the 2 bolts and quarter scuff plate.
-
-
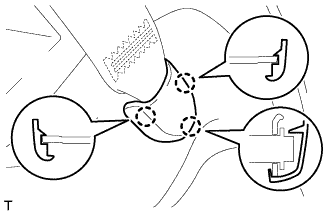
REMOVE REAR DOOR SCUFF PLATE LH
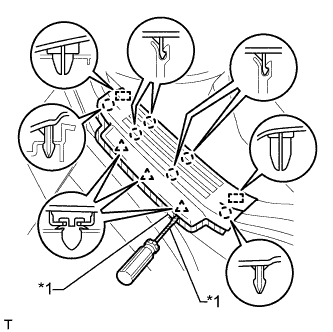
Text in Illustration *1 Protective Tape
-
Put protective tape around the rear door scuff plate.
-
Using a screwdriver, detach the 3 clips, 6 claws and 2 guides and remove the rear door scuff plate.
Tech Tips
Tape the screwdriver tip before use.
-
-
REMOVE REAR DOOR OPENING TRIM WEATHERSTRIP LH
-
Partially remove the rear door opening trim weatherstrip so that the front quarter trim panel assembly LH and deck trim side panel assembly LH can be removed Click here.
-
-
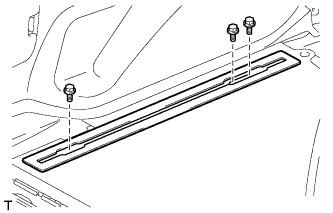
REMOVE FLOOR SIDE RAIL LH (w/ Deck Rail)
-
Remove the 3 bolts and floor side rail.
-
-
REMOVE FLOOR SIDE RAIL RH (w/ Deck Rail)
Tech Tips
Use the same procedure described for the LH side.
-
REMOVE REAR NO. 1 SEAT OUTER LAP BELT ANCHOR COVER
Tech Tips
Use the same procedure for the other rear No. 1 seat outer lap belt anchor cover.
-
Detach the 3 claws and remove the rear No. 1 seat outer lap belt anchor cover.
-
-
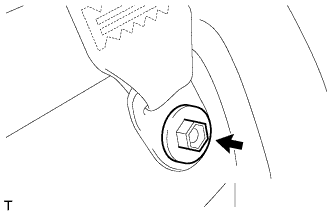
REMOVE NO. 1 LUGGAGE COMPARTMENT TRIM HOOK
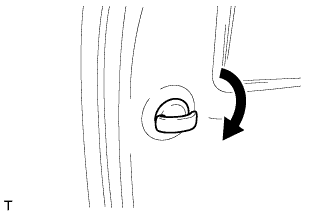
Tech Tips
Use the same procedure for the other No. 1 luggage compartment trim hook.
-
Remove the luggage compartment trim hook by turning it clockwise.
-
-
REMOVE NO. 1 TONNEAU COVER HOLDER CAP (w/o Tonneau Cover)
Text in Illustration *1 Protective Tape Tech Tips
Use the same procedure for the other No. 1 tonneau cover holder cap.
-
Using a screwdriver, detach the 2 claws and remove the No. 1 tonneau cover holder cap.
Tech Tips
Tape the screwdriver tip before use.
-
-
REMOVE FRONT DECK SIDE TRIM COVER LH (w/ Tonneau Cover)
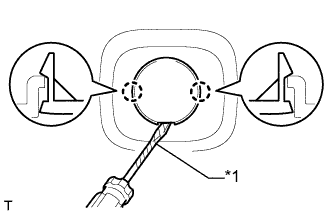
Text in Illustration *1 Protective Tape Tech Tips
Use the same procedure for the other front deck side trim cover.
-
Using a screwdriver, detach the 2 claws and remove the front deck side trim cover.
Tech Tips
Tape the screwdriver tip before use.
-
-
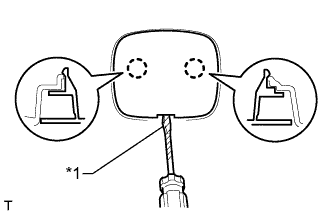
REMOVE ASSIST GRIP PLUG
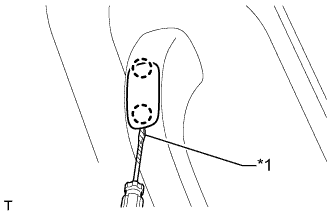
Text in Illustration *1 Protective Tape Tech Tips
Use the same procedure for all assist grip plugs.
-
Using a screwdriver, detach the 2 claws and remove the assist grip plug.
Tech Tips
Tape the screwdriver tip before use.
-
-
REMOVE ASSIST GRIP SUB-ASSEMBLY
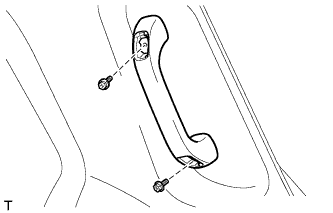
Tech Tips
Use the same procedure for the other assist grip.
-
Remove the 2 bolts and assist grip.
-
-
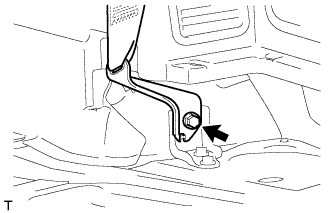
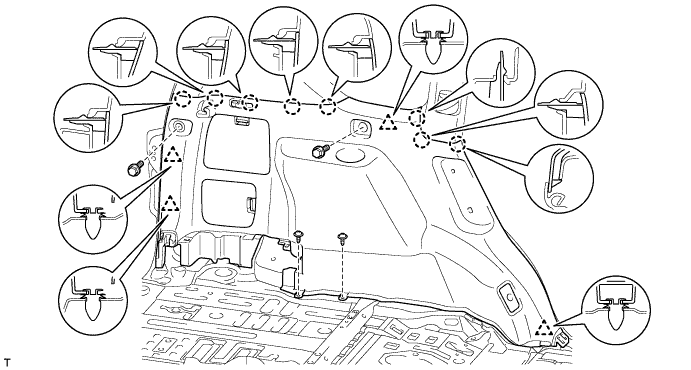
REMOVE DECK TRIM SIDE PANEL ASSEMBLY LH
-
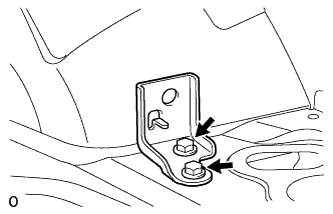
Remove the bolt and disconnect the rear No. 1 seat outer belt floor anchor.
-
Remove the bolt and disconnect the rear No. 2 seat outer belt floor anchor.
-
for RH Side:
Remove the bolt and disconnect the rear No. 2 seat outer belt floor anchor.
-
Detach the 4 clips and 8 claws and remove the deck trim side panel.
-
-
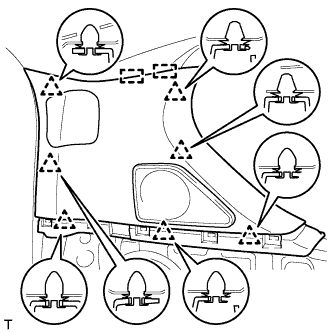
REMOVE REAR QUARTER TRIM PANEL ASSEMBLY LH
-
w/o Rear No. 2 Seat:
-
Detach the 7 clips and 2 guides and remove the rear quarter trim panel.
-
-
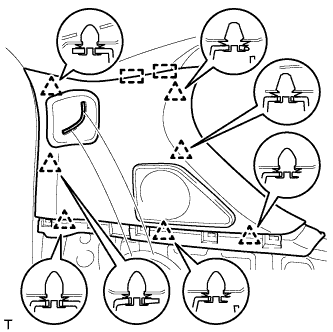
w/ Rear No. 2 Seat:
-
Detach the 7 clips and 2 guides.
-
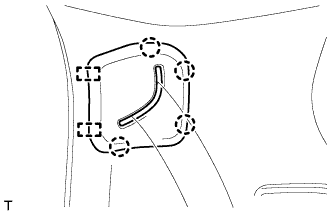
Detach the 4 clips and 2 guides, pass the rear No. 2 seat outer belt floor anchor through the rear quarter trim panel and remove the rear quarter trim panel.
-
-
-
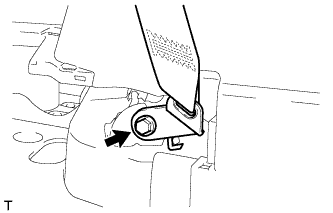
REMOVE REAR NO. 2 SEAT OUTER BELT ASSEMBLY LH
-
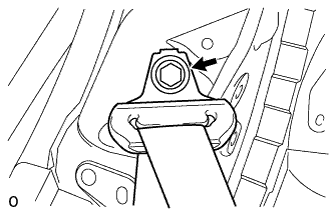
Remove the bolt and rear No. 1 seat outer belt shoulder anchor.
-
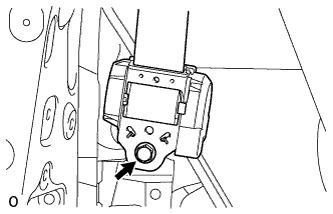
Remove the bolt and rear No. 2 seat outer belt assembly.
-
-
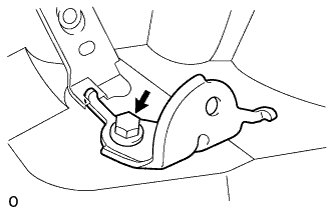
REMOVE REAR SEAT OUTER BELT ANCHOR PLATE SUB-ASSEMBLY LH
-
Remove the bolt and anchor plate.
-
-
REMOVE SEAT BELT ANCHOR PLATE ASSEMBLY (for RH Side)
-
Remove the 2 bolts and anchor plate.
-