REAR NO. 2 SEAT ASSEMBLY (for Power Seat Type LH Side) REMOVAL

CAUTION:
Wear protective gloves. Sharp areas on the parts may injure your hands.
Note
-
Under either of the following conditions, perform initialization (initial position memorization) of the fold seat control ECU Click here.
-
The fold seat control ECU is replaced with a new one.
-
Initialization (initial position reset) of the fold seat control ECU is performed.
-
Under any of the following conditions, perform initialization (initial position reset and initial position memorization) of the fold seat control ECU Click here.
-
The fold seat control ECU is exchanged with one from another vehicle.
-
The seatback frame and seat leg are inspected.
-
The seat is disassembled and the positions of the seatback and seat cushion change with respect to one another.
-
The seatback frame or seat leg is replaced.
-
The cable is disconnected from the battery while the seatback or seat cushion is operating.
Tech Tips
-
Use the same procedure for the RH and LH sides.
-
The procedure listed below is for the LH side.
-
REMOVE DECK BOARD ASSEMBLY
-
Operate the No. 2 fold seat switch and fold down the 2 seatbacks.
-
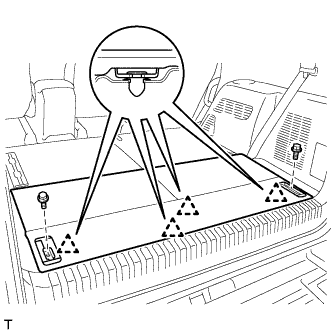
Remove the 2 bolts.
-
Detach the 4 clips and remove the deck board.
-
-
REMOVE REAR NO. 4 FLOOR BOARD
-
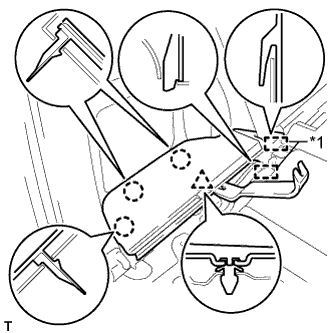
Text in Illustration *1 Guide Using a moulding remover, detach the clip and 3 claws.
-
Detach the 2 guides and remove the floor board.
-
-
REMOVE REAR NO. 3 FLOOR BOARD (w/o Rear Air Conditioning System)
-
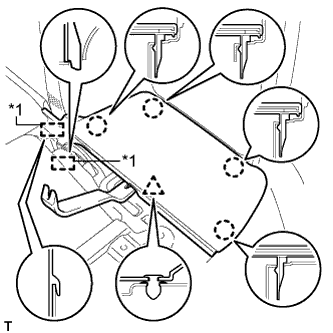
Text in Illustration *1 Guide Using a moulding remover, detach the clip and 4 claws.
-
Detach the 2 guides and remove the floor board.
-
-
REMOVE REAR NO. 3 FLOOR BOARD (w/ Rear Air Conditioning System)
-
Text in Illustration *1 Guide Using a moulding remover, detach the clip and 3 claws.
-
Detach the 2 guides and remove the floor board.
-
-
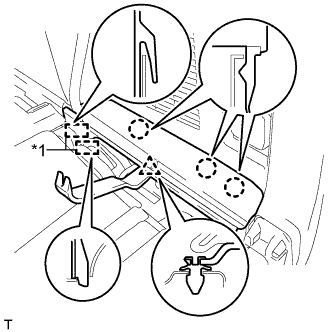
REMOVE REAR FLOOR MAT SUPPORT PLATE
-
Remove the 3 bolts.
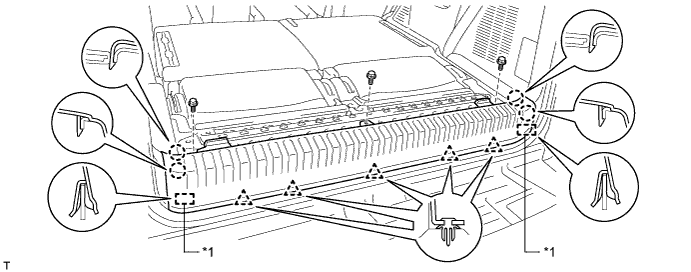
Text in Illustration *1 Guide - - -
Detach the 4 claws and 2 guides.
-
Detach the 5 clips and remove the support plate.
-
-
REMOVE DECK BOARD BRACKET REINFORCEMENT
-
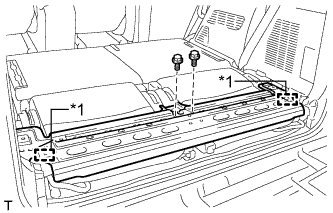
Text in Illustration *1 Hook Remove the 2 bolts.
-
Detach the 2 hooks and reinforcement.
-
-
REMOVE NO. 1 DECK BOARD BRACKET LH
-
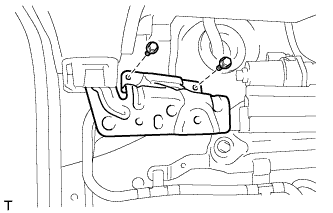
Remove the 2 bolts and bracket.
-
-
REMOVE REAR NO. 2 SEAT ASSEMBLY LH
-
Operate the No. 2 fold seat switch and raise the 2 seatbacks.
-
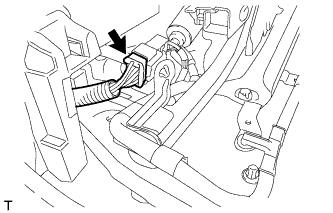
Disconnect the connector.
-
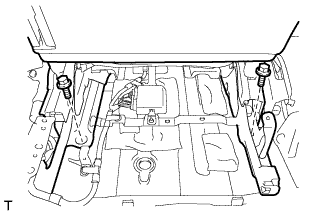
Remove the 2 bolts.
-
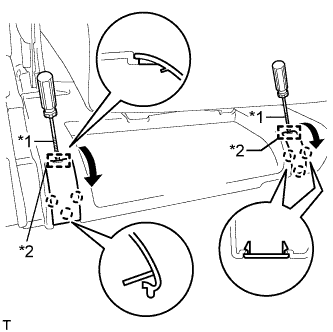
Text in Illustration *1 Protective Tape *2 Guide Using a screwdriver, detach the 2 guides and 6 claws and open the 2 covers.
Tech Tips
Tape the screwdriver tip before use.
-
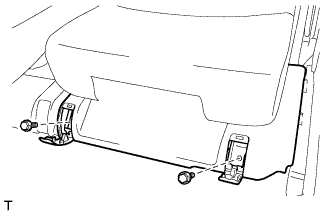
Remove the 2 bolts.
-
Remove the rear No. 2 seat assembly from the vehicle.
Note
Be careful not to damage the vehicle body.
Tech Tips
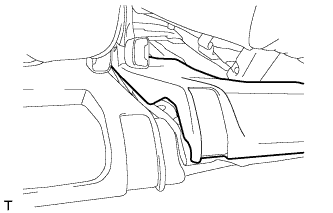
If removing the seat on the RH side with the LH side installed, remove it with the No. 3 rear seat leg cover LH raised as shown in the illustration.
-