DOOR COURTESY LIGHT (for Front) INSTALLATION

Tech Tips
-
Use the same procedure for LHD and RHD vehicles.
-
The procedure listed below is for LHD vehicles.
-
Use the same procedure for the RH and LH sides.
-
The procedure listed below is for the LH side.
-
INSTALL COURTESY LIGHT BULB
-
Install the bulb.
-
-
INSTALL FRONT DOOR COURTESY LIGHT ASSEMBLY LH
-
Connect the connector.
-
Attach the 2 claws to install the light.
-
-
INSTALL FRONT DOOR INNER GLASS WEATHERSTRIP LH
-
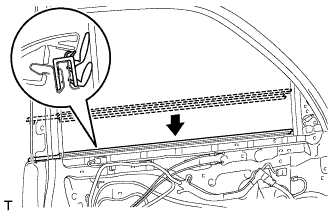
Install the front door inner glass weatherstrip.
-
-
INSTALL FRONT DOOR TRIM BOARD SUB-ASSEMBLY LH
-
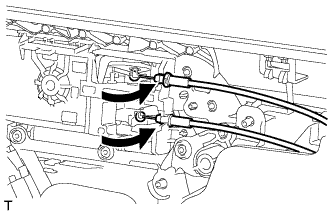
Connect the front door lock remote control cable assembly and front door inside locking cable assembly.
-
Connect 2 connectors.
-
w/ Seat Position Memory System:
-
Connect the connectors.
-
-
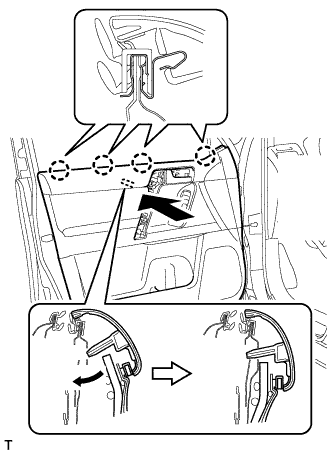
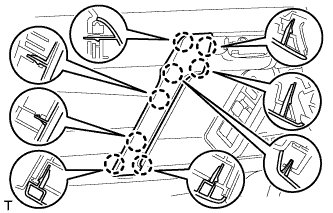
Attach the front door trim board sub-assembly by attaching the 4 claws of the front door inner glass weatherstrip as shown in the illustration.
-
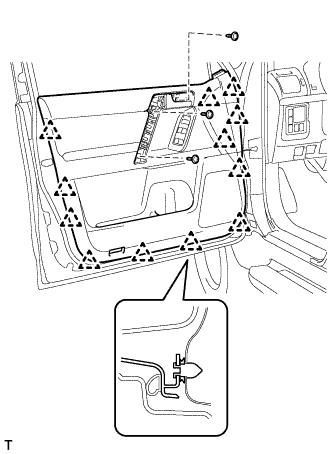
Attach the 12 clips and front door trim board retainer to install the front door trim board sub-assembly.
-
Install the 3 screws.
-
-
INSTALL FRONT DOOR ARMREST COVER LH
-
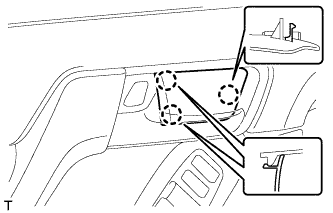
Attach the 8 claws to install the assist grip cover.
-
-
INSTALL NO. 2 DOOR INSIDE HANDLE BEZEL LH
-
Attach the 3 claws to install the inside handle bezel.
-
-
INSTALL FRONT DOOR LOWER FRAME BRACKET GARNISH LH
-
Attach the 2 claws to install the front door lower frame bracket garnish.
-