ROOM LIGHT (for Rear) REMOVAL

-
REMOVE NO. 2 ROOM LIGHT ASSEMBLY
-
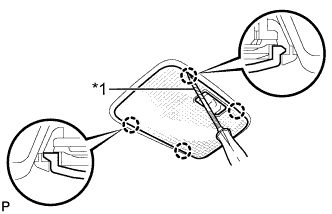
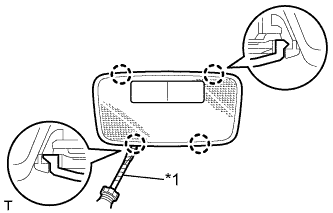
Text in Illustration *1 Protective Tape Using a screwdriver, detach the 4 claws and remove the lens.
Tech Tips
Tape the screwdriver tip before use.
-
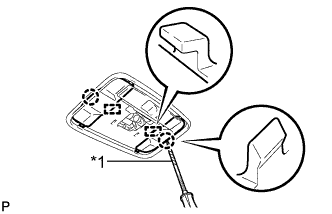
Text in Illustration *1 Protective Tape Using a screwdriver, detach the 2 claws and 2 guides, and remove the 2 covers.
Tech Tips
Tape the screwdriver tip before use.
-
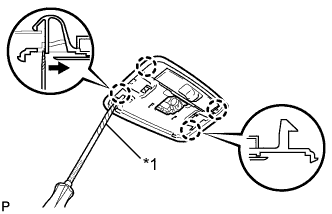
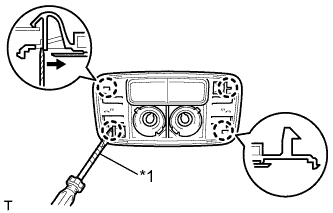
Text in Illustration *1 Protective Tape Using a screwdriver, detach the 4 claws and disconnect the light as shown in the illustration.
Tech Tips
Tape the screwdriver tip before use.
-
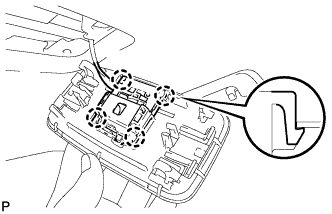
Using a screwdriver, detach the 4 claws and disconnect the room light switch base from the light.
-
-
REMOVE NO. 2 ROOM LIGHT ASSEMBLY (w/ Personal Light)
-
Text in Illustration *1 Protective Tape Using a screwdriver, detach the 4 claws and remove the lens.
Tech Tips
Tape the screwdriver tip before use.
-
Text in Illustration *1 Protective Tape Using a screwdriver, detach the 4 claws and disconnect the light as shown in the illustration.
Tech Tips
Tape the screwdriver tip before use.
-

Using a screwdriver, detach the 8 claws and disconnect the room light switch base from the light.
-