PERSONAL LIGHT (for Rear Door) REMOVAL

Tech Tips
-
Use the same procedure for LHD and RHD vehicles.
-
The procedure listed below is for LHD vehicles.
-
Use the same procedure for the RH side and LH side.
-
The procedure listed below is for the LH side.
-
REMOVE NO. 2 DOOR INSIDE HANDLE BEZEL LH
-
Using moulding remover A, detach the 3 claws and remove the rear door inside handle bezel as shown in the illustration.
-
-
REMOVE FRONT DOOR ARMREST COVER LH
-
Using moulding remover A, detach the 8 claws and remove the assist grip cover.
-
-
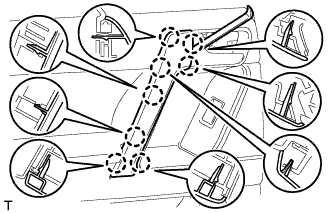
REMOVE REAR DOOR TRIM BOARD SUB-ASSEMBLY LH
-
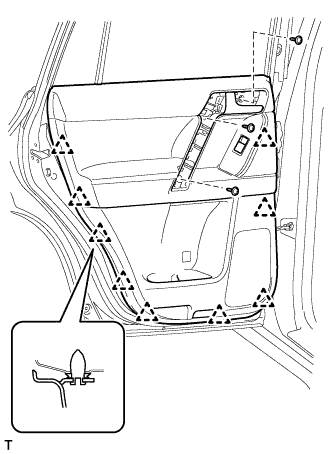
Remove the 3 screws.
-
Using a clip remover, detach the 9 clips.
-
Pull out the rear door trim board sub-assembly in the direction indicated by the arrow in the illustration.
-
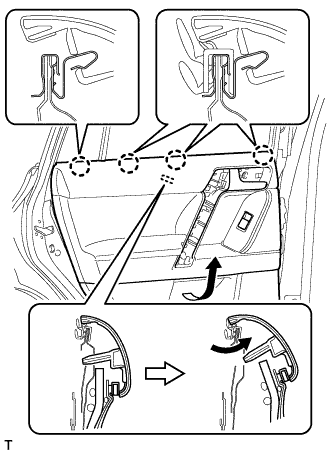
Raise the rear door trim board sub-assembly to detach the 4 claws and remove the rear door trim board sub-assembly together with the rear door inner glass weatherstrip.
-
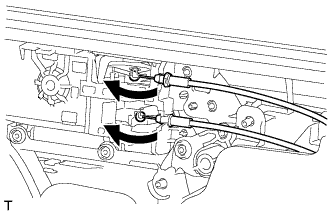
Disconnect the rear door lock remote control cable assembly and rear door inside locking cable assembly as shown in the illustration.
-
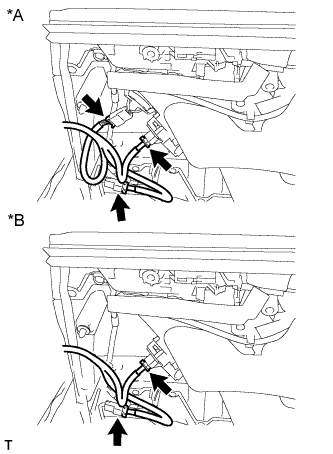
Text in Illustration *A for 14 Speakers *B for 9 Speakers Disconnect each connector.
-
Using a screwdriver, detach the claw and remove the clamp.
-
-
REMOVE REAR DOOR INNER GLASS WEATHERSTRIP LH
-
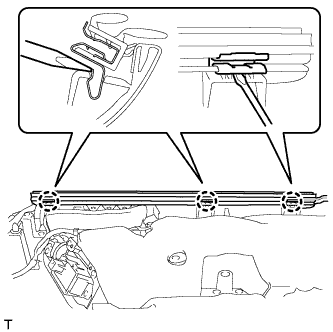
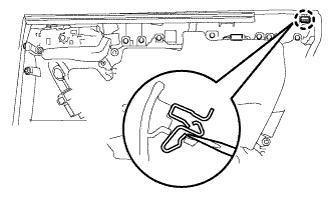
Using a screwdriver, detach the 3 claws and remove the rear door inner glass weatherstrip from the rear door trim board sub-assembly as shown in the illustration.
-
-
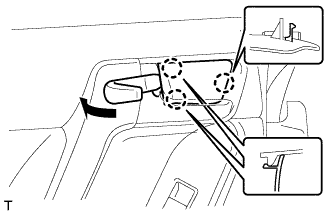
REMOVE REAR DOOR INSIDE HANDLE ILLUMINATION LIGHT ASSEMBLY LH
-
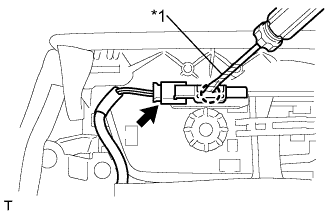
Text in Illustration *1 Protective Tape Disconnect the connector.
-
Using a screwdriver, detach the claw and remove the light.
Tech Tips
Tape the screwdriver tip before use.
-
-
REMOVE NO. 2 INTERIOR ILLUMINATION LIGHT SUB-ASSEMBLY
-

Disconnect the connector.
-
Detach the clamp.
-
Turn the light in the direction indicated by the arrow and remove it.
-