NAVIGATION ECU INSTALLATION

Tech Tips
A bolt without a torque specification is shown in the standard bolt chart Click here.
-
INSTALL DISC PLAYER BRACKET
-
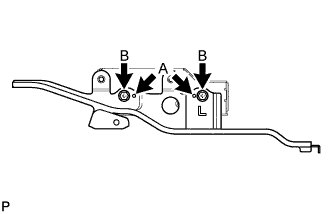
Align the protrusions of the disc player bracket, labeled A, with the indentations of the navigation module board.
-
Install the disc player bracket with the 2 screws labeled B.
-
-
INSTALL NO. 2 DISC PLAYER BRACKET
-
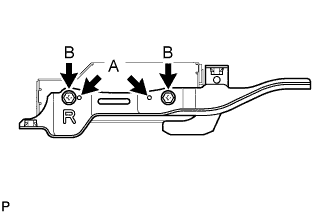
Align the protrusions of the No. 2 disc player bracket, labeled A, with the indentations of the navigation module board.
-
Install the No. 2 disc player bracket with the 2 screws labeled B.
-
-
INSTALL DISC PLAYER COVER
-
Install the disc player cover with the 3 screws.
-
-
INSTALL NAVIGATION MODULE BOARD WITH BRACKET
-
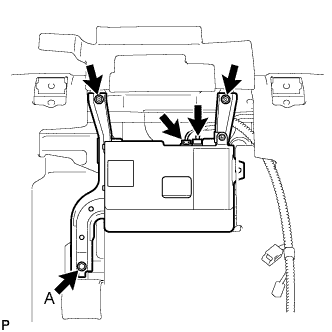
Connect the connectors.
-
Install the navigation module board with bracket with the 2 screws and bolt.
- Torque:
- Bolt A
- 4.5 N*m { 46 kgf*cm, 40 in.*lbf }
-
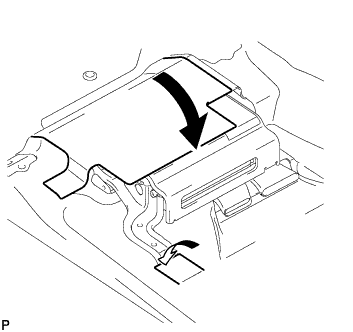
Return the floor carpets to their original positions as shown in the illustration and attach the fastener.
-
-
INSTALL FRONT SEAT ASSEMBLY LH
-
for Manual Seat:
Install the front seat LH Click here.
-
for Power Seat:
Install the front seat LH Click here.
-
for Walk in Seat Type:
Install the front seat LH Click here.
-
-
CONNECT CABLE TO NEGATIVE BATTERY TERMINAL
Note
When disconnecting the cable, some systems need to be initialized after the cable is reconnected Click here.
-
CHECK SRS WARNING LIGHT
-
Check the SRS warning light Click here.
-