REAR BRAKE INSTALLATION

Tech Tips
-
Use the same procedure for the RH and LH sides.
-
The procedure listed below is for the LH side.
-
INSTALL REAR DISC
-
Align the matchmarks and install the rear disc.
Tech Tips
When replacing the disc with a new one, select the installation position where the disc has the smallest runout.
-
-
INSTALL REAR DISC BRAKE BUSH DUST BOOT
-
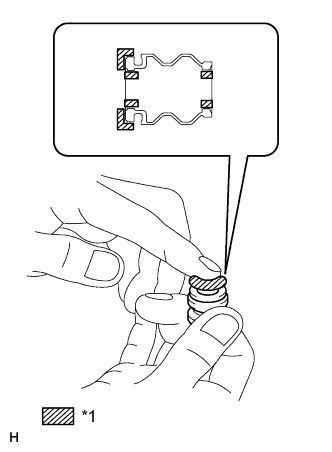
Text in Illustration *1 Lithium soap base glycol grease Apply a light coat of lithium soap base glycol grease to the entire circumference of a new rear disc brake bush dust boot where it contacts the rear disc brake cylinder mounting, and the entire inner circumference of both ends.
Tech Tips
Apply at least 0.3 g (0.01 oz.) of lithium soap base glycol grease to the rear disc brake bush dust boot.
Note
Apply a sufficient amount of lithium soap base glycol grease to the entire circumference of the rear disc brake bush dust boot and rear disc brake cylinder mounting contact surfaces.
-
Install the rear disc brake bush dust boot to the rear disc brake cylinder mounting.
-
-
INSTALL REAR DISC BRAKE CYLINDER SLIDE BUSH
-
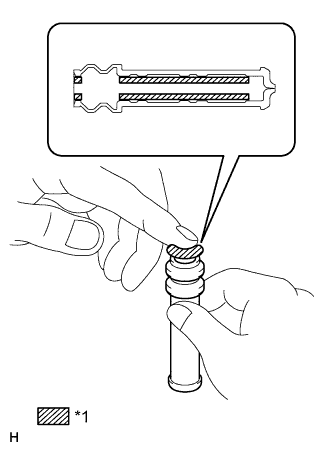
Text in Illustration *1 Lithium soap base glycol grease Apply a light coat of lithium soap base glycol grease to a new rear disc brake cylinder slide bush.
Tech Tips
Apply at lease to 0.8 g (0.03 oz.) of lithium soap base glycol grease to the rear disc brake cylinder slide bush.
-
Install the rear disc brake cylinder slide bush to the rear disc brake cylinder mounting.
-
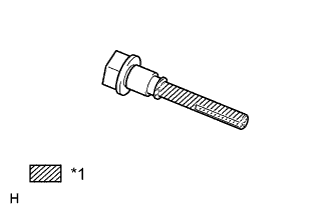
Text in Illustration *1 Lithium soap base glycol grease Apply a light coat of lithium soap base glycol grease to the cylinder slide pin, insert it into the rear disc brake cylinder slide bush in order to properly grease the parts, and then remove it.
-
-
INSTALL REAR DISC BRAKE CYLINDER HOLE PLUG
-
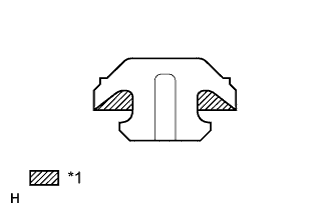
Text in Illustration *1 Lithium soap base glycol grease Apply a light coat of lithium soap base glycol grease to a new rear disc brake cylinder hole plug.
-
Install the rear disc brake cylinder hole plug to the rear disc brake cylinder mounting.
-
-
INSTALL REAR DISC BRAKE CYLINDER MOUNTING LH
-
Install the rear disc brake cylinder mounting and 2 plate washers with the 2 bolts.
- Torque:
- 105 N*m { 1071 kgf*cm, 77 ft.*lbf }
-
-
INSTALL REAR NO. 1 DISC BRAKE PAD SUPPORT PLATE
-
Install the 2 rear disc No. 1 brake pad support plates to the rear disc brake cylinder mounting.
-
-
INSTALL REAR NO. 2 DISC BRAKE PAD SUPPORT PLATE
-
Install the 2 rear disc No. 2 brake pad support plates to the rear disc brake cylinder mounting.
-
-
INSTALL REAR DISC BRAKE PAD WEAR INDICATOR PLATE
-
Install the rear disc brake pad wear indicator plate to the inner side disc brake pad.
Tech Tips
Install the rear disc brake pad wear indicator facing downward.
-
-
INSTALL REAR DISC BRAKE ANTI-SQUEAL SHIM
Note
If necessary, replace the rear disc brake anti-squeal shim when replacing the rear disc brake pad.
-
Install the rear disc brake anti-squeal shims to the rear disc brake pads.
Note
There should be no oil or grease on the friction surfaces of the rear disc brake pads and the rear disc.
-
-
INSTALL REAR DISC BRAKE PAD
-
Install the 2 rear disc No. 1 and No. 2 brake pad support plates to the rear disc brake cylinder mounting.
-
Install the 2 rear disc brake pads together with the rear disc brake anti-squeal shims to the rear disc brake cylinder.
-
-
INSTALL REAR DISC BRAKE CYLINDER ASSEMBLY LH
-
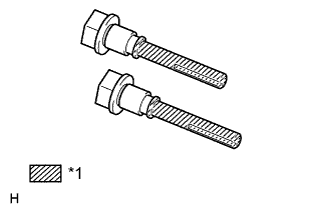
Text in Illustration *1 Lithium soap base glycol grease Apply a light coat of lithium soap base glycol grease to the sliding surfaces of the rear disc brake cylinder slide pins.
-
Install the rear disc brake cylinder with the 2 rear disc brake cylinder slide pins.
- Torque:
- 88 N*m { 900 kgf*cm, 65 ft.*lbf }
-
-
CONNECT REAR FLEXIBLE HOSE LH
-
Connect the rear flexible hose to the rear disc brake cylinder with the union bolt and a new gasket.
- Torque:
- 31 N*m { 316 kgf*cm, 23 ft.*lbf }
-
-
BLEED BRAKE LINE (for Hydraulic Brake Booster)
-
Turn the ignition switch to ON.
-
Remove the brake master cylinder reservoir filler cap assembly.
-
Add brake fluid until the fluid level is between the MIN and MAX lines of the reservoir.
-
Repeatedly depress the brake pedal and bleed air from the bleeder plug of the front disc brake cylinder RH.
-
Repeat the step above until the air is completely bled, and then tighten the bleeder plug while depressing the brake pedal.
- Torque:
- 11 N*m { 110 kgf*cm, 8 ft.*lbf }
-
Bleed the air from the bleeder plug of the front disc brake cylinder LH using the same procedure as for the RH side.
-
With the brake pedal depressed, loosen the bleeder plug of the rear disc brake cylinder RH, continue to hold the brake pedal and allow brake fluid to be drained from the bleeder plug while the pump motor operates.
Tech Tips
-
Air is bled as the pump motor operates while the brake pedal is being depressed.
-
Be sure to release the brake pedal to stop the motor after approximately 100 seconds of continuous operation.
-
As brake fluid is continuously drained while the pump operates, it is not necessary to repeatedly depress the brake pedal.
-
-
When there is no more air in the brake fluid, tighten the bleeder plug, and then release the brake pedal.
- Torque:
- 11 N*m { 110 kgf*cm, 8 ft.*lbf }
-
Bleed the air from the bleeder plug of the rear disc brake cylinder LH using the same procedure as for the RH side.
-
Turn the ignition switch off.
-
Inspect for brake fluid leaks.
-
Check and adjust the brake fluid level Click here.
-
Clear the DTCs Click here.
-
-
BLEED BRAKE LINE (for Vacuum Brake Booster)
-
Remove the brake master cylinder reservoir filler cap assembly.
-
Add brake fluid until the fluid level is between the MIN and MAX lines of the reservoir.
-
Loosen the bleeder plug of the front disc brake cylinder RH.
-
Repeatedly depress the brake pedal and bleed the air from the bleeder plug of the front disc brake cylinder RH.
Note
Add fluid as necessary so that the fluid in the reservoir does not decrease below the MIN level.
-
After air is completely bled out, tighten the bleeder plug while depressing the brake pedal.
- Torque:
- 11 N*m { 110 kgf*cm, 8 ft.*lbf }
-
Bleed the air from the bleeder plug of the front disc brake cylinder LH using the same procedure as for the RH side.
-
Loosen the bleeder plug of the rear disc brake cylinder RH.
-
Repeatedly depress the brake pedal and bleed the air from the bleeder plug of the rear disc brake cylinder RH.
Note
Add fluid as necessary so that the fluid in the reservoir does not decrease below the MIN level.
-
After air is completely bled out, tighten the bleeder plug while depressing the brake pedal.
- Torque:
- 11 N*m { 110 kgf*cm, 8 ft.*lbf }
-
Bleed the air from the bleeder plug of the rear disc brake cylinder LH using the same procedure as for the RH side.
-
Inspect for brake fluid leaks.
-
Check and adjust the brake fluid level Click here.
-
Check and clear the DTCs Click here for VSC).
-
-
INSTALL REAR WHEEL
- Torque:
- 112 N*m { 1137 kgf*cm, 82 ft.*lbf }