FUEL LID LOCK CONTROL CABLE ASSEMBLY (for 5 Door) REMOVAL

-
DISCONNECT CABLE FROM NEGATIVE BATTERY TERMINAL
Note
-
After turning the ignition switch off, waiting time may be required before disconnecting the cable from the battery terminal. Therefore, make sure to read the disconnecting the cable from the battery terminal notice before proceeding with work Click here.
-
When disconnecting the cable, some systems need to be initialized after the cable is reconnected Click here.
-
-
REMOVE FRONT SEAT ASSEMBLY (for RHD)
-
for Manual Seat:
Remove the front seat assembly Click here.
-
for Power Seat:
Remove the front seat assembly Click here.
-
-
REMOVE CONSOLE BOX ASSEMBLY (for RHD)
-
for Automatic Transmission:
Remove the console box assembly Click here.
-
for Manual Transmission:
Remove the console box assembly Click here.
-
w/ Refrigerated Cool Box:
Remove the console box assembly Click here.
-
-
REMOVE REAR NO. 2 SEAT ASSEMBLY (w/ Rear No. 2 Seat)
-
for Manual Seat Type:
Remove the rear No. 2 seat assembly Click here.
-
for Power Seat Type:
Remove the rear No. 2 seat assembly Click here.
-
for Face to Face Seat Type:
Remove the rear No. 2 seat assembly Click here.
-
-
REMOVE REAR NO. 1 SEAT ASSEMBLY (w/ Rear No. 1 Seat)
-
for 60/40 Split Slide Walk-in Seat Type LH Side:
Remove the rear No. 1 seat assembly Click here.
-
for 60/40 Split Slide Walk-in Seat Type RH Side:
Remove the rear No. 1 seat assembly Click here.
-
-
REMOVE REAR NO. 1 SEATBACK ASSEMBLY (w/ Rear No. 1 Seat)
-
for 60/40 Split Double-folding Seat Type LH Side:
Remove the rear No. 1 seatback assembly Click here.
-
for 60/40 Split Double-folding Seat Type RH Side:
Remove the rear No. 1 seatback assembly Click here.
-
-
REMOVE REAR NO. 1 FLOOR STEP COVER (w/ Rear No. 2 Seat)
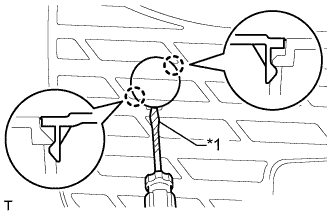
Text in Illustration *1 Protective Tape Tech Tips
Use the same procedure for all rear No. 1 floor step covers.
-
Using a screwdriver, detach the 2 claws and remove the rear No. 1 floor step cover.
Tech Tips
Tape the screwdriver tip before use.
-
-
REMOVE QUARTER SCUFF PLATE LH (w/ Rear No. 2 Seat)
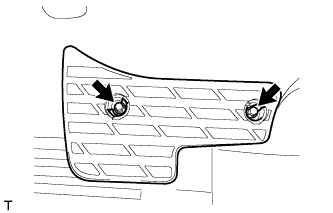
-
Remove the 2 bolts and quarter scuff plate.
-
-
REMOVE QUARTER SCUFF PLATE RH (for RHD, w/ Rear No. 2 Seat)
Tech Tips
Use the same procedure described for the LH side.
-
REMOVE REAR DOOR SCUFF PLATE LH
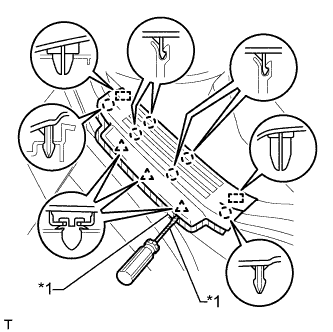
Text in Illustration *1 Protective Tape
-
Put protective tape around the rear door scuff plate.
-
Using a screwdriver, detach the 3 clips, 6 claws and 2 guides and remove the rear door scuff plate.
Tech Tips
Tape the screwdriver tip before use.
-
-
REMOVE REAR DOOR SCUFF PLATE RH (for RHD)
Tech Tips
Use the same procedure described for the LH side.
-
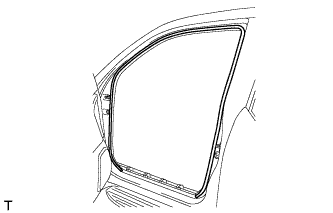
REMOVE REAR DOOR OPENING TRIM WEATHERSTRIP LH
-
Remove the front door opening trim weatherstrip.
-
-
REMOVE TONNEAU COVER ASSEMBLY (w/ Tonneau Cover)
-
Remove the tonneau cover.
-
-
REMOVE FRONT LUGGAGE COMPARTMENT TRIM COVER (w/o Rear No. 2 Seat)

Tech Tips
Use the same procedure for the other front luggage compartment trim cover.
-
Detach the 4 claws and remove the cap.
-
Text in Illustration *1 Luggage Hold Belt Striker Remove the bolt, luggage hold belt striker and front luggage compartment trim cover.
-
-
REMOVE NO. 1 DECK BOARD SUB-ASSEMBLY (w/o Rear No. 2 Seat)
-
Detach the clip and remove the No. 1 deck board.
-
-
REMOVE REAR FLOOR MAT REAR SUPPORT PLATE (w/o Rear No. 2 Seat)
-
Detach the 5 clips and 4 claws and remove the rear floor mat rear support plate.
-
-
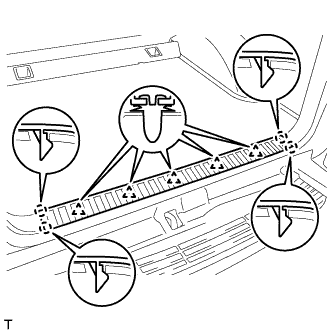
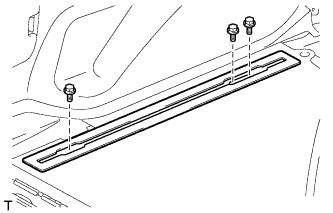
REMOVE FLOOR SIDE RAIL LH (w/ Deck Rail)
-
Remove the 3 bolts and floor side rail.
-
-
REMOVE FLOOR SIDE RAIL RH (w/ Deck Rail)
Tech Tips
Use the same procedure described for the LH side.
-
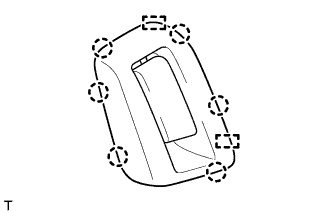
REMOVE REAR FLOOR CARPET ASSEMBLY (w/o Rear No. 2 Seat)
-
Detach the 4 claws and remove the rear floor carpet.
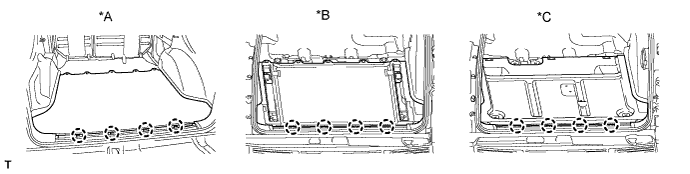
Text in Illustration *A w/o Deck Rail *B w/ Deck Rail *C for Face to Face Seat Type - -
-
-
REMOVE REAR NO. 1 SEAT OUTER LAP BELT ANCHOR COVER

Tech Tips
Use the same procedure for the other rear No. 1 seat outer lap belt anchor cover.
-
Detach the 3 claws and remove the rear No. 1 seat outer lap belt anchor cover.
-
-
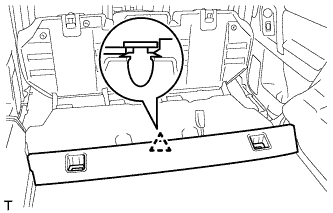
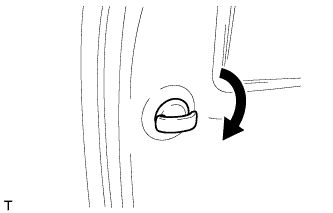
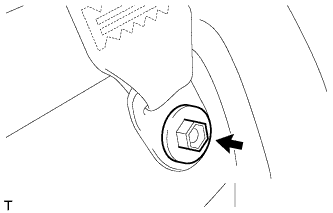
REMOVE NO. 1 LUGGAGE COMPARTMENT TRIM HOOK
Tech Tips
Use the same procedure for the other No. 1 luggage compartment trim hook.
-
Remove the luggage compartment trim hook by turning it clockwise.
-
-
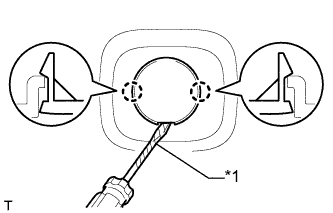
REMOVE NO. 1 TONNEAU COVER HOLDER CAP (w/o Tonneau Cover)
Text in Illustration *1 Protective Tape Tech Tips
Use the same procedure for the other No. 1 tonneau cover holder cap.
-
Using a screwdriver, detach the 2 claws and remove the No. 1 tonneau cover holder cap.
Tech Tips
Tape the screwdriver tip before use.
-
-
REMOVE FRONT DECK SIDE TRIM COVER (w/ Tonneau Cover)
Text in Illustration *1 Protective Tape Tech Tips
Use the same procedure for the other front deck side trim cover.
-
Using a screwdriver, detach the 2 claws and remove the front deck side trim cover.
Tech Tips
Tape the screwdriver tip before use.
-
-
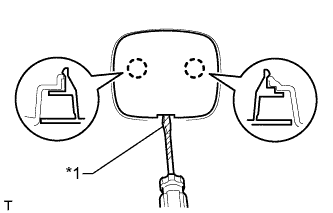
REMOVE ASSIST GRIP PLUG (w/ Rear No. 2 Seat)
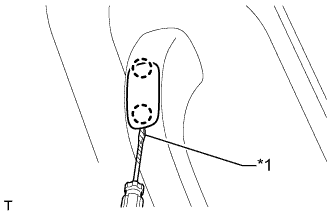
Text in Illustration *1 Protective Tape Tech Tips
Use the same procedure for all assist grip plugs.
-
Using a screwdriver, detach the 2 claws and remove the assist grip plug.
Tech Tips
Tape the screwdriver tip before use.
-
-
REMOVE ASSIST GRIP SUB-ASSEMBLY (w/ Rear No. 2 Seat)
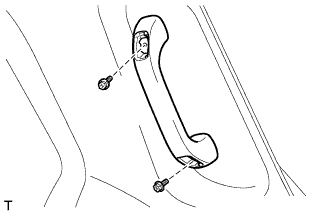
Tech Tips
Use the same procedure for the other assist grip.
-
Remove the 2 bolts and assist grip.
-
-
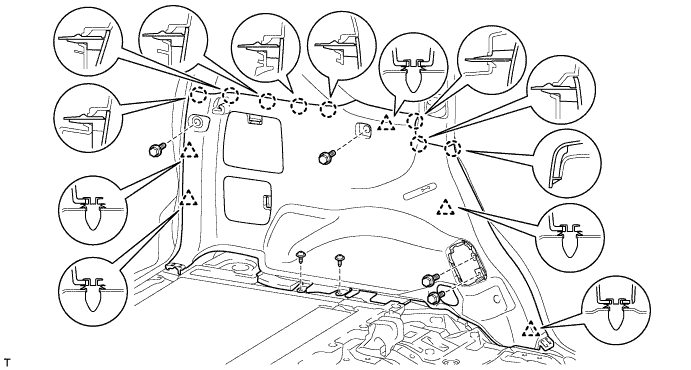
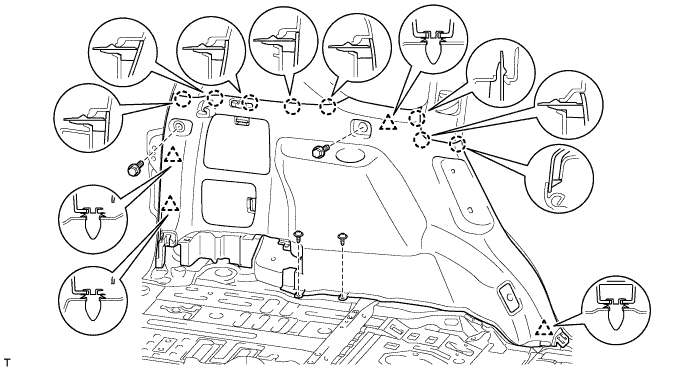
REMOVE DECK TRIM SIDE PANEL ASSEMBLY LH
-
w/o Rear No. 2 Seat:
-
Remove the bolt and disconnect the rear No. 1 seat outer belt floor anchor.
-
Detach the 6 claws and 2 guides and disconnect the rear seatback lock control lever base.
-
Remove the 4 bolts and 2 screws.
-
Detach the 5 clips and 8 claws.
-
Pass the rear seatback lock control lever base through the deck trim side panel and remove the deck trim side panel.
-
-
w/ Rear No. 2 Seat:
-
Remove the bolt and disconnect the rear No. 1 seat outer belt floor anchor.
-
Remove the bolt and disconnect the rear No. 2 seat outer belt floor anchor.
-
Remove the 2 bolts and 2 screws.
-
Detach the 4 clips and 8 claws and remove the deck trim side panel.
-
-
-
REMOVE REAR QUARTER TRIM PANEL ASSEMBLY LH

-
w/o Rear No. 2 Seat:
-
Detach the 7 clips and 2 guides and remove the rear quarter trim panel.
-
-
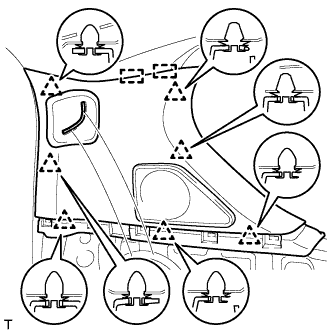
w/ Rear No. 2 Seat:
-
Detach the 7 clips and 2 guides.
-
Detach the 4 clips and 2 guides, pass the rear No. 2 seat outer belt floor anchor through the rear quarter trim panel and remove the rear quarter trim panel.
-
-
-
REMOVE DOOR SCUFF PLATE ASSEMBLY LH
Text in Illustration *1 Protective Tape
-
Put protective tape around the door scuff plate.
-
Using a screwdriver, detach the 4 clips, 10 claws and 2 guides and remove the door scuff plate.
Tech Tips
Tape the screwdriver tip before use.
-
-
REMOVE DOOR SCUFF PLATE ASSEMBLY RH (for RHD)
Tech Tips
Use the same procedure described for the LH side.
-
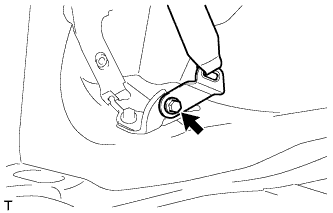
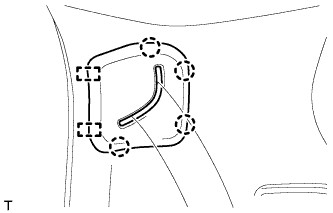
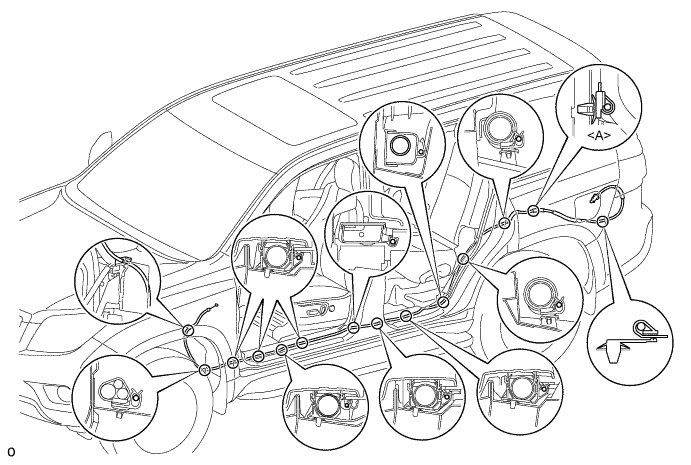
REMOVE FUEL LID LOCK OPEN LEVER SUB-ASSEMBLY
-

Detach the 3 claws.
-
Remove the fuel lid lock control cable assembly and fuel lid lock open lever sub-assembly.
-
-
REMOVE FRONT FLOOR CARPET ASSEMBLY
-
for LHD:
-

Detach the 6 clamps and fold back the front floor carpet from the floor carpet hooks.
-
-
for RHD:
-
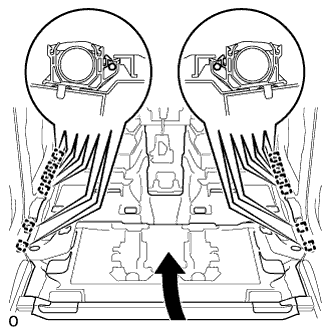
Detach the 12 clamps and fold back the front floor carpet from the floor carpet hooks.
-
-
-
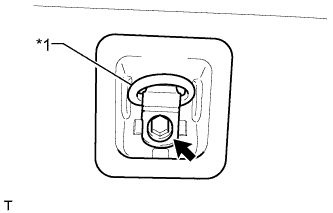
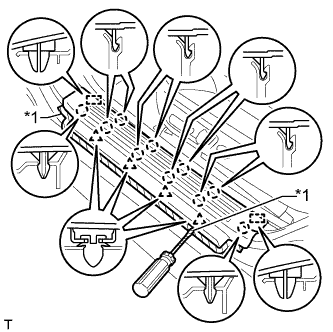
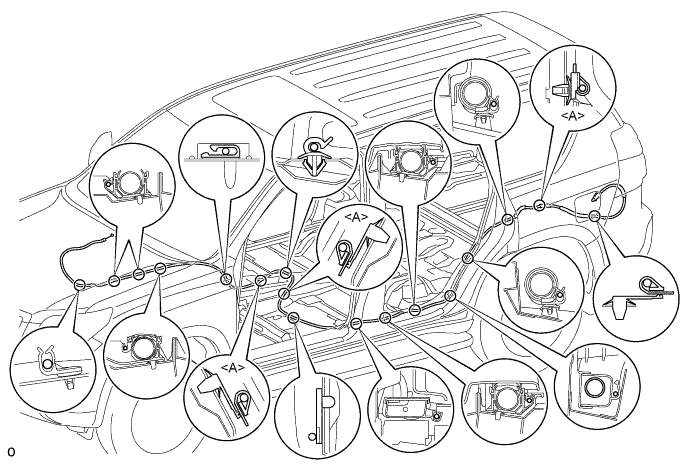
REMOVE FUEL LID LOCK CONTROL CABLE SUB-ASSEMBLY
-
Turn the cable counterclockwise and remove the cable from the retainer.
-

Turn the lock retainer counterclockwise and remove the lock retainer.
-
for LHD:
-
Using a clip remover, detach the clamp labeled <A>.
-
Detach the 13 clamps and remove the fuel lid lock control cable.
-
-
for RHD:
-
Using a clip remover, detach the 3 clamps labeled <A>.
-
Detach the 14 clamps and remove the fuel lid lock control cable.
-
-