HOOD REASSEMBLY

Tech Tips
-
Use the same procedure for RHD and LHD vehicles.
-
The procedure listed below is for LHD vehicles.
-
INSTALL HOOD SUPPORT ASSEMBLY LH
Note
-
Avoid touching the piston rod as much as possible to prevent foreign matter from attaching to it. Be sure to hold the cylinder while servicing.
-
Do not wear cotton gloves or other similar materials when handling the piston rod. Fibers may attach to the rod and result in gas leaks.
-
In order to prevent the piston rod from deforming, do not apply any horizontal load to the hood support.
-
When reusing the hood support assembly:
-
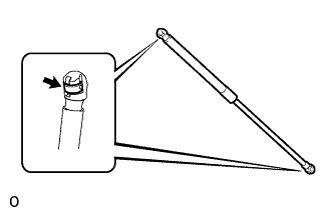
Install the 2 stop rings to the hood support assembly.
-
-
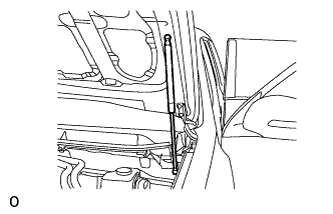
Install the hood support assembly.
Note
Install the hood support assembly while supporting the hood by hand.
-
Check that the hood support assembly is connected to the ball joint and cannot be pulled off.
-
-
INSTALL HOOD SUPPORT ASSEMBLY RH
Tech Tips
Use the same procedure described for the LH side.
-
CONNECT WASHER HOSE ASSEMBLY
-
Attach the 4 clips and connect the washer hose assembly.
-
-
INSTALL WASHER NOZZLE SUB-ASSEMBLY
-
Connect a new washer nozzle sub-assembly to the washer hose.
-
Attach the 2 claws to install the washer nozzle sub-assembly.
-
-
INSPECT WASHER NOZZLE SUB-ASSEMBLY
-
With the engine running, check the position that the washer fluid hits the windshield.
Standard Washer fluid hits the windshield in the areas shown in the illustration. 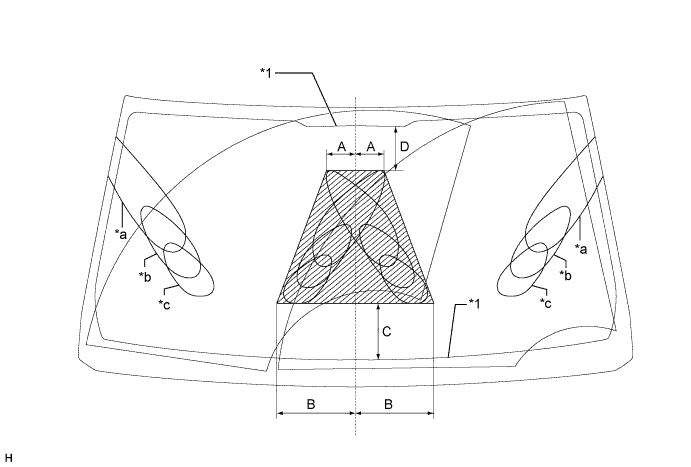
Text in Illustration *1 Ceramic Line - - *a Upper Limit *b Standard *c Lower Limit - - 
Washer Fluid Spray Area - - Standard Clearance Area Specified Condition Area Specified Condition A 78 mm (3.07 in.) B 213 mm (8.39 in.) C 158 mm (6.22 in.) D 124 mm (4.88 in.) Tech Tips
If the result is not as specified, replace the malfunctioning washer nozzle sub-assembly.
-
-
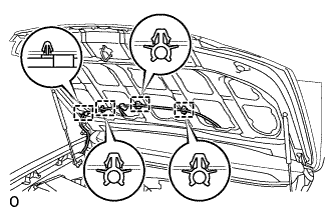
INSTALL HOOD INSULATOR
-
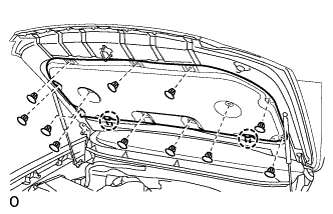
Attach the 2 claws.
-
Install the hood insulator with the 11 clips.
-
-
INSTALL HOOD TO RADIATOR SUPPORT SEAL
-
Attach the 7 clips to install the hood to radiator support seal.
-
-
INSTALL FRONT HOOD MOULDING ASSEMBLY
-
Install the front hood moulding with the 7 nuts.
-