HOOD DISASSEMBLY

-
REMOVE FRONT HOOD MOULDING ASSEMBLY
-
Remove the 7 nuts and front hood moulding.
-
-
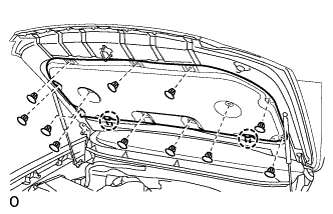
REMOVE HOOD TO RADIATOR SUPPORT SEAL
-

Using a clip remover, detach the 7 clips and remove the hood to radiator support seal.
-
-
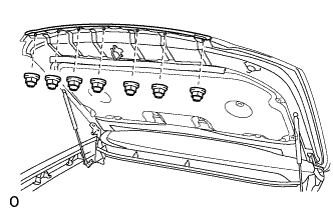
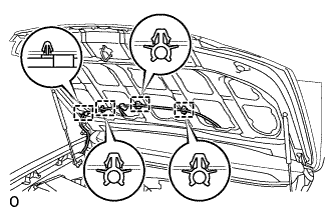
REMOVE HOOD INSULATOR
-
Using a clip remover, remove the 11 clips.
-
Detach the 2 claws and remove the hood insulator.
-
-
REMOVE WASHER NOZZLE SUB-ASSEMBLY
-
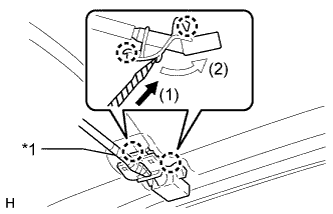
Text in Illustration *1 Protective Tape Using a screwdriver, detach the 2 claws and separate the washer nozzle sub-assembly as shown in the illustration.
Tech Tips
Tape the screwdriver tip before use.
Note
Be careful not to damage the windshield.
-
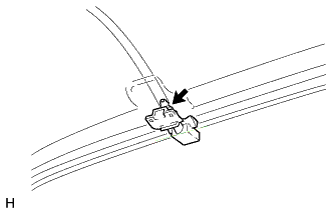
Disconnect the washer nozzle sub-assembly from the washer hose.
Note
Washer nozzles cannot be reused.
-
-
DISCONNECT WASHER HOSE ASSEMBLY
-
Detach the 4 clamps and disconnect the washer hose assembly.
-
-
REMOVE HOOD SUPPORT ASSEMBLY LH
Note
-
Avoid touching the piston rod as much as possible to prevent foreign matter from attaching to it. Be sure to hold the cylinder while performing work.
-
Do not wear cotton gloves or other similar materials when handling the piston rod. Fibers may attach to the rod and result in gas leaks.
-
In order to prevent the piston rod from deforming, do not apply any horizontal load to the hood support.
-
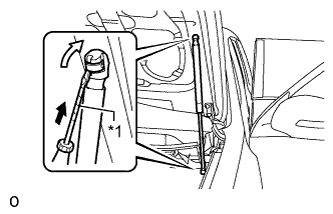
Text in Illustration *1 Protective Tape Using a screwdriver, remove the 2 stop rings as shown in the illustration, and then remove the hood support.
Tech Tips
Tape the screwdriver tip before use.
Note
Remove the hood support assembly while supporting the hood panel with one hand.
-
-
REMOVE HOOD SUPPORT ASSEMBLY RH
Tech Tips
Use the same procedure described for the LH side.