FRONT CONSOLE BOX (for Bench Seat Type) REMOVAL

Tech Tips
-
Use the same procedure for RHD and LHD vehicles.
-
The procedure listed below is for LHD vehicles.
-
REMOVE INTEGRATION CONTROL AND PANEL ASSEMBLY

-
Detach the 4 clips.
-
Disconnect the connector and remove the integration control and panel assembly.
-
-
REMOVE NO. 2 INSTRUMENT PANEL FINISH PANEL CUSHION
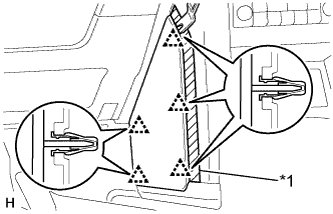
Text in Illustration *1 Protective Tape
-
Put protective tape around the No. 2 instrument panel finish panel cushion.
-
Using a moulding remover, detach the 5 clips and remove the No. 2 instrument panel finish panel cushion.
-
-
REMOVE NO. 1 INSTRUMENT PANEL FINISH PANEL CUSHION
Tech Tips
Use the same procedure described for the No. 2 instrument panel finish panel cushion.
-
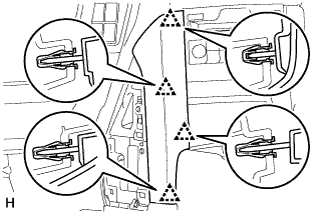
REMOVE INSTRUMENT PANEL FINISH PANEL END LH
-
Detach the 4 clips and remove the instrument panel finish panel end.
-
-
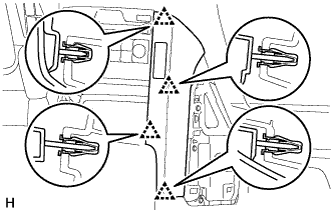
REMOVE INSTRUMENT PANEL FINISH PANEL END RH
-
Detach the 4 clips.
-
Disconnect the connector and remove the instrument panel finish panel end.
-
-
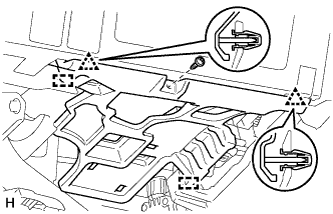
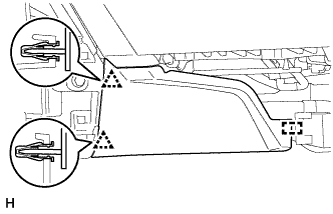
REMOVE FRONT CONSOLE UPPER PANEL GARNISH
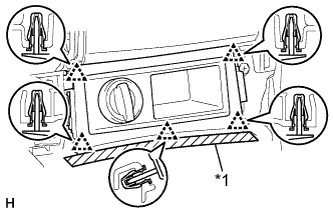
Text in Illustration *1 Protective Tape
-
Put protective tape around the front console upper panel garnish.
-
Detach the 5 clips.
-
Disconnect the connectors and remove the front console upper panel garnish.
-
-
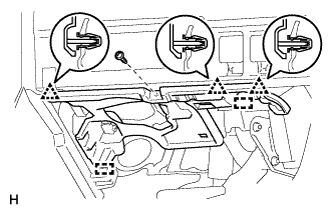
REMOVE NO. 1 INSTRUMENT PANEL UNDER COVER SUB-ASSEMBLY
-
for LHD:
-
Remove the screw.
-
Detach the 2 clips and 2 guides and remove the No. 1 instrument panel under cover.
-
-
for RHD:
-
Remove the screw.
-
Detach the 3 clips and 2 guides and remove the No. 1 instrument panel under cover.
-
-
-
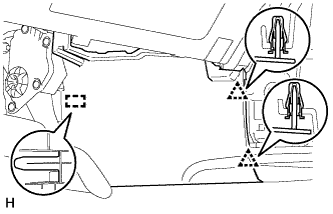
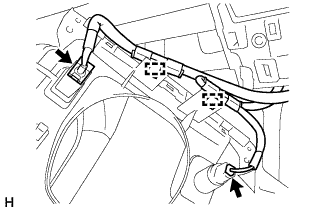
REMOVE FRONT NO. 1 CONSOLE BOX INSERT
-
Detach the 2 clips and guide and remove the front No. 1 console box insert.
-
-
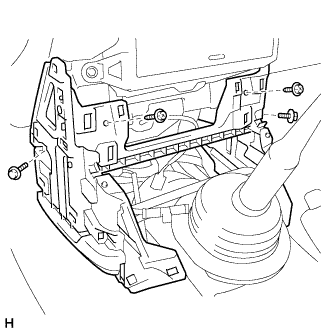
REMOVE NO. 2 INSTRUMENT PANEL UNDER COVER SUB-ASSEMBLY
-
Remove the screw.
-
Detach the 3 clips and 2 guides and remove the No. 2 instrument panel under cover.
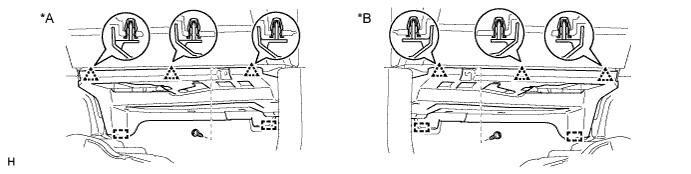
Text in Illustration *A for LHD *B for RHD
-
-
REMOVE FRONT NO. 2 CONSOLE BOX INSERT
-
Detach the 2 clips and guide and remove the front No. 2 console box insert.
-
-
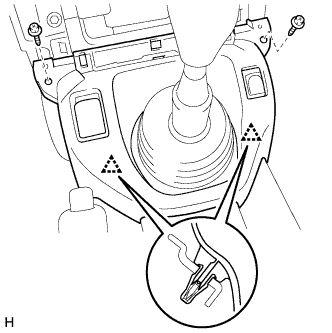
REMOVE UPPER CONSOLE PANEL
-
Remove the 2 screws.
-
Detach the 2 clips.
-
Disconnect the connectors, detach the clamps and remove the upper console panel.
-
-
REMOVE REAR CONSOLE BOX ASSEMBLY
-
Remove the 2 screws, 2 bolts and rear console box.
-