FUEL SENDER GAUGE ASSEMBLY INSTALLATION

-
INSTALL FUEL SENDER GAUGE ASSEMBLY
-
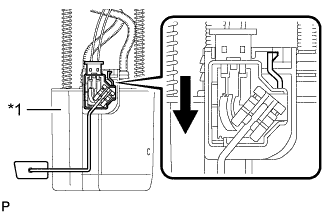
Text in Illustration *1 Fuel Sub-Tank 
Slide Set the fuel sender gauge on the fuel sub-tank. Then slide the fuel sender gauge downward to install it.
-
Connect the fuel sender gauge connector.
-
-
INSTALL FUEL SENDER GAUGE ASSEMBLY (for Fuel Sub Tank)
-
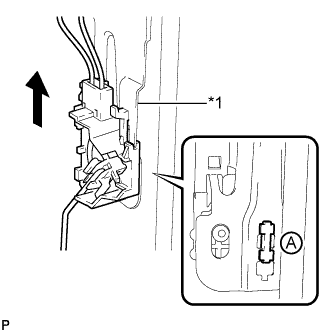
Text in Illustration *1 Fuel Gauge Support Slide Set the fuel sender gauge on the fuel gauge support. Then slide the fuel sender gauge upward to install it.
Note
Make sure the part labeled A in the illustration is securely inserted into the hole of the fuel gauge support before sliding the fuel sender gauge upward.
-
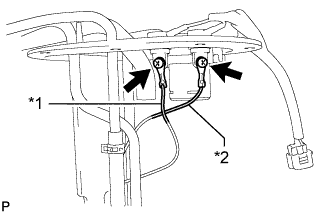
Text in Illustration *1 Lead Wire (Black) *2 Lead Wire (Red) Install the 2 lead wires with the 2 screws.
- Torque:
- 2.0 N*m { 20 kgf*cm, 18 in.*lbf }
Note
Be sure to install the lead wires in the correct locations according to their color as shown in the illustration.
-
-
INSTALL FUEL TANK VENT TUBE ASSEMBLY
-
for Single Tank Type:
Install the fuel tank vent tube assembly Click here.
-
for Double Tank Type:
-
for Fuel Main Tank:
Install the fuel tank vent tube assembly Click here.
-
for Fuel Sub Tank:
Install the fuel tank vent tube assembly Click here.
-
-