CRANKSHAFT POSITION SENSOR (w/ DPF) REMOVAL

-
REMOVE UPPER RADIATOR SUPPORT SEAL
-
Remove the 13 clips and upper radiator support seal.
-
-
REMOVE FRONT BUMPER LOWER COVER
-
Remove the clip, 5 bolts and front bumper lower cover.
-
-
REMOVE NO. 1 ENGINE UNDER COVER SUB-ASSEMBLY
-
Remove the 4 bolts and No. 1 engine under cover.
-
-
DRAIN ENGINE COOLANT
CAUTION:
Do not remove the radiator reservoir cap while the engine and radiator are still hot. Pressurized, hot engine coolant and steam may be released and cause serious burns.
-
Loosen the radiator drain cock plug.
Tech Tips
Collect the coolant in a container and dispose of it according to the regulations in your area.
-
Drain the coolant by removing the reservoir cap and, using a wrench, remove the vent plug.
-
Loosen the cylinder block drain cock plug.
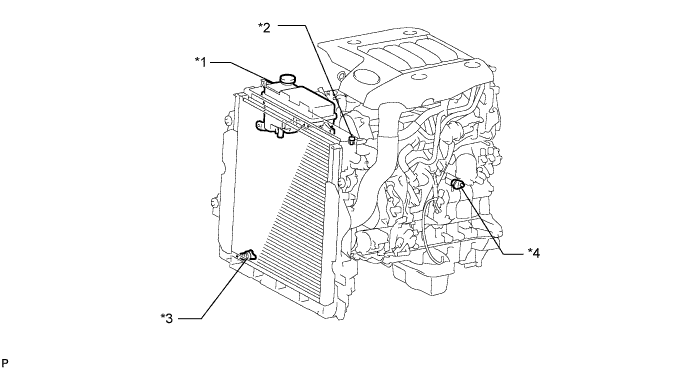
Text in Illustration *1 Radiator Reservoir *2 Vent Plug *3 Radiator Drain Cock Plug *4 Cylinder Block Drain Cock Plug
-
-
REMOVE NO. 3 ENGINE WIRE (for Cold Area Specification Vehicles)
-
Remove the 2 nuts from the battery terminal.
-
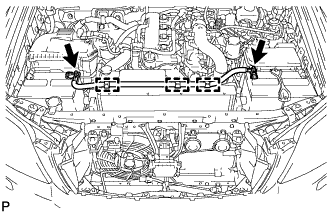
Detach the 3 wire harness clamps.
-
Remove the No. 3 engine wire from the fan shroud.
-
-
REMOVE NO. 1 AIR HOSE
-
Loosen the 2 clamps.
-
Remove the No. 1 air hose from the inlet pipe and intercooler.
-
-
REMOVE INTERCOOLER AIR HOSE
-
Disconnect the No. 2 vacuum transmitting hose from the intercooler.
-
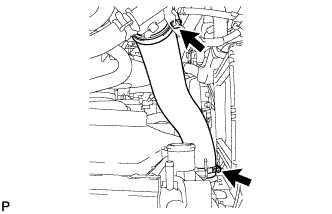
Loosen the 2 clamps.
-
Remove the intercooler air hose from the intake pipe and intercooler.
-
-
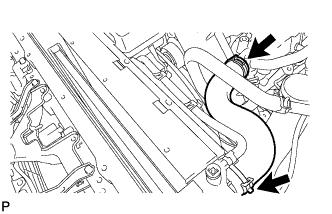
REMOVE NO. 1 RADIATOR HOSE
-
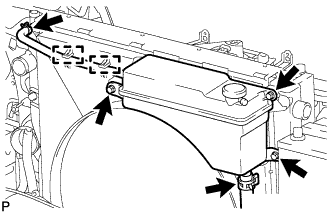
REMOVE FAN SHROUD
-
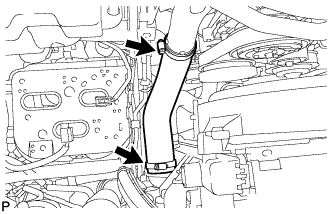
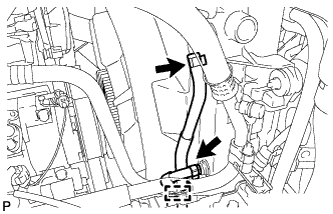
Disconnect the No. 1 water by-pass hose and detach the 2 clamps from the fan shroud.
-
Disconnect the No. 2 water by-pass hose from the radiator reservoir.
-
Remove the 3 bolts and radiator reservoir.
-
for Automatic Transmission:
-
Remove the inlet and outlet oil cooler hoses and detach the clamp from the fan shroud.
-
Disconnect the 2 oil cooler hoses from the radiator.
-
-
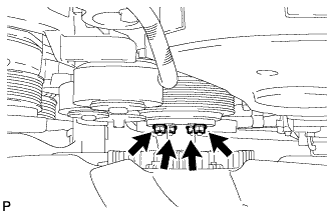
Loosen the 4 nuts holding the fan with fluid coupling.
-
Remove the fan and generator V belt Click here.
-
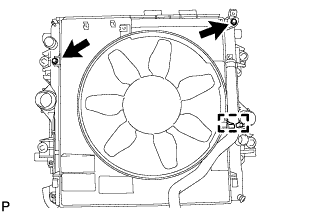
Remove the 2 bolts holding the fan shroud.
-
Remove the 4 nuts for the fan with fluid coupling, and then remove the shroud together with the fan with fluid coupling.
Note
Be careful not to damage the radiator core.
-
Detach the No. 2 water by-pass hose from the hose clamp on the fan shroud.
-
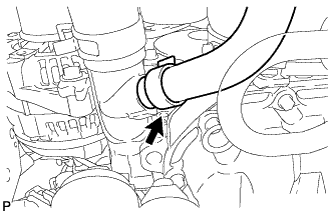
Remove the No. 2 water by-pass hose from the water inlet.
-
Remove the fan pulley from the water pump.
-
-
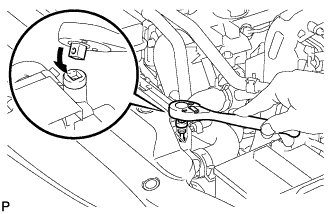
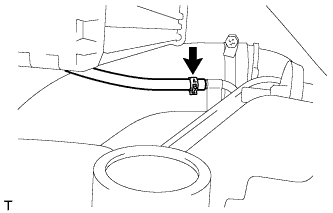
REMOVE CRANKSHAFT POSITION SENSOR
-
Disconnect the crankshaft position sensor connector.
-
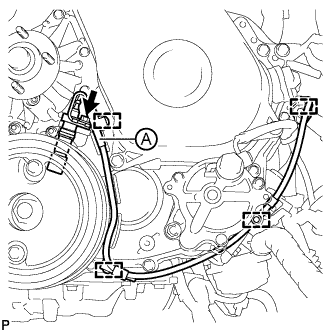
Remove the clamp labeled A in the illustration.
Note
-
Make sure that no portion of the clamp labeled A remains in the clamp installation hole. If there is any portion of the clamp remaining, remove it.
-
Do not reuse the clamp labeled A.
-
-
Detach the 3 wire harness clamps and remove the bolt and crankshaft position sensor.
-