WATER PUMP ON-VEHICLE INSPECTION

-
REMOVE FAN SHROUD
-
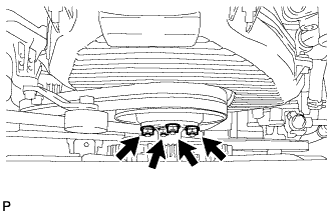
Loosen the 4 nuts holding the fluid coupling fan.
-
Remove the vane pump V belt and the fan and generator V belt Click here.
-
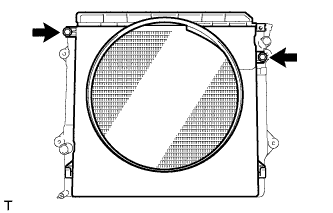
Remove the 2 bolts holding the fan shroud.
-
Remove the 4 nuts of the fluid coupling fan, and then remove the shroud together with the coupling fan.
Note
Be careful not to damage the radiator core.
-
Remove the fan pulley from the water pump.
-
-
INSPECT WATER PUMP ASSEMBLY
-
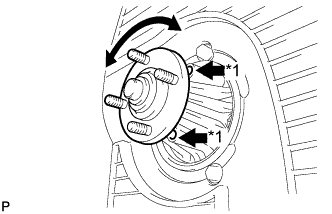
Text in Illustration *1 Air Hole Visually check the air holes for coolant leakage.
If leakage is found, replace the water pump assembly.
-
Turn the pulley, and check that the pump bearing moves smoothly and quietly.
If the bearing moves roughly or noisily, replace the water pump assembly.
-
-
INSPECT FLUID COUPLING ASSEMBLY
-
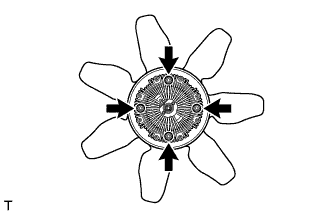
Remove the 4 nuts and fan.
-
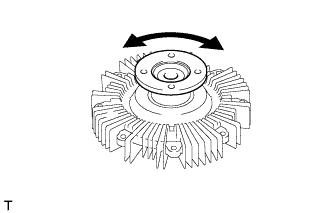
Check the fluid coupling for damage or silicon oil leaks. If necessary, replace the fluid coupling.
-
Install the fan with the 4 nuts.
- Torque:
- 6.5 N*m { 66 kgf*cm, 58 in.*lbf }
-
-
INSTALL FAN SHROUD
-
Install the fan pulley to the water pump.
-
Install the shroud together with the coupling fan between the radiator and engine.
Note
Be careful not to damage the radiator core.
-
Temporarily install the fluid coupling fan to the fan pulley with the 4 nuts. Tighten the nuts as much as possible by hand.
-
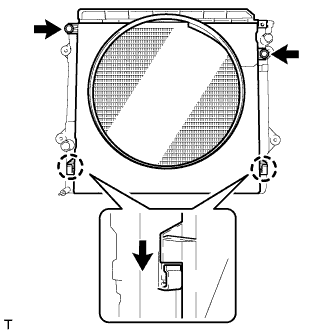
Attach the claws of the shroud as shown in the illustration.
-
Install the shroud with the 2 bolts.
- Torque:
- 5.0 N*m { 51 kgf*cm, 44 in.*lbf }
-
Install the fan and generator V belt and vane pump V belt Click here.
-
Tighten the 4 nuts of the fluid coupling fan.
- Torque:
- 19 N*m { 189 kgf*cm, 14 ft.*lbf }
-