EXHAUST PIPE (w/ DPF) REMOVAL

-
REMOVE TAILPIPE ASSEMBLY
-
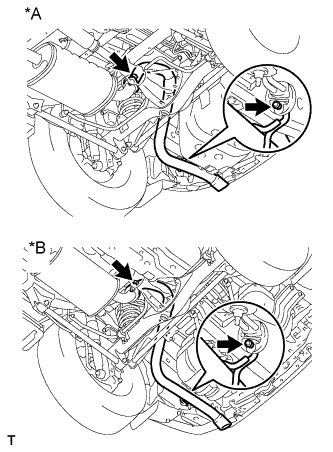
Text in Illustration *A for 3 Door *B for 5 Door Remove the 2 bolts and disconnect the tailpipe from the exhaust pipe support.
-
Remove the gasket.
-
-
REMOVE CENTER EXHAUST PIPE ASSEMBLY
-
for 3 Door:
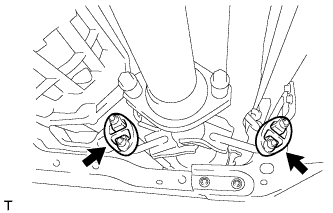
Remove the 2 bolts and 2 compression springs, and then disconnect the center exhaust pipe from the 2 exhaust pipe supports.
-

for 5 Door:
-
Remove the 2 bolts and 2 compression springs, and then disconnect the center exhaust pipe from the 3 exhaust pipe supports.
-
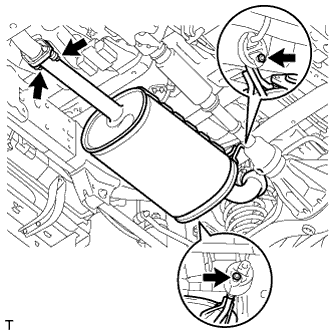
Remove the 2 bolts and exhaust pipe damper.
-
Remove the nuts and No. 1 exhaust pipe heat insulator.
-
-
Remove the gasket.
-
-
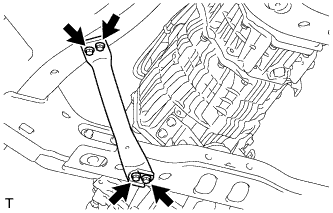
REMOVE FRONT SUSPENSION MEMBER BRACKET LH (for Manual Transmission)
-
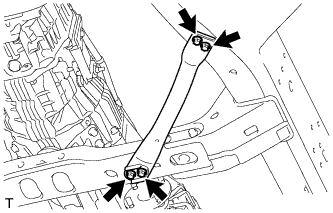
Remove the 4 bolts and front suspension member bracket LH.
-
-
REMOVE FRONT SUSPENSION MEMBER BRACKET RH (for Manual Transmission)
-
Remove the 4 bolts and front suspension member bracket RH.
-
-
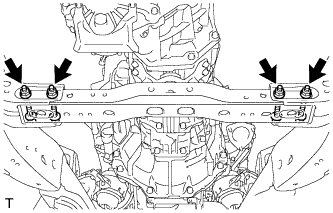
REMOVE FRONT SUSPENSION MEMBER BRACKET RH (for Automatic Transmission)
-
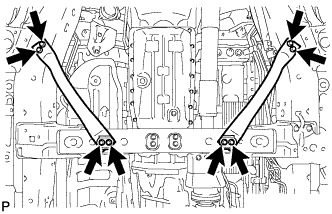
Remove the 8 bolts, front bracket suspension member LH and front bracket suspension member RH.
-
-
SUPPORT TRANSMISSION AND TRANSFER ASSEMBLY
-
Support the transmission and transfer with a transmission jack.
Note
For safety reasons, install the No. 3 frame crossmember after removing the front exhaust pipe.
-
-
REMOVE NO. 3 FRAME CROSSMEMBER SUB-ASSEMBLY (for Automatic Transmission)
-
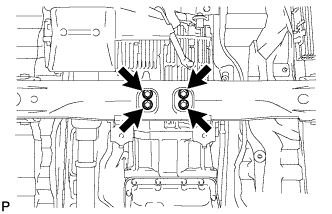
Remove the 4 bolts of the rear engine mounting insulator.
-
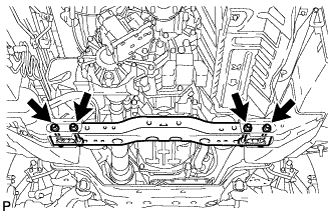
Remove the 4 nuts, 4 bolts and frame crossmember.
-
-
REMOVE NO. 3 FRAME CROSSMEMBER SUB-ASSEMBLY (for Manual Transmission)
-
Support the rear side of the transmission with a support stand.
-

Remove the 4 bolts from the No. 3 frame crossmember sub-assembly.
-
Remove the 4 nuts, 4 bolts and No. 3 frame crossmember sub-assembly.
-
-
REMOVE NO. 2 EXHAUST PIPE SUPPORT BRACKET
-
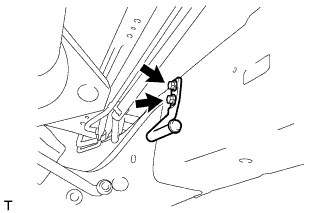
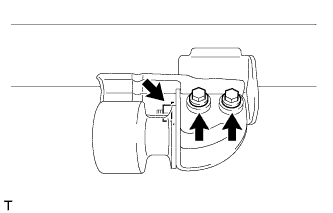
Remove the 2 bolts and No. 2 exhaust pipe support bracket from the body.
-
-
REMOVE NO. 3 EXHAUST PIPE SUPPORT BRACKET
-
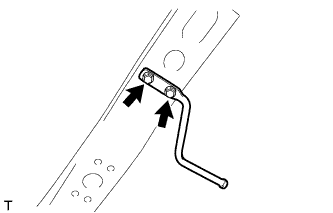
Remove the 2 bolts and No. 3 exhaust pipe support bracket from the No. 3 frame crossmember.
-
-
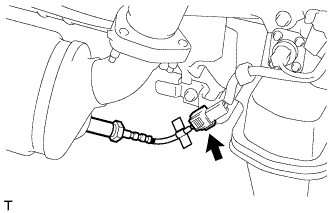
REMOVE AIR FUEL RATIO SENSOR
-
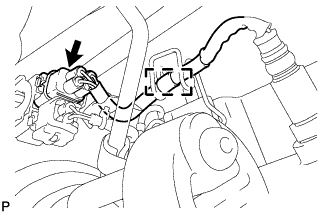
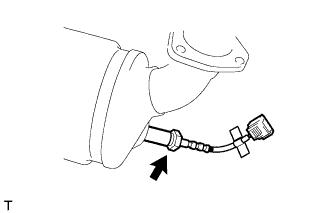
Disconnect the air fuel ratio sensor connector and detach the clamp.
-

Using SST, remove the air fuel ratio sensor from the front exhaust pipe.
- SST
- 09224-00010
-
-
REMOVE FRONT EXHAUST PIPE ASSEMBLY
-
Disconnect the exhaust gas temperature sensor connector.
-
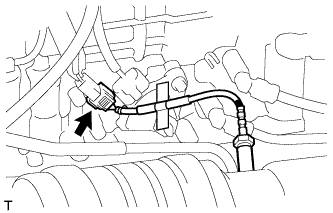
Disconnect the No. 2 exhaust gas temperature sensor connector.
-

Disconnect the No. 3 exhaust gas temperature sensor connector.
-
Disconnect the No. 6 exhaust pipe air hose from the front exhaust pipe.
-
Disconnect the No. 7 exhaust pipe air hose from the front exhaust pipe.
-
Remove the 2 exhaust pipe supports.
Tech Tips
Remove the exhaust pipe supports before removing the No. 3 frame crossmember.
-
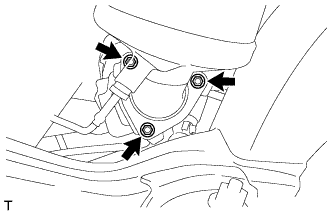
Remove the 3 nuts and front exhaust pipe.
-
Remove the gasket.
-
-
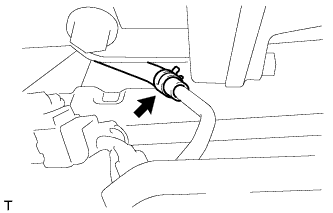
REMOVE EXHAUST GAS TEMPERATURE SENSOR
Note
If the sensor is dropped, replace it with a new one.
-
Using a 14 mm union nut wrench, remove the exhaust gas temperature sensor.
-
-
REMOVE NO. 2 EXHAUST GAS TEMPERATURE SENSOR
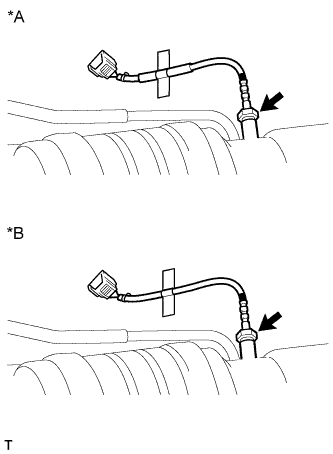
Text in Illustration *A for Automatic Transmission *B for Manual Transmission Note
If the sensor is dropped, replace it with a new one.
-
Using a 14 mm union nut wrench, remove the No. 2 exhaust gas temperature sensor.
-
-
REMOVE NO. 3 EXHAUST GAS TEMPERATURE SENSOR

Note
If the sensor is dropped, replace it with a new one.
-
Detach the sensor wire harness.
-
Using a 14 mm union nut wrench, remove the No. 3 exhaust gas temperature sensor.
-
-
REMOVE NO. 3 WIRING HARNESS CLAMP BRACKET
-
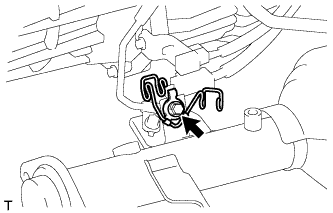
Remove the bolt and No. 3 wiring harness clamp bracket.
-
-
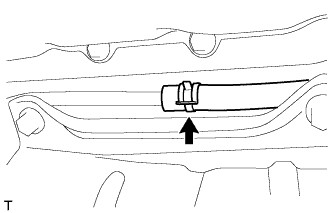
REMOVE EXHAUST PIPE CLAMP SUB-ASSEMBLY
-
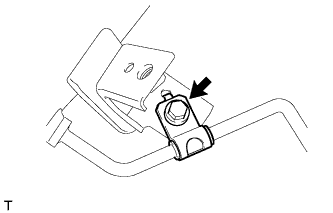
Remove the bolt and exhaust pipe clamp.
-
-
REMOVE MONOLITHIC CONVERTER PROTECTOR
-
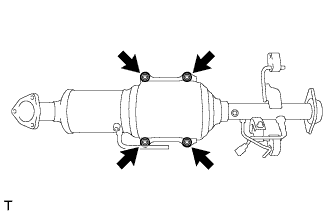
Remove the 4 bolts and 4 nuts.
-
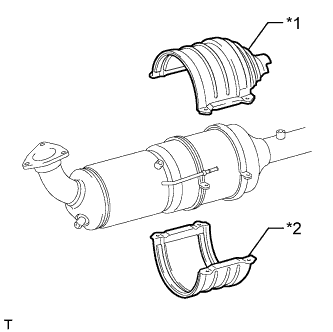
Text in Illustration *1 Upper Monolithic Converter Protector *2 Lower Monolithic Converter Protector Remove the upper monolithic converter protector and lower monolithic converter protector.
-
-
REMOVE CONVERTER PROTECTOR STAY
-
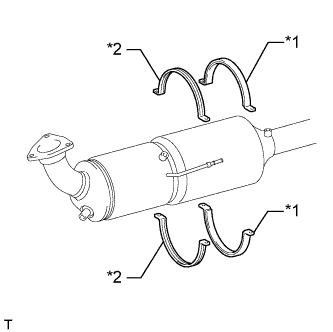
Text in Illustration *1 No. 1 Converter Protector Stay *2 No. 2 Converter Protector Stay Remove the 2 No. 1 converter protector stays and 2 No. 2 converter protector stays.
-