EXHAUST GAS TEMPERATURE SENSOR INSTALLATION

-
INSTALL NO. 3 EXHAUST GAS TEMPERATURE SENSOR
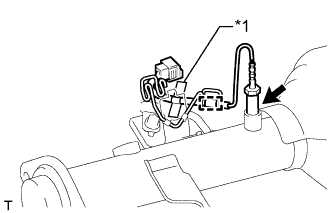
Text in Illustration *1 Blue Tape Note
If the sensor is dropped, replace it with a new one.
-
Using a 14 mm union nut wrench, install the No. 3 exhaust gas temperature sensor.
- Torque:
- 30 N*m { 306 kgf*cm, 22 ft.*lbf }
Note
Use the formula to calculate special torque values for situations where a union nut wrench is combined with a torque wrench Click here.
Tech Tips
The identification tape on the exhaust gas temperature sensor is blue.
-
Attach the No. 3 exhaust gas temperature sensor wire harness.
-
-
INSTALL NO. 2 EXHAUST GAS TEMPERATURE SENSOR
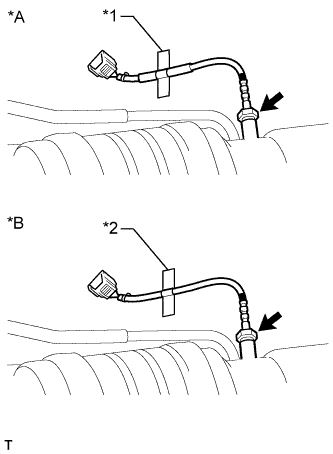
Text in Illustration *A for Automatic Transmission *B for Manual Transmission *1 Yellow Tape *2 Red Tape Note
If the sensor is dropped, replace it with a new one.
-
Using a 14 mm union nut wrench, install the No. 2 exhaust gas temperature sensor.
- Torque:
- 30 N*m { 306 kgf*cm, 22 ft.*lbf }
Note
Use the formula to calculate special torque values for situations where a union nut wrench is combined with a torque wrench Click here.
Tech Tips
Refer to the illustration to identify the No. 2 exhaust gas temperature sensor being used.
-
-
INSTALL EXHAUST GAS TEMPERATURE SENSOR
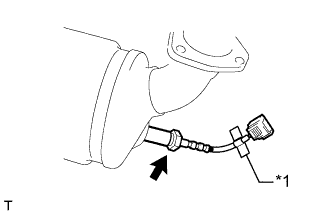
Text in Illustration *1 Green Tape Note
If the sensor is dropped, replace it with a new one.
-
Using a 14 mm union nut wrench, install the exhaust gas temperature sensor.
- Torque:
- 30 N*m { 306 kgf*cm, 22 ft.*lbf }
Note
Use the formula to calculate special torque values for situations where a union nut wrench is combined with a torque wrench Click here.
Tech Tips
The identification tape on the exhaust gas temperature sensor is green.
-
-
INSTALL FRONT EXHAUST PIPE ASSEMBLY