ПЕРЕДНИЙ САЛЬНИК КОЛЕНЧАТОГО ВАЛА СНЯТИЕ
-
REMOVE FRONT FENDER SPLASH SHIELD SUB-ASSEMBLY LH
-
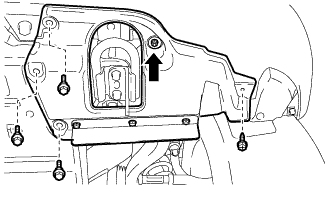
Выверните 3 болта и винт.
-
Поверните фиксатор, указанный стрелкой на рисунке, чтобы снять брызговик левого переднего крыла в сборе.
-
-
REMOVE FRONT FENDER SPLASH SHIELD SUB-ASSEMBLY RH
-
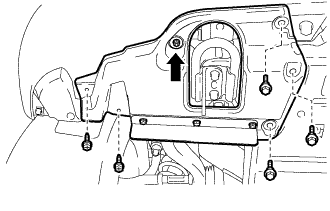
Выверните 3 болта и 2 винта.
-
Поверните фиксатор, указанный стрелкой на рисунке, чтобы снять брызговик правого переднего крыла в сборе.
-
-
REMOVE NO. 1 ENGINE UNDER COVER SUB-ASSEMBLY
-
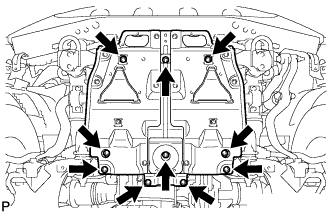
Выверните 10 болтов и снимите защиту картера двигателя № 1.
-
-
DRAIN ENGINE COOLANT
CAUTION:
Не снимайте пробку радиатора, пока двигатель и радиатор не остынут. Выброс горячей охлаждающей жидкости и пара под давлением может стать причиной серьезных ожогов.
-
Ослабьте пробку сливного крана радиатора.
Tech Tips
Слейте охлаждающую жидкость в контейнер и утилизируйте ее в соответствии с местными требованиями.
-
Снимите пробку радиатора. Затем слейте охлаждающую жидкость из радиатора.
-
Ослабьте 2 пробки сливного крана блока цилиндров. Затем слейте охлаждающую жидкость из двигателя.
-
Затяните 2 пробки сливных кранов блока цилиндров.
- Torque:
- 13 Н*м { 133 кгс*см, 10 фунт-сила-футов }
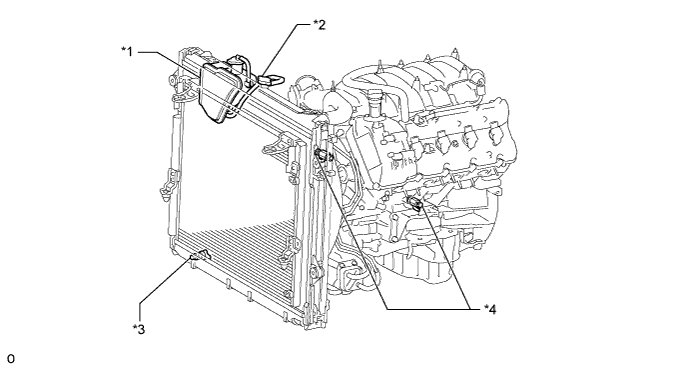
Обозначения на рисунке *1 Бачок радиатора *2 Пробка радиатора *3 Пробка сливного крана радиатора *4 Пробка сливного крана блока цилиндров -
Затяните пробку сливного крана радиатора вручную.
-
-
REMOVE V-BANK COVER SUB-ASSEMBLY
-
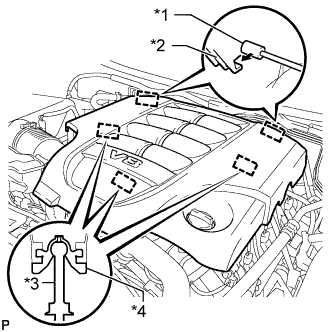
Обозначения на рисунке *1 Кронштейн *2 Крепежный крюк *3 Штифт *4 Уплотнительная шайба Поднимите переднюю часть декоративной крышки V-образного двигателя, чтобы открепить 3 штифта. Затем снимите 2 крюка декоративной крышки V-образного двигателя с кронштейна, чтобы снять декоративную крышку V-образного двигателя.
-
-
REMOVE NO. 1 RADIATOR HOSE
-
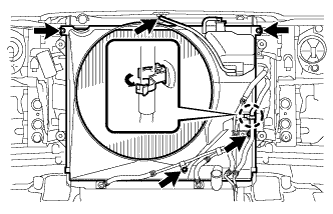
REMOVE FAN SHROUD
-

Loosen the 4 nuts holding the fluid coupling fan.
-
Remove the fan and generator V-belt Click here.
-
Disconnect the reservoir hose from the upper radiator tank.
-
Detach the claw to open the flexible hose clamp.
-
Remove the 2 bolts and disconnect the oil cooler tube from the fan shroud.
-
Remove the 2 bolts holding the fan shroud.
-
Remove the 4 nuts of the fluid coupling fan, and then remove the shroud together with the coupling fan.
Note
Be careful not to damage the radiator core.
-
Remove the fan pulley.
-
-
REMOVE OIL PRESSURE SENDER GAUGE ASSEMBLY
-
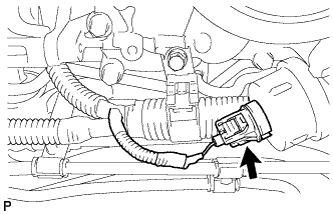
Disconnect the sender gauge connector.
-
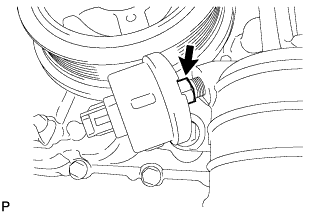
Remove the oil pressure sender gauge.
-
-
DISCONNECT COOLER COMPRESSOR ASSEMBLY
-
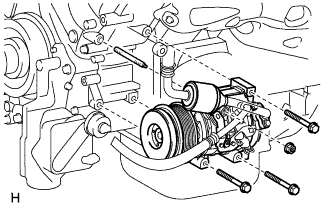
Remove the 3 bolts, nut and stud bolt, and disconnect the cooler compressor.
Tech Tips
It is not necessary to completely remove the compressor. With the hoses connected to the compressor, hang the compressor on the vehicle body with a rope.
-
-
DISCONNECT NO. 2 WATER BY-PASS PIPE SUB-ASSEMBLY
-
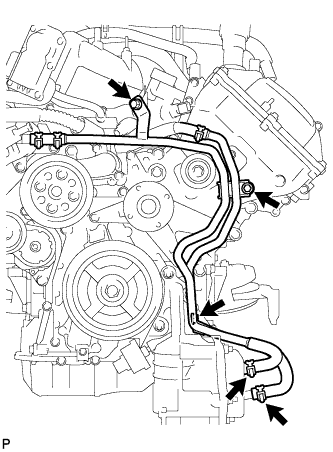
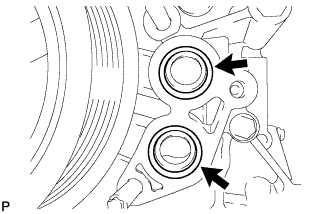
Remove the 3 bolts and disconnect the 2 water by-pass hoses from the oil cooler.
-
-
REMOVE NO. 1 OIL COOLER BRACKET
-
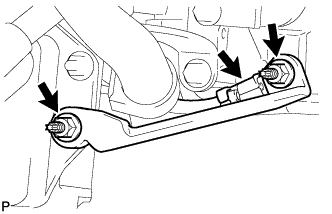
Remove the 2 nuts and bracket.
-
Disconnect the ground wire from the cylinder block.
-
-
REMOVE OIL FILTER BRACKET
-
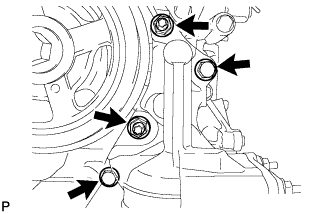
Remove the 2 bolts, 2 nuts and filter bracket.
-
Remove the 2 O-rings.
-
-
REMOVE CRANKSHAFT PULLEY
-
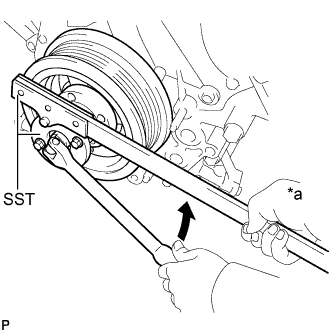
Text in Illustration *a Hold 
Turn Using SST, loosen the crankshaft pulley set bolt until 2 or 3 threads are engaged.
- SST
- 09213-70011
- 09330-00021
-
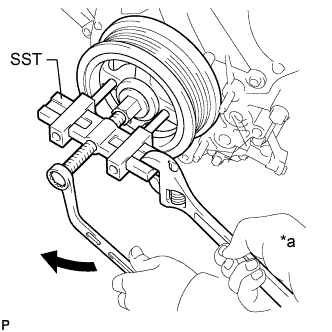
Text in Illustration *a Hold Turn Using the pulley set bolt and SST, remove the crankshaft pulley.
- SST
- 09950-50013 ( 09951-05010, 09952-05010, 09953-05010, 09954-05011 )
-
-
REMOVE CRANKSHAFT TIMING GEAR KEY
-
Remove the crankshaft timing gear key from the crankshaft.
-
-
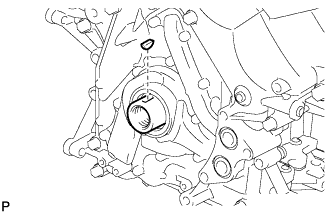
REMOVE FRONT CRANKSHAFT OIL SEAL
-
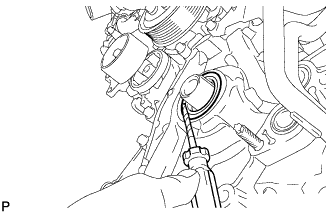
Using a screwdriver, pry out the oil seal.
Note
Do not damage the surface of the oil seal press fit hole and crankshaft.
Tech Tips
Tape the screwdriver tip before use.
-