-
Click here
REMOVE SPARE WHEEL CARRIER HINGE BRACKET (w/ Tire Carrier)
-
Detach the 2 claws and remove the bracket.
-
-
Click here
REMOVE SPARE WHEEL COVER SUB-ASSEMBLY (w/ Tire Carrier)
-
Remove the 2 nuts.
-
Detach the clip and remove the cover.
-
- Click here
REMOVE SPARE WHEEL CARRIER SUB-ASSEMBLY (w/ Tire Carrier)
-
Remove the spare tire.
-
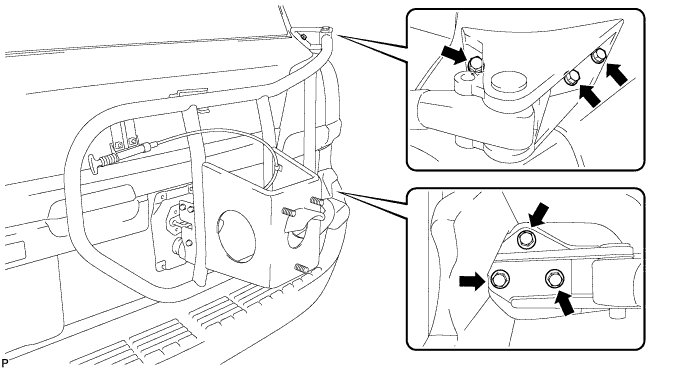
Remove the 6 bolts and spare wheel carrier.
-
-
Click here
REMOVE REAR QUARTER PANEL MUDGUARD LH
-
Remove the clip.
-
Using a T30 "TORX" socket, remove the 6 screws and mudguard.
-
-
Click here
REMOVE REAR QUARTER PANEL MUDGUARD RH
-
Remove the clip.
-
Using a T30 "TORX" socket, remove the 7 screws and mudguard.
-
- Click here
REMOVE REAR NO. 1 BUMPER PLATE
-
Put protective tape around the rear No. 1 bumper plate.
-
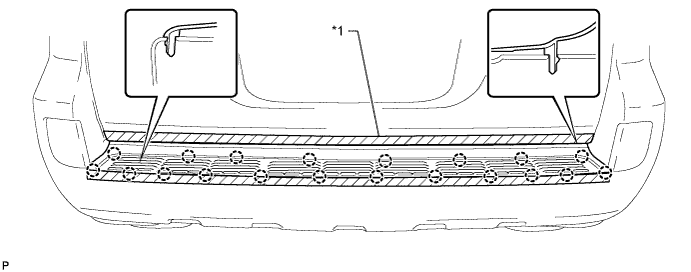
Detach the 20 claws and remove the rear No. 1 bumper plate.
Table 1. Text in Illustration *1 Protective Tape - -
-
- Click here
REMOVE REAR BUMPER COVER
Tip:For the rear bumper cover with tire carrier, use the procedures described below.
-
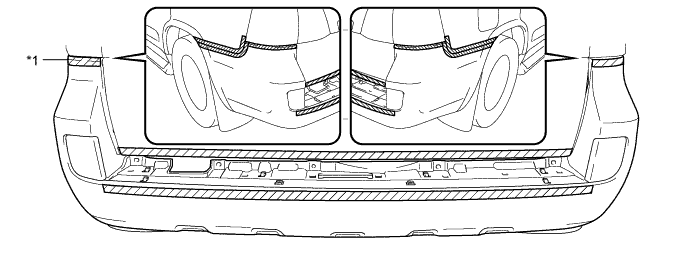
Put protective tape around the rear bumper cover.
Table 2. Text in Illustration *1 Protective Tape - - -
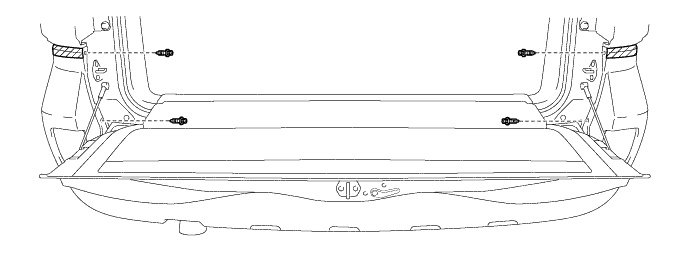
Open the tail gate and remove the 4 clips.
-
Close the tail gate.
-
Remove the 7 bolts, 6 screws and 2 clips.
-
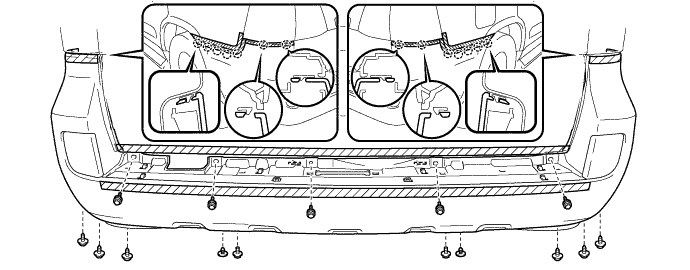
Detach the 14 claws and remove the rear bumper cover.
-
w/ TOYOTA Parking Assist-sensor System or w/ Rear Fog Light:
Disconnect the No. 2 frame wire connector.
-
- Click here
REMOVE REAR COMBINATION LIGHT ASSEMBLY LH
-
Using a screwdriver wrapped with protective tape, detach the 6 claws and remove the 2 cover.
Table 3. Text in Illustration *1 Protective Tape -
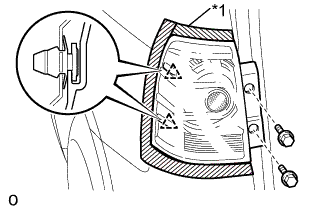
Put protective tape around the rear combination light assembly LH.
Table 4. Text in Illustration *1 Protective Tape -
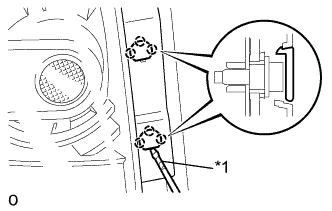
Remove the 2 bolts.
-
Detach the 2 clips and remove the rear combination light assembly LH.
-
Disconnect the connector.
-
- Click here
REMOVE REAR COMBINATION LIGHT ASSEMBLY RH
Tip:Use the same procedure described for the LH side.
- Click here
REMOVE REAR UPPER BUMPER RETAINER LH
-

Detach the 2 clips and remove the rear upper bumper retainer LH.
-
- Click here
REMOVE REAR UPPER BUMPER RETAINER RH
Tip:Use the same procedure described for the LH side.
- Click here
REMOVE REAR BUMPER SIDE SUPPORT LH
-
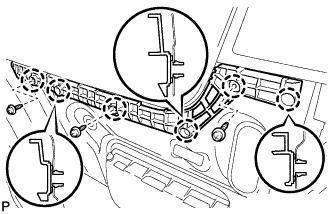
Remove the 3 screws.
-
Detach the 6 claws and remove the rear bumper side support LH.
-
- Click here
REMOVE REAR BUMPER SIDE SUPPORT RH
Tip:Use the same procedure described for the LH side.
- Click here
REMOVE REAR NO. 2 BUMPER REINFORCEMENT
-
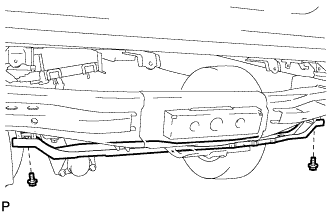
Remove the 2 bolts and rear No. 2 bumper reinforcement.
-
- Click here
REMOVE REAR BUMPER ARM BRACKET
-
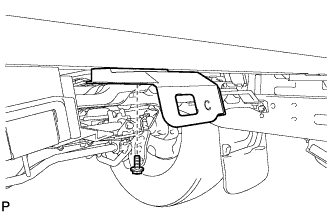
Remove the bolt and rear bumper arm bracket.
Tip:Use the same procedure to remove the rear bumper arm bracket on the other side.
-
- Click here
REMOVE REAR BUMPER ARM BRACKET LH
-
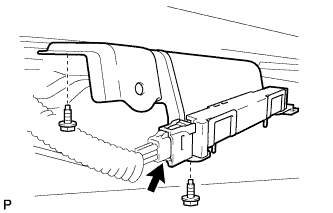
Disconnect the connector.
-
Remove the 2 bolts and rear bumper arm bracket LH.
-
-
Click here
REMOVE NO. 2 LUGGAGE COMPARTMENT SIDE COVER PROTECTOR
-
Remove the 2 screws, 2 grommets and No. 2 luggage compartment side cover protector.
-
- Click here
REMOVE NO. 1 LUGGAGE COMPARTMENT SIDE COVER PROTECTOR
Tip:Use the same procedure described for the LH side.