- Click here
REMOVE SPARE TIRE (w/ Tire Carrier)
- Click here
REMOVE SPARE WHEEL CARRIER HINGE BRACKET (w/ Tire Carrier)
-
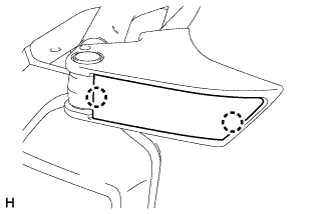
Detach the 2 claws and remove the spare wheel carrier hinge bracket.
-
- Click here
REMOVE SPARE WHEEL COVER SUB-ASSEMBLY (w/ Tire Carrier)
-
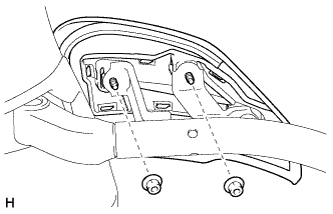
Remove the 2 nuts.
-
Detach the clip and remove the spare wheel cover.
-
- Click here
REMOVE SPARE WHEEL CARRIER SUB-ASSEMBLY (w/ Tire Carrier)
-
Remove the 3 bolts and spare tire.
-

Remove the 9 bolts and spare wheel carrier.
-
- Click here
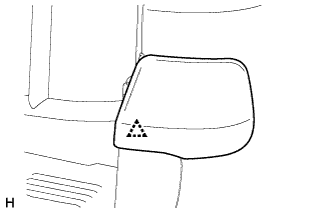
REMOVE ASSIST GRIP LH (for LH Side)
-
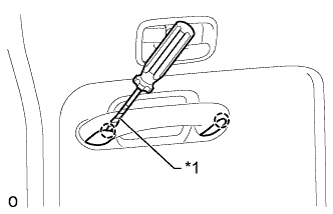
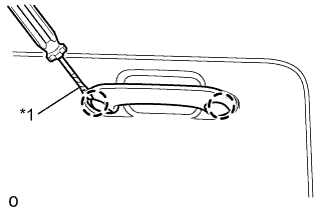
Using a screwdriver, detach the 2 claws and open the 2 covers.
Tip:Tape the screwdriver tip before use.
Table 1. Text in Illustration *1 Protective Tape -
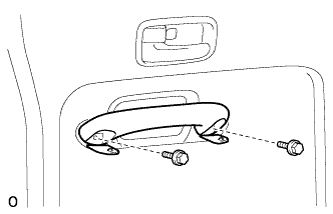
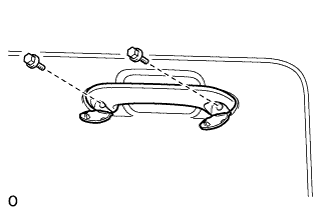
Remove the 2 bolts and assist grip.
-
- Click here
REMOVE DOOR INSIDE HANDLE BEZEL LH (for LH Side)
-
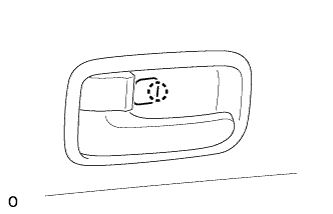
Detach the claw and open the cover.
-

Remove the screw.
-
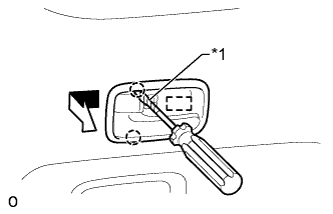
Using a screwdriver, detach the 2 claws.
Tip:Tape the screwdriver tip before use.
Table 2. Text in Illustration *1 Protective Tape -
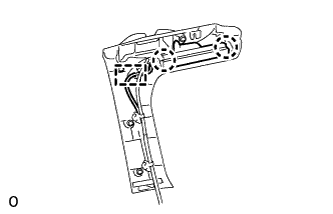
Detach the guide and remove the door inside handle bezel in the direction indicated by the arrow in the illustration.
-
- Click here
REMOVE BACK DOOR TRIM PANEL ASSEMBLY LH (for LH Side)
-
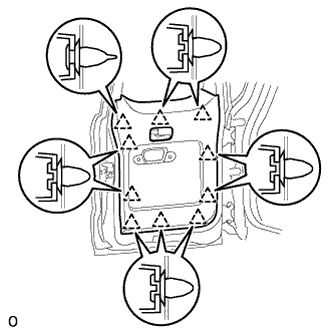
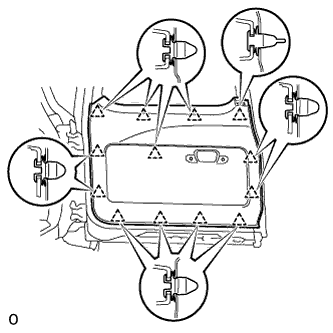
Detach the 10 clips and remove the back door trim panel.
-
- Click here
REMOVE ASSIST GRIP RH (for RH Side)
-
Using a screwdriver, detach the 2 claws and open the 2 covers.
Tip:Tape the screwdriver tip before use.
Table 3. Text in Illustration *1 Protective Tape -
Remove the 2 bolts and assist grip.
-
- Click here
REMOVE BACK DOOR TRIM COVER RH (for RH Side)
-

Detach the 5 clips and 2 claws.
-
Detach the clamp and 2 claws and remove the back door trim cover.
-
- Click here
REMOVE BACK DOOR TRIM PANEL ASSEMBLY RH (for RH Side)
-
Detach the 13 clips and remove the back door trim panel.
-
- Click here
REMOVE REAR WIPER ARM AND BLADE ASSEMBLY (w/ Rear Wiper)
-
Open the wiper arm head cap.
-
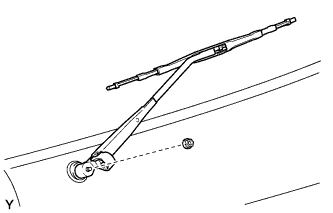
Remove the nut and remove the rear wiper arm and blade assembly.
-
- Click here
REMOVE BACK DOOR CENTER WEATHERSTRIP (for RH Side)
-
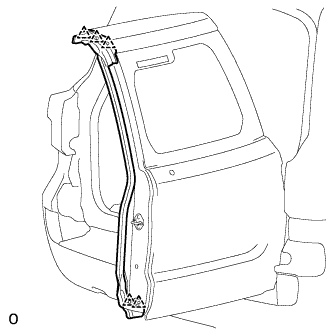
Detach the 5 clips and remove the back door center weatherstrip.
-
- Click here
REMOVE BACK DOOR GLASS LH
-
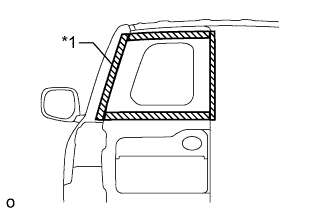
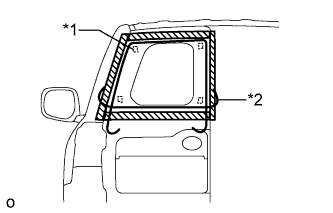
Apply protective tape to the outer surface of the vehicle body to prevent scratches.
Note:When separating the back door glass from the vehicle, be careful not to damage the vehicle paint or interior/exterior ornaments.
Table 4. Text in Illustration *1 Protective Tape -
Disconnect the connectors.
-
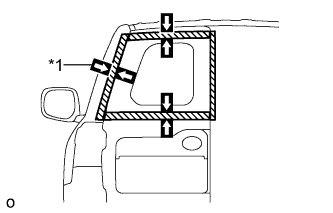
Place matchmarks on the glass and vehicle body at the locations indicated in the illustration.
Table 5. Text in Illustration *1 Matchmark Tip:Matchmarks do not need to be placed if the glass is not going to be reused.
-
From the interior, insert a piano wire between the vehicle body and back door glass as shown in the illustration.
Note:Make sure not to damage the wire harness.
Table 6. Text in Illustration *1 Clip *2 Piano Wire -
Tie objects that can serve as handles (for example, wooden blocks) to both wire ends.
-
Cut through the adhesive by pulling the piano wire around the back door glass.
Note:Leave as much adhesive on the vehicle body as possible when removing the back door glass.
-
Using suction cups, remove the back door glass.
-
- Click here
REMOVE BACK DOOR GLASS RH
-
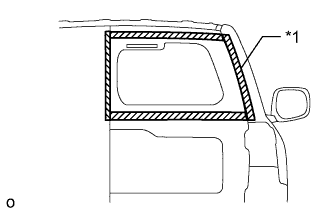
Apply protective tape to the outer surface of the vehicle body to prevent scratches.
Note:When separating the back door glass from the vehicle, be careful not to damage the vehicle paint or interior/exterior ornaments.
-
Disconnect the connectors.
-
Place matchmarks on the glass and vehicle body at the locations indicated in the illustration.
Table 7. Text in Illustration *1 Matchmark Tip:Matchmarks do not need to be placed if the glass is not going to be reused.
-
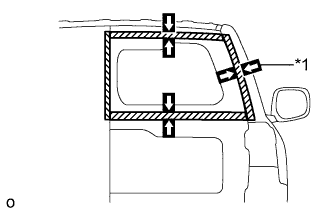
From the interior, insert a piano wire between the vehicle body and back door glass as shown in the illustration.
Note:Make sure not to damage the wire harness.
Table 8. Text in Illustration *1 Clip *2 Piano Wire -
Tie objects that can serve as handles (for example, wooden blocks) to both wire ends.
-
Cut through the adhesive by pulling the piano wire around the back door glass.
Note:Leave as much adhesive on the vehicle body as possible when removing the back door glass.
-
Using suction cups, remove the back door glass.
-
- Click here
CLEAN VEHICLE BODY
-
Clean and shape the contact surface of the vehicle body.
-
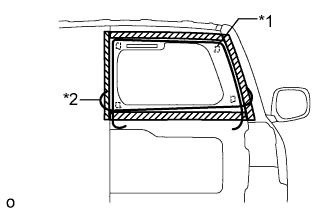
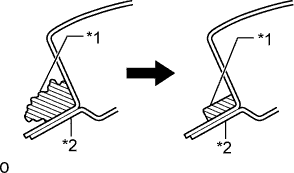
On the contact surface of the vehicle body, use a knife to cut away excess adhesive as shown in the illustration.
Note:Be careful not to damage the vehicle body.
Tip:Leave as much adhesive on the vehicle body as possible.
Table 9. Text in Illustration *1 Adhesive *2 Vehicle Body
-
-