CIGARETTE LIGHTER INSTALLATION

Tech Tips
-
Use the same procedures for LHD and RHD vehicles.
-
The procedures listed below are for LHD vehicles.
-
INSTALL CIGARETTE LIGHTER BEZEL STAY
-
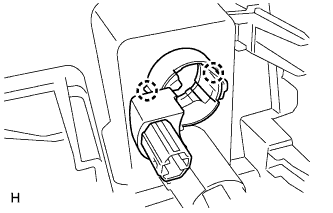
Attach the 2 claws to install the bezel stay.
-
-
INSTALL CIGARETTE LIGHTER ASSEMBLY
-
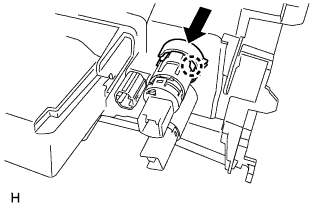
Attach the claw to install the cigarette lighter socket and retainer assembly.
-
Install the cigarette lighter knob and element assembly.
-
-
INSTALL CIGARETTE LIGHTER COVER
-
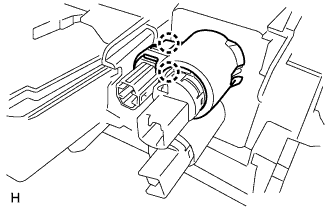
Attach the 2 claws to install the cover.
-
-
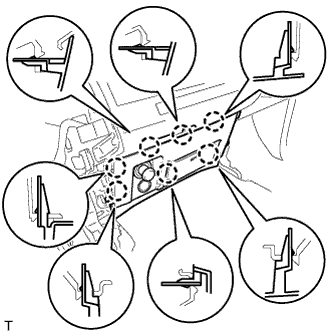
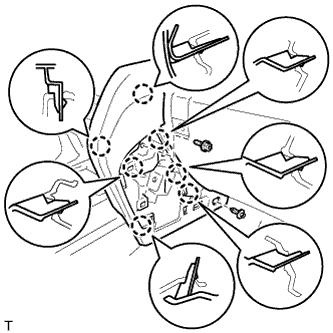
INSTALL LOWER CENTER INSTRUMENT CLUSTER FINISH PANEL SUB-ASSEMBLY
-
Connect the connectors.
-
Attach the 7 claws to install the lower center instrument cluster finish panel sub-assembly.
-
-
INSTALL LOWER INSTRUMENT PANEL PAD SUB-ASSEMBLY RH
-
Attach the 7 claws to install the lower instrument panel pad sub-assembly.
-
Install the clip and screw.
-
-
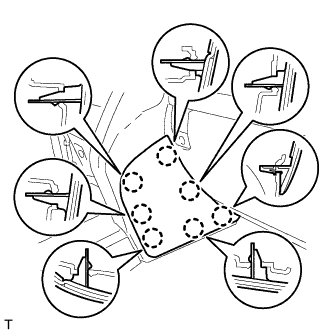
INSTALL NO. 1 INSTRUMENT PANEL FINISH PANEL CUSHION
-
Attach the 7 claws to install the No. 1 instrument panel finish panel cushion.
-
-
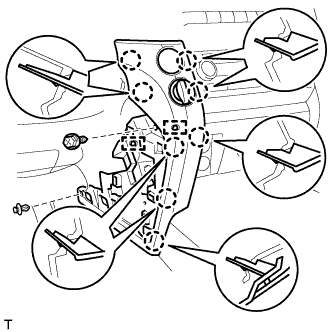
INSTALL LOWER INSTRUMENT PANEL PAD SUB-ASSEMBLY LH
-
Connect the connectors and attach the 2 clamps.
-
Attach the 8 claws to install the lower instrument panel pad sub-assembly.
-
Install the clip and screw.
-
-
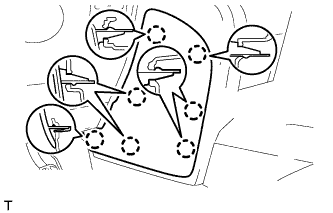
INSTALL NO. 2 INSTRUMENT PANEL FINISH PANEL CUSHION
-
Attach the 7 claws to install the No. 2 instrument panel finish panel cushion.
-