CIGARETTE LIGHTER REMOVAL

Tech Tips
-
Use the same procedures for LHD and RHD vehicles.
-
The procedures listed below are for LHD vehicles.
-
REMOVE NO. 2 INSTRUMENT PANEL FINISH PANEL CUSHION
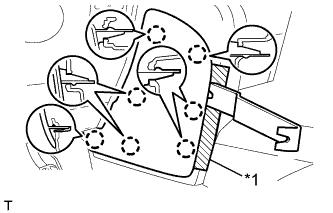
Text in Illustration *1 Protective Tape
-
Put protective tape around the No. 2 instrument panel finish panel cushion.
-
Using a moulding remover, detach the 7 claws and remove the No. 2 instrument panel finish panel cushion.
-
-
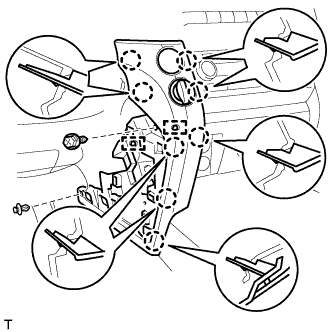
REMOVE LOWER INSTRUMENT PANEL PAD SUB-ASSEMBLY LH
-
Remove the clip and screw.
-
Detach the 8 claws.
-
Disconnect the connectors, detach the 2 clamps and remove the lower instrument panel pad sub-assembly.
-
-
REMOVE NO. 1 INSTRUMENT PANEL FINISH PANEL CUSHION
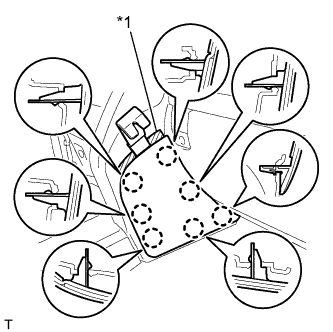
Text in Illustration *1 Protective Tape
-
Put protective tape around the No. 1 instrument panel finish panel cushion.
-
Using a moulding remover, detach the 7 claws and remove the No. 1 instrument panel finish panel cushion.
-
-
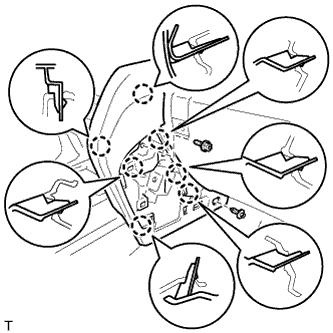
REMOVE LOWER INSTRUMENT PANEL PAD SUB-ASSEMBLY RH
-
Remove the clip and screw.
-
Detach the 7 claws and remove the lower instrument panel pad sub-assembly.
-
-
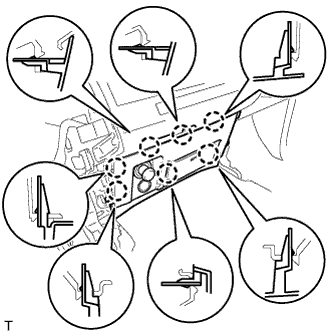
REMOVE LOWER CENTER INSTRUMENT CLUSTER FINISH PANEL SUB-ASSEMBLY
-
Detach the 7 claws.
-
Disconnect the connectors and remove the lower center instrument cluster finish panel sub-assembly.
-
-
REMOVE CIGARETTE LIGHTER COVER
-
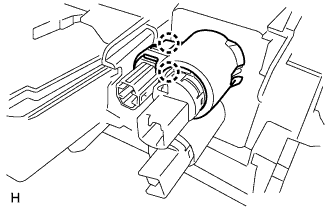
Detach the 2 claws and remove the cover.
-
-
REMOVE CIGARETTE LIGHTER ASSEMBLY
-
Remove the cigarette lighter knob and element assembly.
-
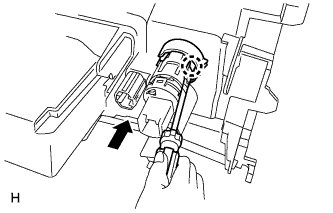
Using a screwdriver, detach the claw, and remove the cigarette lighter socket and retainer assembly.
Tech Tips
Tape the screwdriver tip before use.
-
-
REMOVE CIGARETTE LIGHTER BEZEL STAY
-
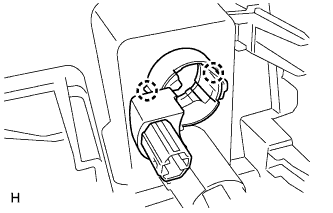
Detach the 2 claws and remove the bezel stay.
-