ELECTRICAL KEY OSCILLATOR (for Front Floor) INSTALLATION

Tech Tips
-
Use the same procedures for LHD and RHD vehicles.
-
The procedures listed below are for LHD vehicles.
-
INSTALL INDOOR ELECTRICAL KEY OSCILLATOR
-
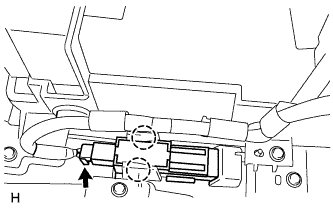
Connect the connector.
-
Attach the 2 claws to install the electrical key oscillator.
-
-
INSTALL UPPER CONSOLE PANEL SUB-ASSEMBLY
-
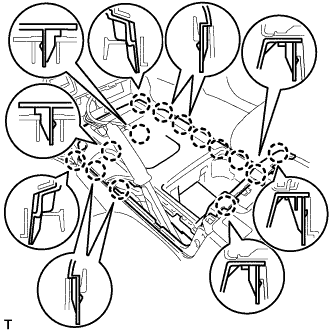
Connect the connectors.
-
Attach the 14 claws to install the console panel.
-
-
INSTALL CONSOLE CUP HOLDER BOX SUB-ASSEMBLY
-
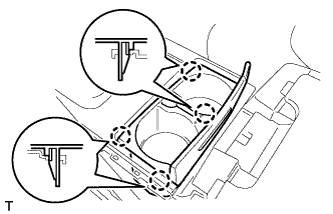
Attach the 4 claws to install the box.
-
-
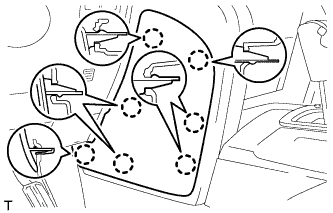
INSTALL REAR UPPER CONSOLE PANEL SUB-ASSEMBLY
-
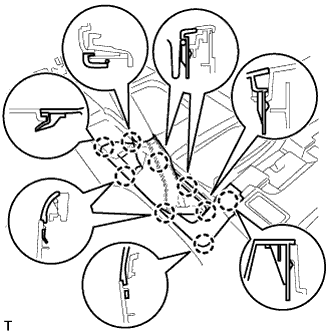
Attach the 9 claws to install the panel.
-
-
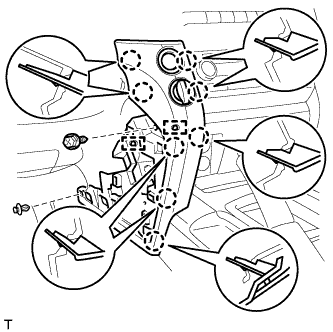
INSTALL LOWER CENTER INSTRUMENT CLUSTER FINISH PANEL SUB-ASSEMBLY
-
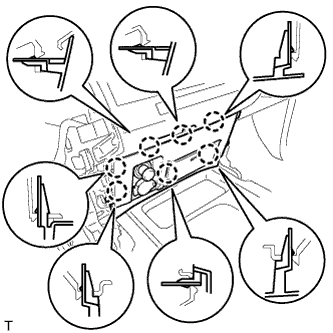
Connect the connectors.
-
Attach the 7 claws to install the panel.
-
-
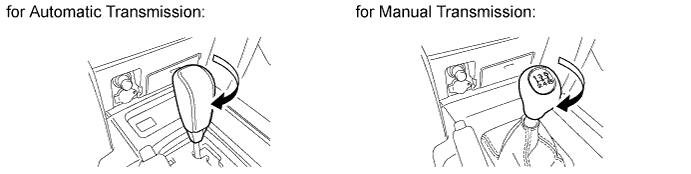
INSTALL SHIFT LEVER KNOB SUB-ASSEMBLY
-
Install the shift lever knob and twist it in the direction indicated by the arrow.
-
-
INSTALL LOWER INSTRUMENT PANEL PAD SUB-ASSEMBLY RH
-
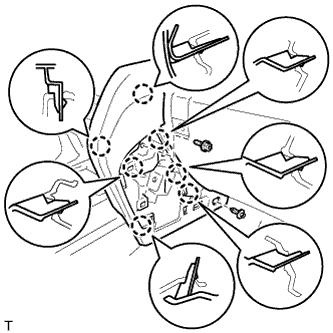
Attach the 7 claws to install the panel pad.
-
Install the screw.
-
Install the clip.
-
-
INSTALL NO. 1 INSTRUMENT PANEL FINISH CUSHION
-
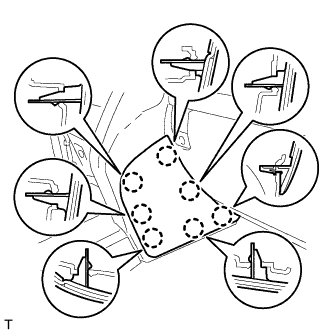
Attach the 7 claws to install the panel cushion.
-
-
INSTALL LOWER INSTRUMENT PANEL PAD SUB-ASSEMBLY LH
-
Connect the connectors and 2 clamps.
-
Attach the 8 claws to install the panel pad.
-
Install the screw.
-
Install the clip.
-
-
INSTALL NO. 2 INSTRUMENT PANEL FINISH PANEL CUSHION
-
Attach the 7 claws to install the panel cushion.
-