CRAWL SWITCH INSTALLATION

-
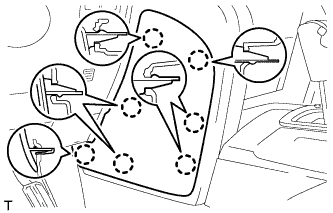
INSTALL SUSPENSION CONTROL SWITCH (CRAWL SWITCH)
-

Attach the 4 claws to install the suspension control switch (CRAWL switch).
-
Connect the 2 connectors.
-
-
INSTALL UPPER CONSOLE PANEL SUB-ASSEMBLY
-
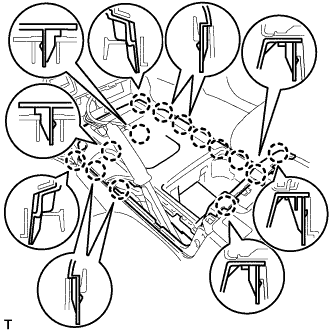
Connect the connectors.
-
Attach the 14 claws to install the console panel.
-
-
INSTALL CONSOLE CUP HOLDER BOX SUB-ASSEMBLY
-
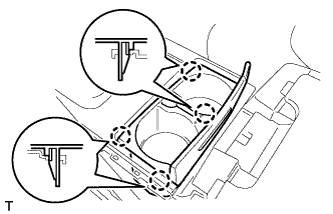
Attach the 4 claws to install the box.
-
-
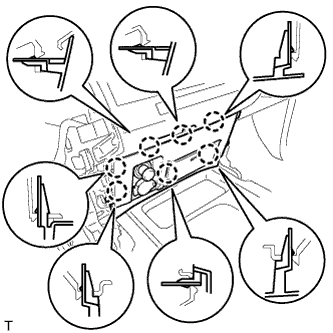
INSTALL REAR UPPER CONSOLE PANEL SUB-ASSEMBLY
-
Attach the 9 claws to install the panel.
-
-
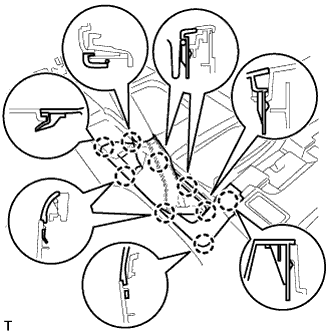
INSTALL LOWER CENTER INSTRUMENT CLUSTER FINISH PANEL SUB-ASSEMBLY
-
Connect the connectors.
-
Attach the 7 claws to install the panel.
-
-
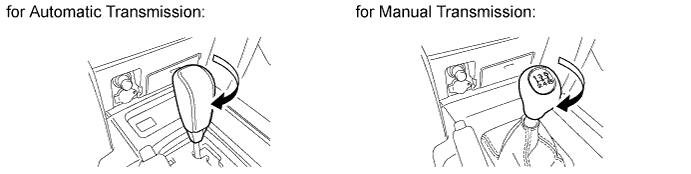
INSTALL SHIFT LEVER KNOB SUB-ASSEMBLY
-
Install the shift lever knob and twist it in the direction indicated by the arrow.
-
-
INSTALL LOWER INSTRUMENT PANEL PAD SUB-ASSEMBLY RH
-
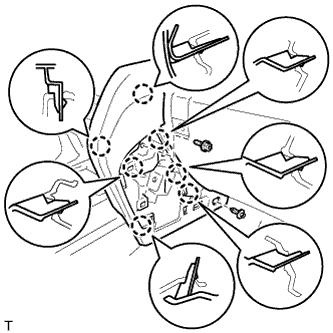
Attach the 7 claws to install the panel pad.
-
Install the screw.
-
Install the clip.
-
-
INSTALL NO. 1 INSTRUMENT PANEL FINISH PANEL CUSHION
-
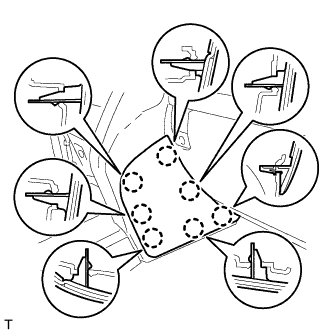
Attach the 7 claws to install the panel cushion.
-
-
INSTALL LOWER INSTRUMENT PANEL PAD SUB-ASSEMBLY LH
-
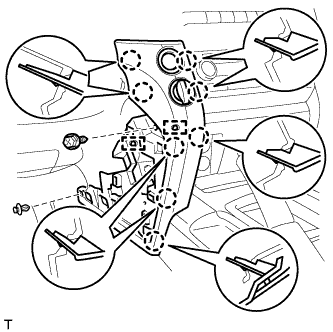
Connect the connectors and 2 clamps.
-
Attach the 8 claws to install the panel pad.
-
Install the screw.
-
Install the clip.
-
-
INSTALL NO. 2 INSTRUMENT PANEL FINISH PANEL CUSHION
-
Attach the 7 claws to install the panel cushion.
-
-
CONNECT CABLE TO NEGATIVE BATTERY TERMINAL
Note
When disconnecting the cable, some systems need to be initialized after the cable is reconnected Click here.