CONTROL VALVE ASSEMBLY REMOVAL

-
REMOVE TAILPIPE ASSEMBLY
-
for 1GR-FE:
Remove the tailpipe Click here.
-
for 1UR-FE:
Remove the tailpipe Click here.
-
for 3UR-FE:
Remove the tailpipe Click here.
-
for 1VD-FTV:
Remove the tailpipe Click here.
-
-
REMOVE CENTER EXHAUST PIPE ASSEMBLY
-
for 1GR-FE:
Remove the center exhaust pipe for Click here.
-
for 1UR-FE:
Remove the center exhaust pipe for Click here.
-
for 3UR-FE:
Remove the center exhaust pipe for Click here.
-
for 1VD-FTV:
Remove the center exhaust pipe for Click here.
-
-
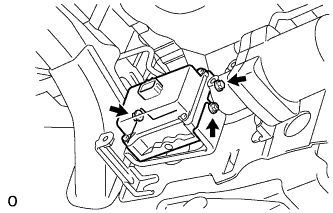
REMOVE HEIGHT CONTROL UNIT INSULATOR
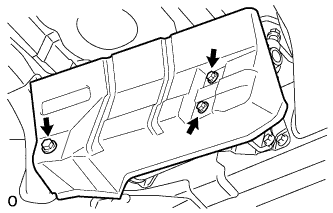
-
Remove the 3 bolts and insulator from the control unit.
-
-
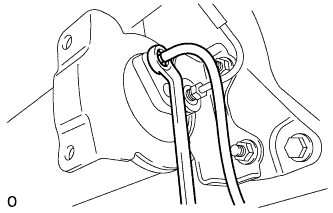
REMOVE CLAMP
-
Remove the clamp from the 3 height control tubes.
-
-
DISCHARGE SUSPENSION FLUID PRESSURE
-
Connect a hose to the bleeder plug for the height control accumulator and loosen the bleeder plug.
-
Discharge the suspension fluid pressure.
-
After the fluid pressure has dropped and oil has drained out, tighten the bleeder plug and remove the hose.
- Torque:
- 6.9 N*m { 70 kgf*cm, 61 in.*lbf }
-
-
REMOVE NO. 7 HEIGHT CONTROL TUBE
-
Using a union nut wrench, remove the control tube from the control valve and pump accumulator.
-
-
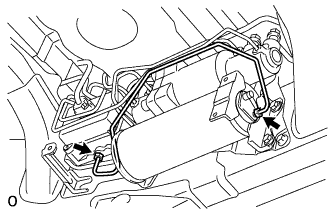
DISCONNECT REAR NO. 4 HEIGHT CONTROL TUBE
-
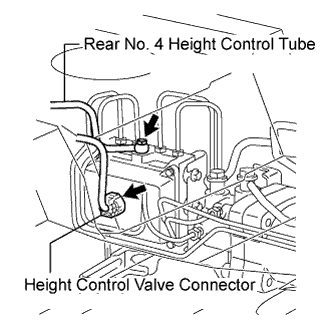
Disconnect the connector.
-
Remove the union bolt and gasket, then disconnect the rear No. 4 height control tube from the control valve.
-
-
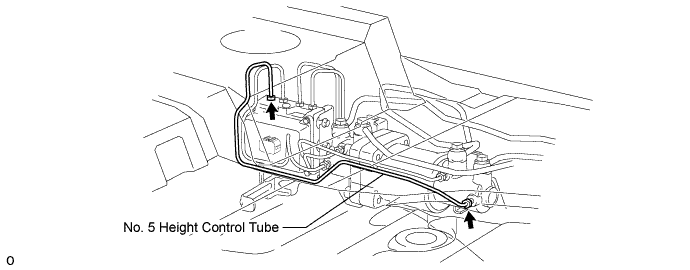
REMOVE NO. 5 HEIGHT CONTROL TUBE
-
Using a union nut wrench, remove the No. 5 height control tube from the control valve and center cylinder.
-
-
REMOVE NO. 5 HEIGHT CONTROL TUBE LH
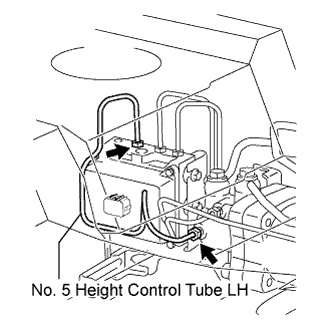
-
Using a union nut wrench, remove the No. 5 height control tube LH from the control valve and center cylinder.
-
-
REMOVE NO. 6 HEIGHT CONTROL TUBE
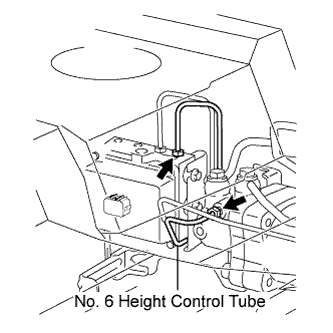
-
Using a union nut wrench, remove the No. 6 height control tube from the control valve and center cylinder.
-
-
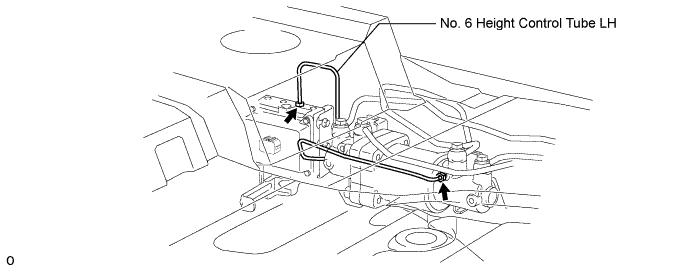
REMOVE NO. 6 HEIGHT CONTROL TUBE LH
-
Using a union nut wrench, remove the No. 6 height control tube LH from the control valve and center cylinder.
-
-
REMOVE NO. 1 HEIGHT CONTROL VALVE ASSEMBLY
-
Remove the 3 nuts and control valve.
-
Remove the 3 bolt holders and 3 bolt cushions from the control valve.
-