REAR DIFFERENTIAL LOCK ACTUATOR (w/ Differential Lock) INSTALLATION

-
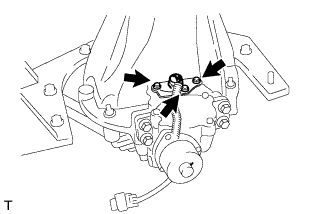
INSTALL DIFFERENTIAL LOCK SHIFT ACTUATOR
-
Remove any old FIPG material.
-
Clean the contact surfaces of any residual FIPG material using non-residue solvent.
-
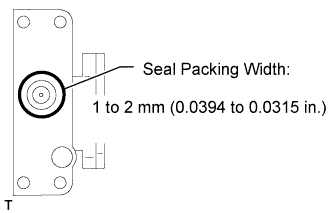
Apply seal packing to the actuator.
Seal packing Toyota Genuine Seal Packing 1281, Three Bond 1281 or equivalent: Tech Tips
Install the actuator within 10 minutes after applying seal packing.
-

Install the shift fork and actuator to the differential and align the shift fork hole with the shift lock.
-
Clean the threads of the set bolt and fork shaft with non-residue solvent.
-
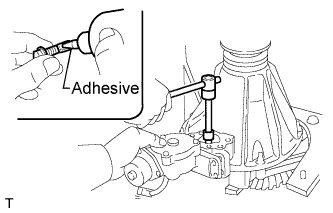
Coat the threads of the set bolt with adhesive.
Adhesive Toyota Genuine Adhesive 1324, Three Bond 1324 or equivalent -
Install the shift fork shaft set bolt.
- Torque:
- 20 N*m { 204 kgf*cm, 15 ft.*lbf }
-
Engage the sleeve with the dog clutch of the differential case.
-
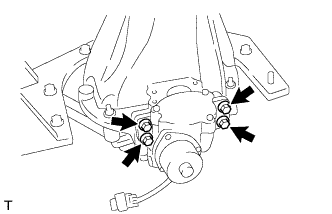
Install the 4 bolts.
- Torque:
- 24 N*m { 245 kgf*cm, 18 ft.*lbf }
-
-
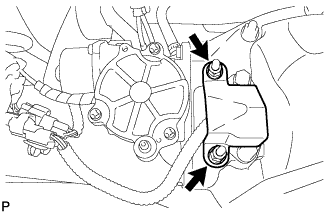
INSTALL REAR DIFFERENTIAL LOCK COVER WITH POSITION SWITCH
-
Remove any old FIPG material.
-
Clean the contact surfaces of any residual FIPG material using non-residue solvent.
-
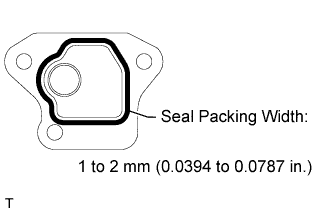
Apply seal packing to the cover.
Seal packing Toyota Genuine Seal Packing 1281, Three Bond 1281 or equivalent Tech Tips
Install the cover within 10 minutes after applying seal packing.
-
Install the cover with the 3 bolts.
- Torque:
- 18 N*m { 184 kgf*cm, 13 ft.*lbf }
-
-
INSTALL REAR DIFFERENTIAL LOCK ACTUATOR PROTECTOR
-
Install the protector with the 2 nuts.
- Torque:
- 35 N*m { 357 kgf*cm, 26 ft.*lbf }
-
-
INSTALL DIFFERENTIAL PROTECTOR ASSEMBLY
-
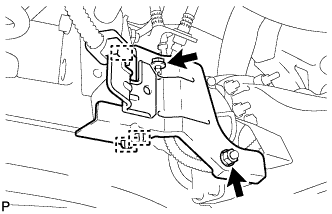
Attach the protector with the bolt and nut.
- Torque:
- 15 N*m { 150 kgf*cm, 11 ft.*lbf }
-
Connect the 2 connector clamps and wire harness clamp.
Note
Make sure the wire harness of the No. 4 transfer indicator switch fits inside the protector.
-