REAR DIFFERENTIAL CARRIER ASSEMBLY (w/ Differential Lock) REMOVAL

-
LOCK REAR DIFFERENTIAL
-
Turn the engine switch on (IG).
-
Push on the 4WD switch.
-
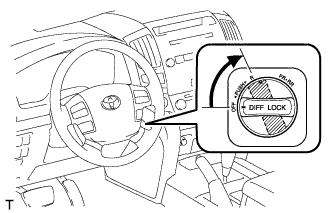
Turn the differential lock control switch to the RR position and lock the rear differential.
Tech Tips
Rotate the rear wheels to check that they are in the differential lock condition.
-
-
DRAIN DIFFERENTIAL OIL
-
Stop the vehicle on a level place.
-
for Front Differential:
-
Remove the engine under cover.
-
Using a 10 mm hexagon wrench, remove the filler plug and gasket.
-
Using a 10 mm hexagon wrench, remove the drain plug and gasket, and drain the oil.
-
Using a 10 mm hexagon wrench, install a new gasket and the drain plug.
- Torque:
- 39 N*m { 400 kgf*cm, 29 ft.*lbf }
-
-
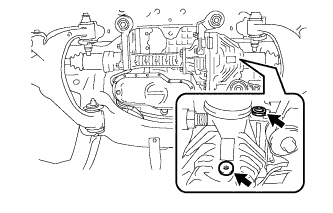
for Rear Differential:
-
Remove the filler plug and gasket.
-
Remove the drain plug and gasket, and drain the oil.
-
Install a new gasket and the drain plug.
- Torque:
- 49 N*m { 500 kgf*cm, 36 ft.*lbf }
-
-
-
REMOVE REAR AXLE SHAFT
-
Remove the axle shaft Click here.
-
-
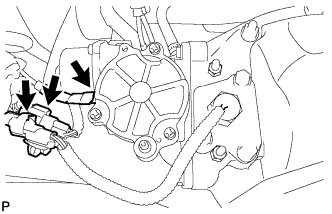
REMOVE DIFFERENTIAL PROTECTOR ASSEMBLY
-
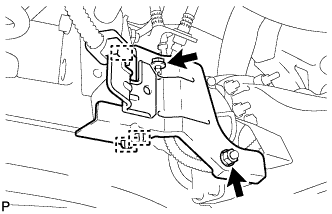
Detach the 2 connector clamps and wire harness clamp.
-
Remove the bolt, nut and protector.
-
-
REMOVE REAR DIFFERENTIAL LOCK ACTUATOR PROTECTOR
-
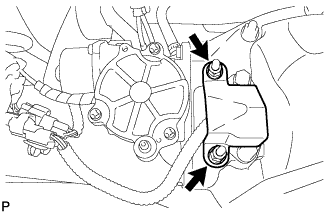
Remove the 2 nuts and protector.
-
-
DISCONNECT REAR PROPELLER SHAFT ASSEMBLY
-
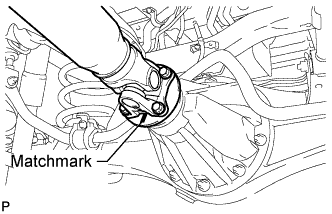
Place matchmarks on the rear propeller shaft and companion flange.
-
Remove the 4 nuts, 4 washers and 4 bolts, and disconnect the propeller shaft from the differential side.
-
Support the propeller shaft securely.
-
-
REMOVE REAR DIFFERENTIAL CARRIER ASSEMBLY
-
Disconnect the lock differential lock shift actuator and No. 4 transfer indicator switch connectors.
-
Disconnect the breather hose.
-
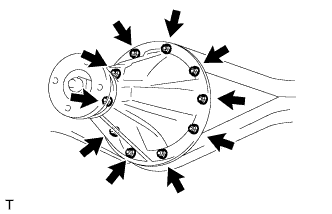
Remove the 10 nuts, 10 washers and differential carrier assembly.
Note
Be careful not to damage the contact surfaces of the differential carrier and rear axle housing.
-
Remove the gasket.
-