FRONT SEATBACK HEATER INSTALLATION

CAUTION:
Wear protective gloves. Sharp areas on the parts may injure your hands.
Tech Tips
-
Use the same procedure for RHD and LHD vehicles.
-
The procedure listed below is for LHD vehicles.
-
Use the same procedure for the RH and LH sides.
-
The procedure listed below is for the LH side.
-
INSTALL FRONT SEATBACK HEATER ASSEMBLY LH
-
Set the seatback heater with the name stamp side facing the front separate type seatback cover.
-
w/o Climate Control Seat System:
Install the front seatback heater assembly LH to the front separate type seatback cover with new tack pins.
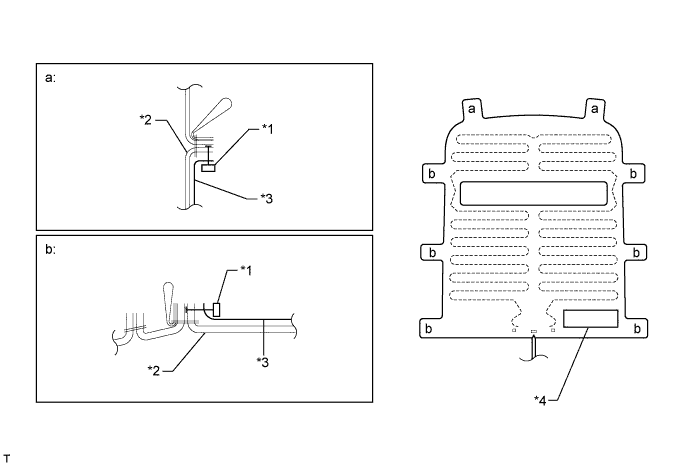
Text in Illustration *1 Tack Pin *2 Front Separate Type Seatback Cover *3 Front Seatback Heater Assembly LH *4 Name Stamp -
w/ Climate Control Seat System:
Install the front seatback heater assembly LH to the front separate type seatback cover with new tack pins.

Text in Illustration *1 Tack Pin *2 Front Separate Type Seatback Cover *3 Front Seatback Heater Assembly LH *4 Name Stamp
-
-
INSTALL FRONT SEPARATE TYPE SEATBACK COVER
-
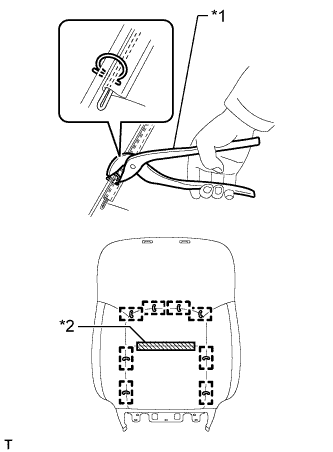
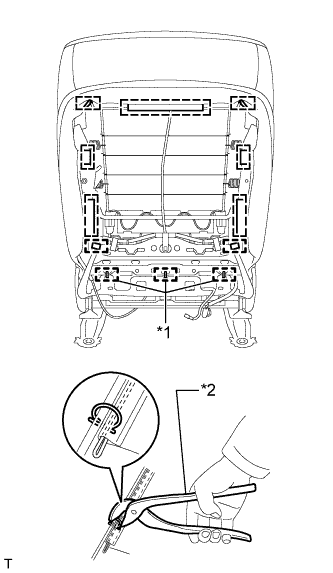
Text in Illustration *1 Hog Ring Pliers *2 Fastening Tape Attach the fastening tape to install the front separate type seatback cover.
-
Using hog ring pliers, install new hog rings.
Note
-
Be careful not to damage the cover.
-
When installing the hog rings, avoid wrinkling the cover.
-
-
Text in Illustration *1 Seatback Cover Bracket Pass the seatback cover bracket through the hole of the front separate type seatback pad.
-
-
INSTALL FRONT SEPARATE TYPE SEATBACK COVER (w/ Climate Control Seat System)
-
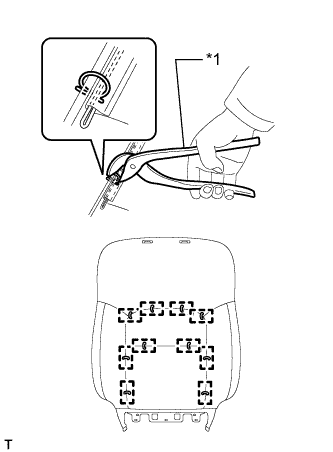
Text in Illustration *1 Hog Ring Pliers Using hog ring pliers, install the front separate type seatback cover to the front separate type seatback pad with new hog rings.
Note
-
Be careful not to damage the cover.
-
When installing the hog rings, avoid wrinkling the cover.
-
-
Text in Illustration *1 Seatback Cover Bracket Pass the seatback cover bracket through the hole of the front separate type seatback pad.
-
-
INSTALL SEATBACK COVER WITH PAD
-
Attach the hooks to install the seatback cover with pad.
Text in Illustration *1 Hog Ring *2 Hog Ring Pliers -
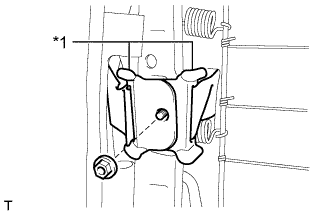
Text in Illustration *1 Seatback Cover Bracket Attach the seatback cover bracket with the nut.
- Torque:
- 5.0 N*m { 51 kgf*cm, 44 in.*lbf }
CAUTION:
After the seatback cover with pad is installed, make sure the seatback cover bracket is not twisted.
-
Using hog ring pliers, install new hog rings.
Note
Be careful not to damage the cover.
-
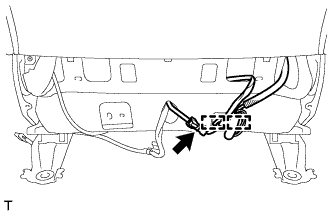
w/o Climate Control Seat System:
Connect the connector and attach the 2 wire harness clamps.
-
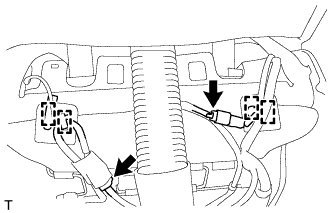
w/ Climate Control Seat System:
Connect the 2 connectors and attach the 4 wire harness clamps.
-
-
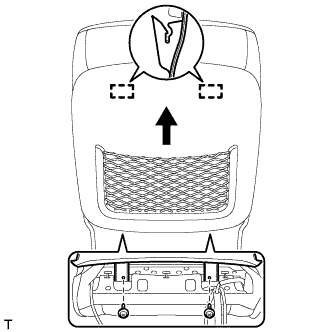
INSTALL FRONT SEAT HEADREST SUPPORT
-
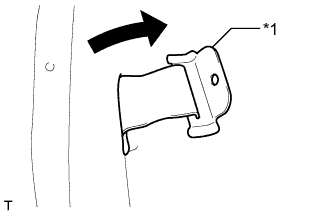
Attach the 4 claws to install the 2 front seat headrest supports.
-
-
INSTALL SEAT CLIMATE CONTROL CONTROLLERLH (w/ Climate Control Seat System)

-
Attach the 4 hooks to install the seat climate control controller LH.
-
Attach the 2 claws to connect the seat climate control blower LH.
-
-
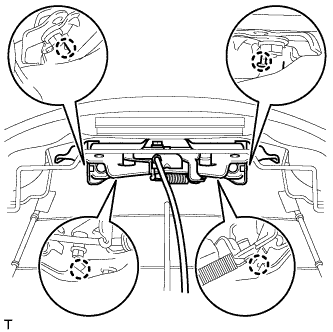
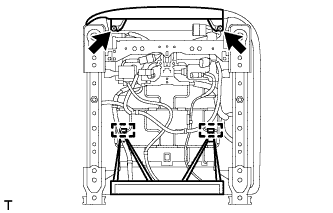
INSTALL FRONT SEATBACK BOARD SUB-ASSEMBLY LH
-
Move the front seatback board sub-assembly in the direction of the arrow to attach the 2 hooks and install it.
-
Install the 2 screws.
-
-
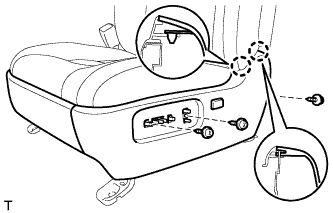
INSTALL FRONT INNER SEAT CUSHION SHIELD LH
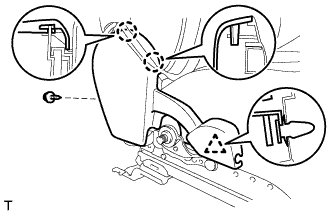
-
Attach the 2 claws and clip to install the front inner seat cushion shield LH.
-
Install the screw.
-
-
INSTALL FRONT SEAT INNER BELT ASSEMBLY LH
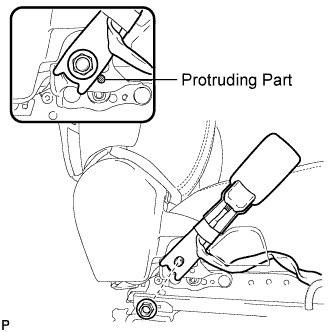
-
Install the front seat inner belt assembly with the nut.
- Torque:
- 42 N*m { 428 kgf*cm, 31 ft.*lbf }
Note
Do not allow the anchor part of the front seat inner belt assembly to overlap the protruding parts of the front seat adjuster.
-
Connect the connectors and attach the clamps.
-
-
INSTALL FRONT SEAT CUSHION SHIELD LH
-
for Driver Side:
Connect the connector.
-
Attach the 2 claws to install the front seat cushion shield LH together with the front inner No. 1 cushion shield LH.
-
Install the 3 screws.
-
Connect the 2 rubber bands.
-
Install the 2 screws.
-
-
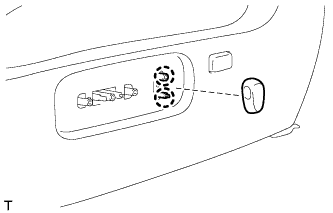
INSTALL RECLINING POWER SEAT SWITCH KNOB
-
Attach the 2 claws to install the reclining power seat switch knob.
-
-
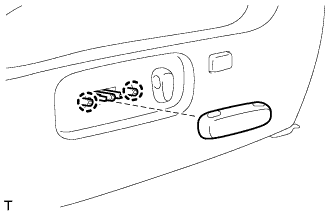
INSTALL SLIDE AND VERTICAL POWER SEAT SWITCH KNOB
-
Attach the 2 claws to install the slide and vertical power seat switch knob.
-
-
INSTALL FRONT SEAT ASSEMBLY LH