WASHER NOZZLE INSTALLATION

Tech Tips
-
Use the same procedure for both the RH and LH sides.
-
The procedure described below is for the LH side.
-
INSTALL WASHER NOZZLE SUB-ASSEMBLY
-
Connect a new washer nozzle sub-assembly to the washer hose.
-

Engage the 2 claws to install the washer nozzle sub-assembly as shown in the illustration.
-
-
INSPECT WASHER NOZZLE SUB-ASSEMBLY
-
Operate the washer nozzle sub-assembly and check the position that the washer fluid hits the windshield.
Standard Washer fluid hits the windshield in the areas shown in the illustration. 
Standard Clearance Area Measurement Area Measurement A 35.1 mm (1.38 in.) B 381.2 mm (1.25 ft.) C 191.8 mm (7.55 in.) D 76.5 mm (3.01 in.) Text in Illustration *a Upper Limit *b Standard *c Lower Limit - - Tech Tips
If the result is not as specified, replace the washer nozzle sub-assembly.
-
-
ADJUST WASHER NOZZLE SUB-ASSEMBLY
-
Select a washer nozzle so that the contact area is within the standard. Replace the washer nozzle with the selected one.
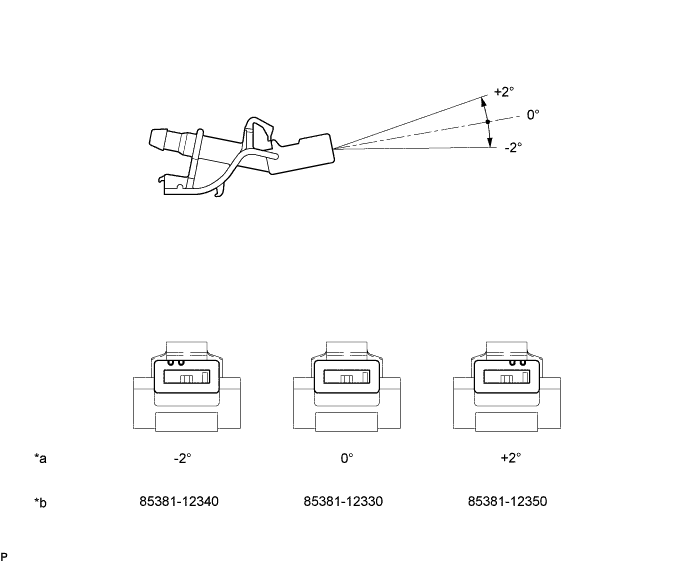
Text in Illustration *a Washer Fluid Spray Angle *b Part Number
-