HOOD REASSEMBLY

-
INSTALL HOOD SUPPORT ASSEMBLY LH
Note
-
Avoid touching the piston rod as much as possible to prevent foreign matter from attaching to it. Be sure to hold the cylinder while servicing.
-
Do not wear cotton gloves or other similar materials when handling the piston rod. Fibers may attach to the rod and result in gas leaks.
-
In order to prevent the piston rod from deforming, do not apply any horizontal load to the door stay.
-
When reusing the hood support assembly:
-
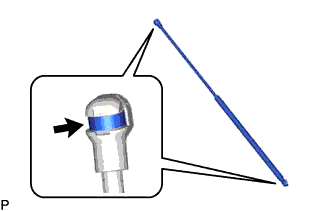
Install the 2 stop rings to the hood support assembly.
-
-
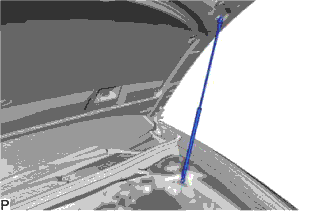
Install the hood support assembly.
Note
Install the hood support assembly while supporting the hood by hand.
-
Check that the hood support assembly is engaged in the ball joint and it cannot be pulled out.
-
-
INSTALL HOOD SUPPORT ASSEMBLY RH
Tech Tips
Use the same procedure as for the LH side.
-
CONNECT WASHER HOSE ASSEMBLY
-
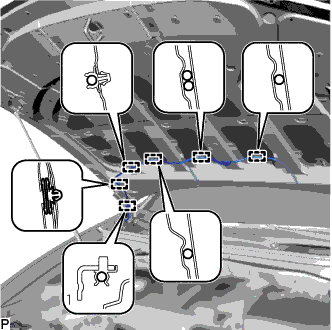
Engage the 6 clamps to connect the washer hose assembly.
-
-
INSTALL WASHER NOZZLE SUB-ASSEMBLY
-
Connect a new washer nozzle sub-assembly to the washer hose.
-

Engage the 2 claws to install the washer nozzle sub-assembly as shown in the illustration.
-
-
INSPECT WASHER NOZZLE SUB-ASSEMBLY
-
Operate the washer nozzle sub-assembly and check the position that the washer fluid hits the windshield.
Standard Washer fluid hits the windshield in the areas shown in the illustration. 
Standard Clearance Area Measurement Area Measurement A 35.1 mm (1.38 in.) B 381.2 mm (1.25 ft.) C 191.8 mm (7.55 in.) D 76.5 mm (3.01 in.) Text in Illustration *a Upper Limit *b Standard *c Lower Limit - - Tech Tips
If the result is not as specified, replace the washer nozzle sub-assembly.
-
-
ADJUST WASHER NOZZLE SUB-ASSEMBLY
-
Select a washer nozzle so that the contact area is within the standard. Replace the washer nozzle with the selected one.
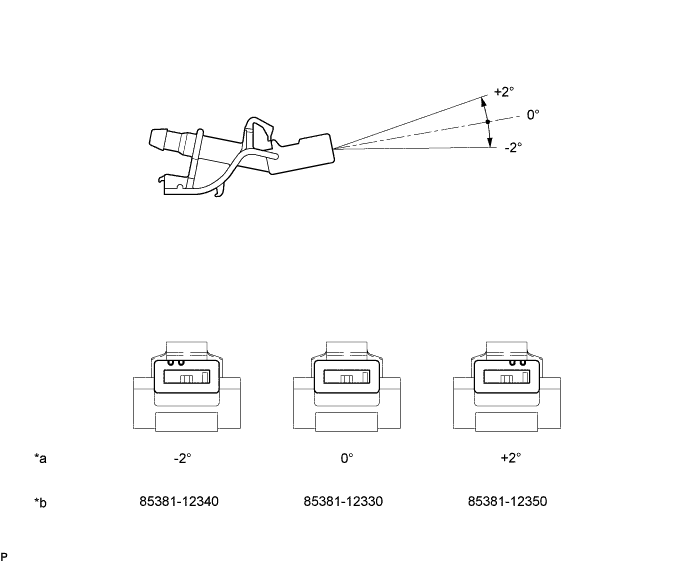
Text in Illustration *a Washer Fluid Spray Angle *b Part Number
-
-
INSTALL HOOD INSULATOR
-
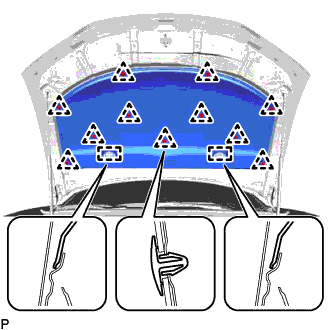
Engage the 2 guides.
-
Install the hood insulator with 11 new hood insulator clips.
-
-
INSTALL HOOD TO RADIATOR SUPPORT SEAL
-
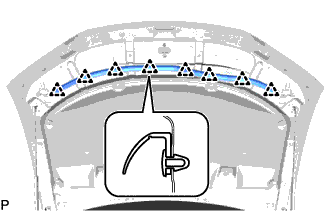
Engage the 8 clips to install the hood to radiator support seal.
-