AMBIENT LIGHT (for Instrument Panel Side) REMOVAL

-
REMOVE INSTRUMENT CLUSTER FINISH PANEL SUB-ASSEMBLY
-

Remove the 2 screws <E>.
-
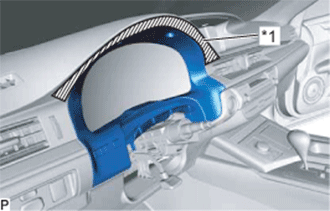
Text in Illustration *1 Protective Tape Apply protective tape to the area shown in the illustration.
-
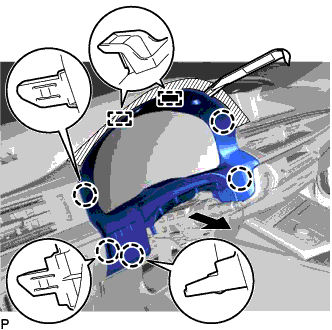
Using a moulding remover, disengage the 5 claws and 2 guides as shown in the illustration.
-
Disconnect the connector to remove the instrument cluster finish panel sub-assembly.
-
-
REMOVE CENTER INSTRUMENT CLUSTER FINISH PANEL GARNISH
-
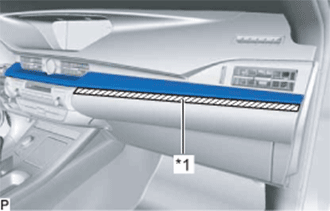
Text in Illustration *1 Protective Tape Apply protective tape to the area shown in the illustration.
-
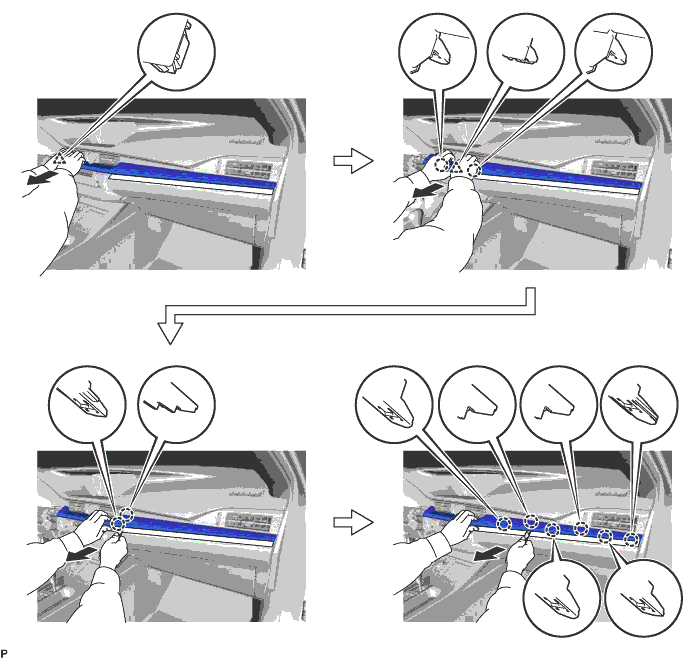
Using a moulding remover, disengage the 10 claws and 2 clips as shown in the illustration.
-
Disconnect the connector to remove the center instrument cluster finish panel garnish.
-
-
REMOVE INTERIOR ILLUMINATION LIGHT SUB-ASSEMBLY
-
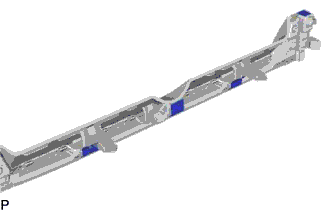
Remove the 4 pieces of adhesive tape.
-
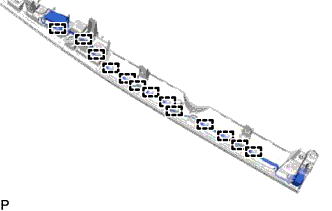
Disengage the 13 guides and disconnect the wire harness of the interior illumination light sub-assembly.
-
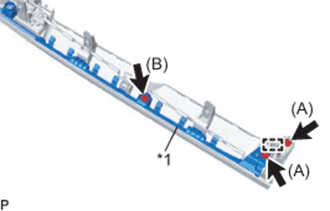
Text in Illustration *1 Instrument Panel Finish Panel Remove the 2 screws (A).
-
Disengage the pin and remove the lower instrument cluster finish garnish.
-
Remove the screw (B) and turn back the instrument panel finish panel to a position where the interior illumination light sub-assembly can be removed.
-
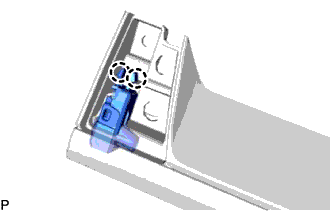
Disengage the 2 claws.
-
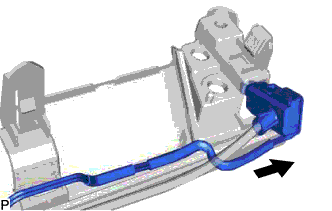
Slide the interior illumination light sub-assembly in the direction indicated by the arrow in the illustration to remove it.
-